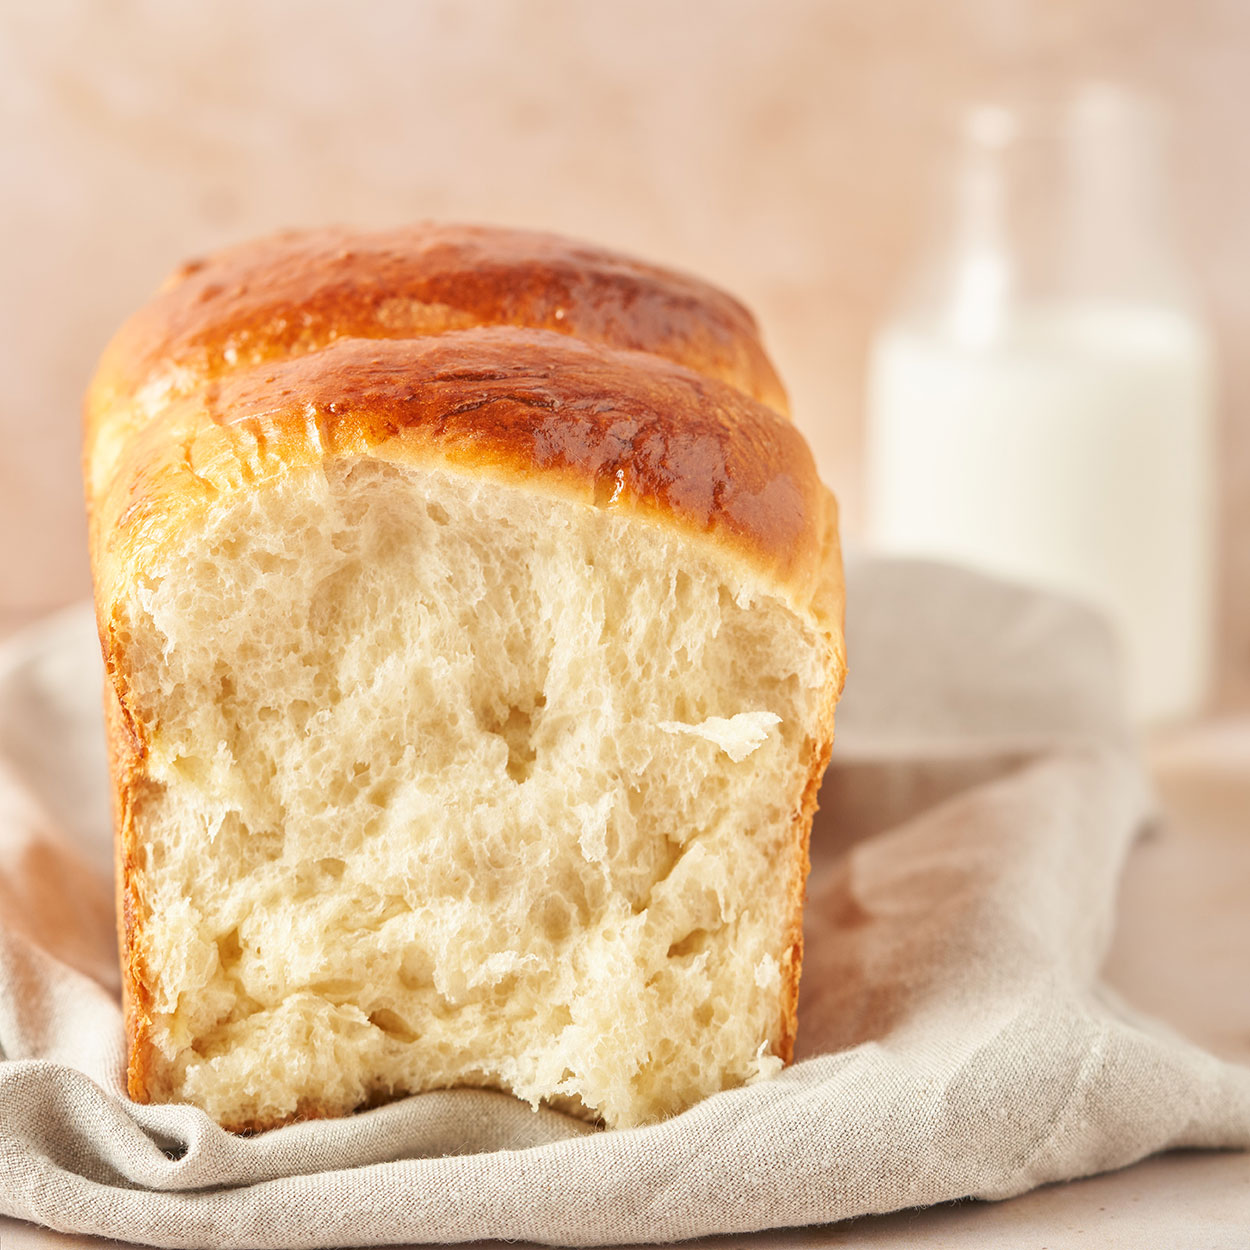
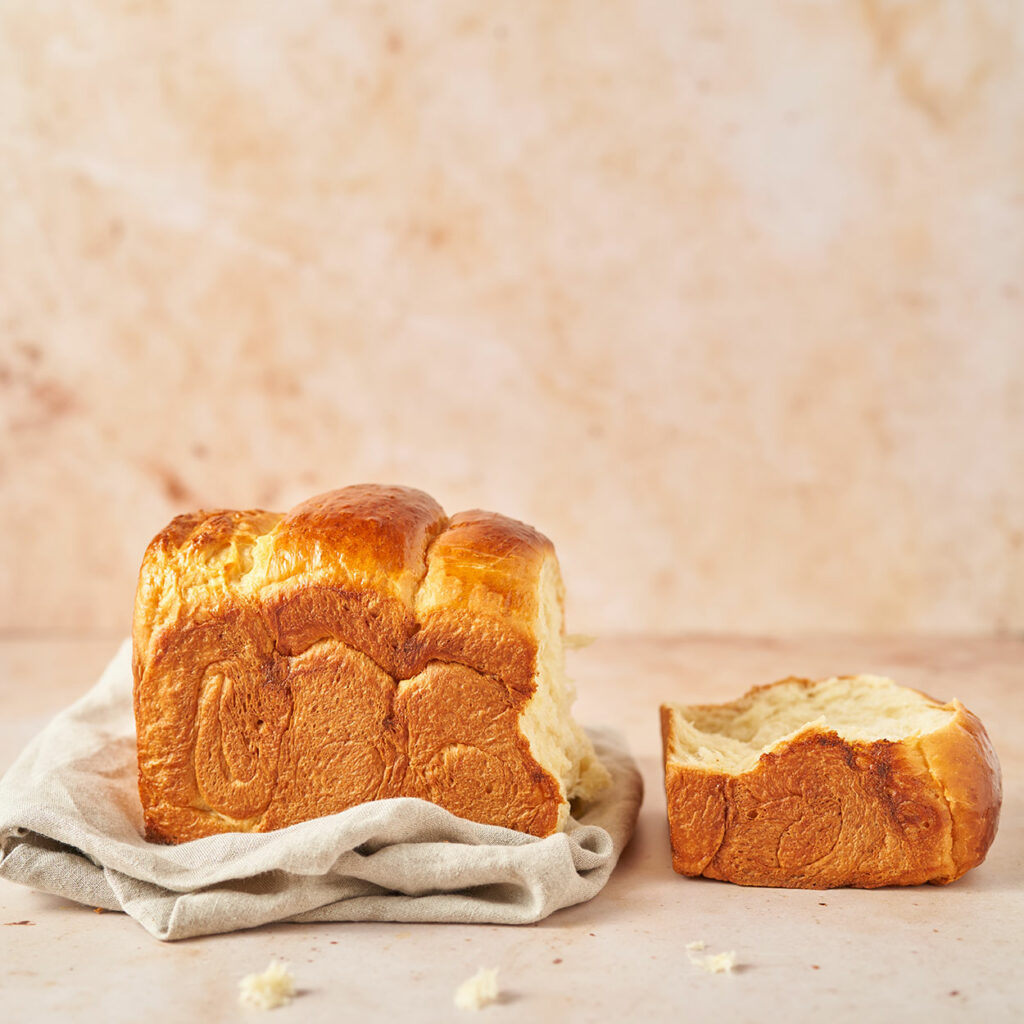
This is the softest, fluffiest, melt in your mouth Hokkaido Milk Bread you will ever make. There is literally no reason to buy toast bread from the supermarket anymore. Why would you? When you can have a far superior product in the comfort of your own home. Once you have this easy technique down nothing will stop you from making loaf after loaf. It works great for sandwiches, french toast, or our favorite butter and jam.
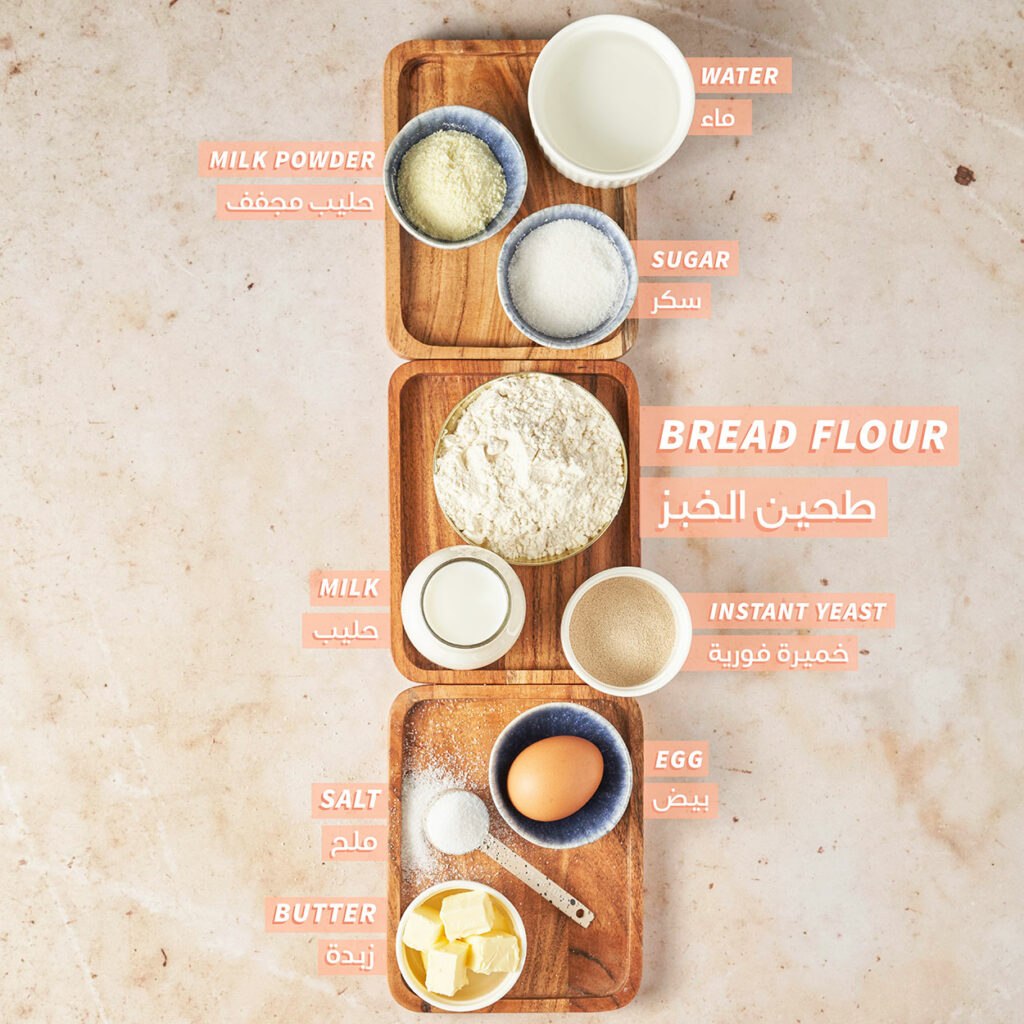
Here is what you will need to make Hokkaido (Japanese) Milk Bread
What is Hokkaido Milk Bread?
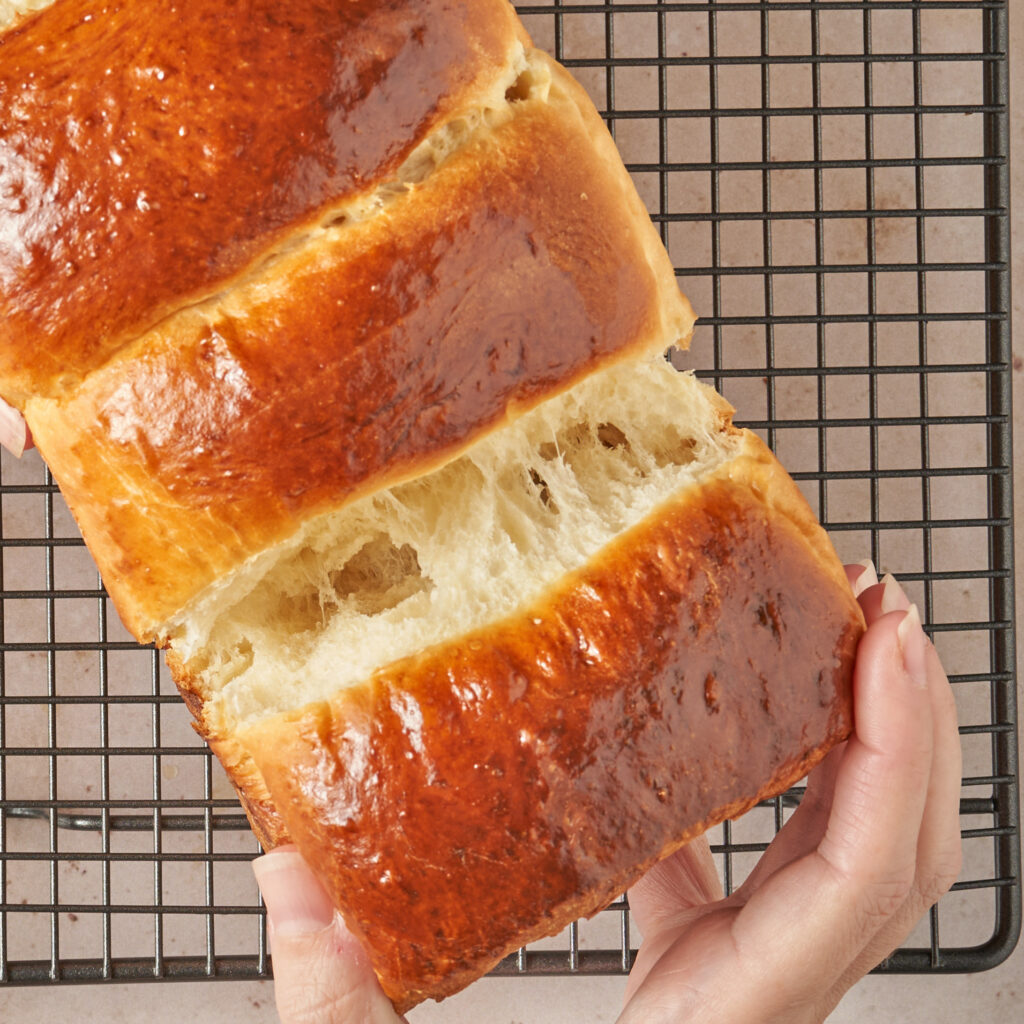
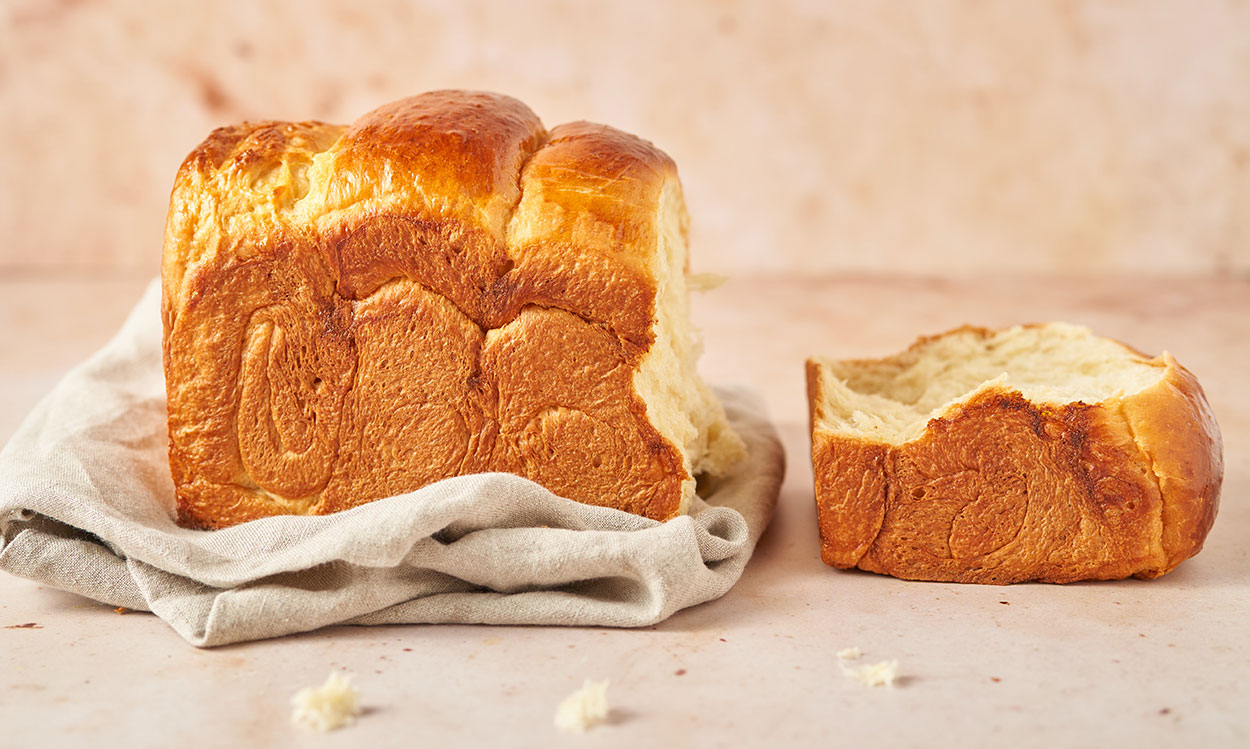
It is a Japanese bread made with a tangzhong base (we will get into this later). It is super fluffy, light, slightly sweetened, with an almost melt in your mouth cloud-like texture.
Bread Flour vs All Purpose Flour:
The main difference between bread flour and all-purpose flour is the protein percentage. Bread flour has a higher protein amount (12-14%), why is that important? Because bread needs protein to produce more gluten. And we love gluten in our bread, it’s what gives it stretchiness, elasticity, a higher rise, and that chew we love. We highly recommend using bread flour in this recipe for the closest results to actual Hokkaido milk bread. Saying that, we have also used all-purpose flour to make this bread, it is still amazing but not the same.
What is Tangzhong
Tangzhong is an Asian technique developed to allow the starches in the dough to absorb more water. Since we have more water absorbed into the actual starch of the dough, your dough is less sticky, rises higher(bc of internal steam the tangzhong will create), and most importantly the dough will be softer and moister.
The paste-like mixture, similar to a thick slurry, is made by cooking a small percentage of flour with water or milk or both. After making this and seeing the results we are trying to understand why this is not a widely known and used technique. The results are amazing with minimal effort.
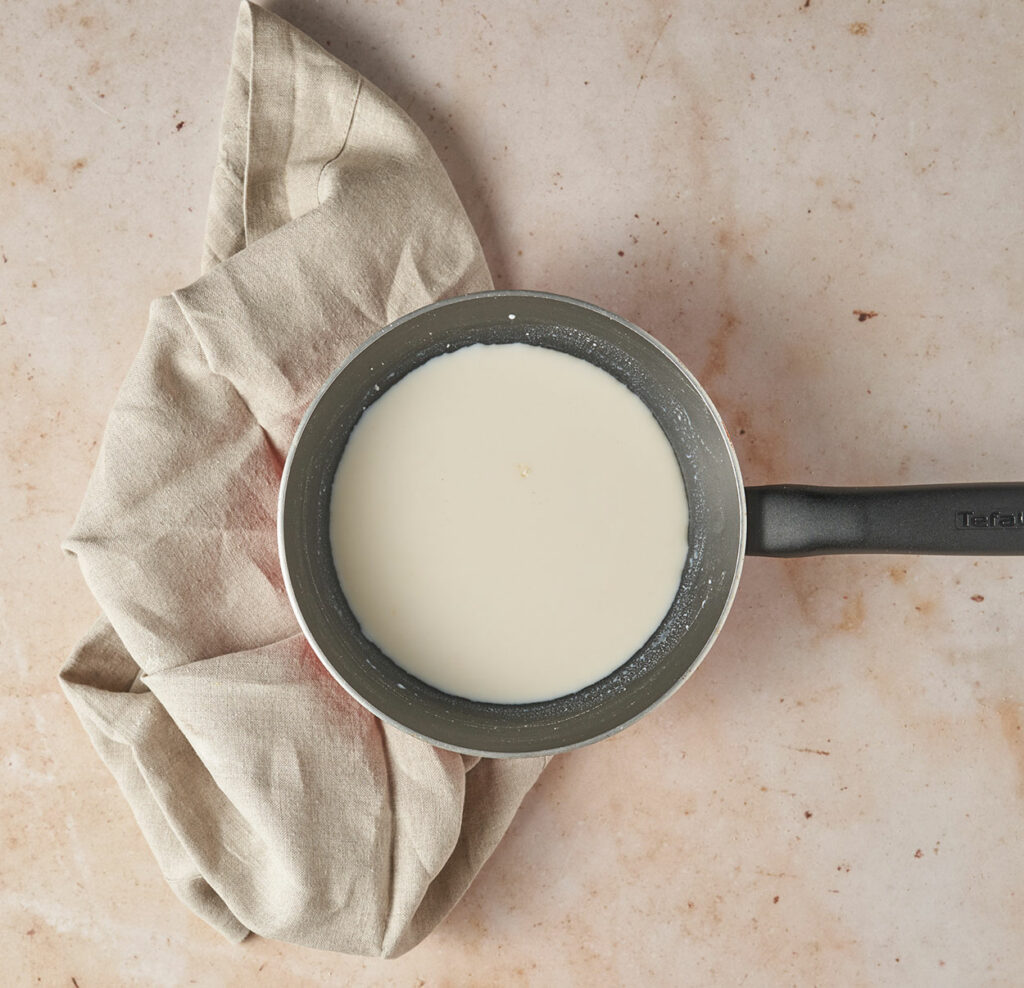
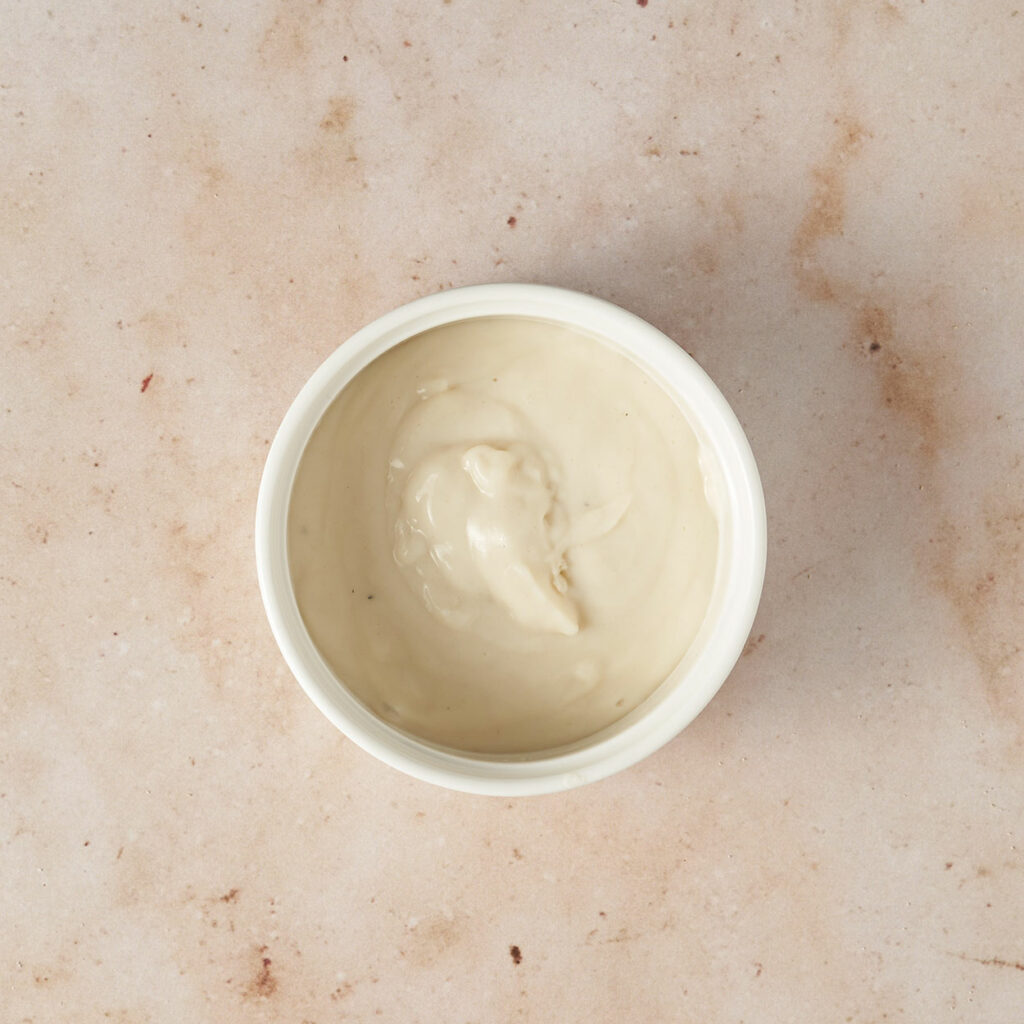
Lets make the Tangzhong
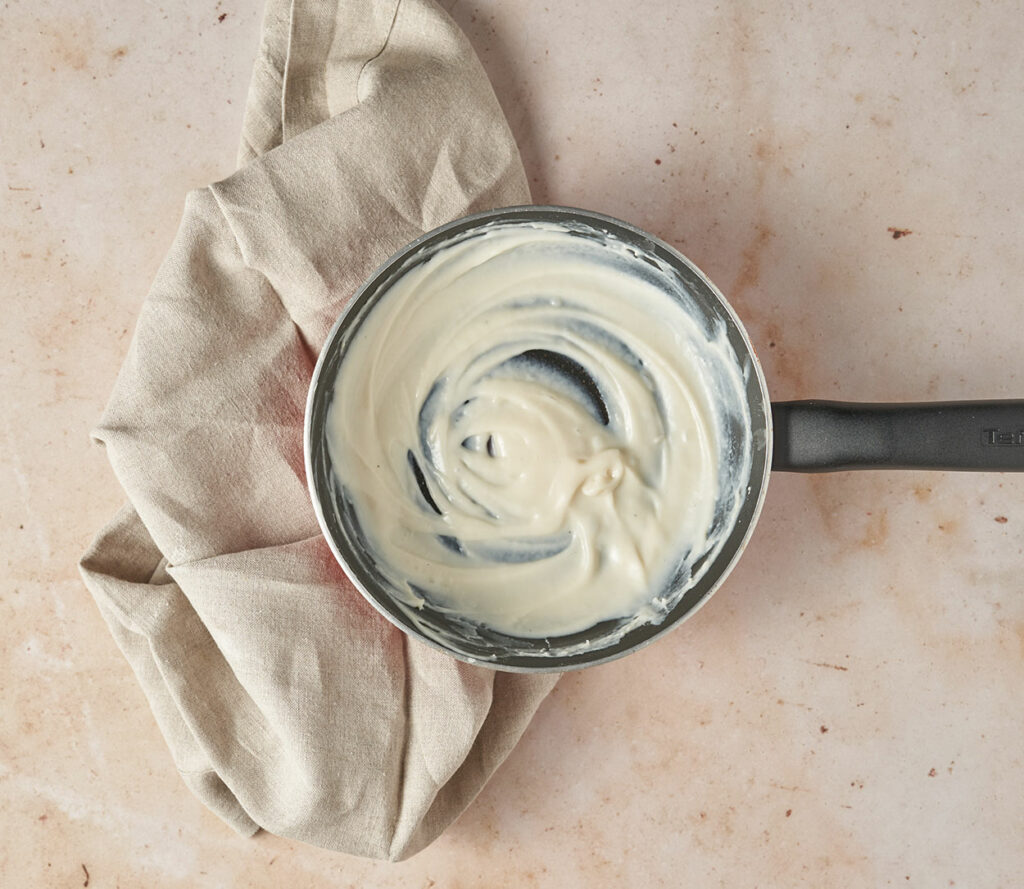
To make the tangzhong, combine water, milk, and flour in a small saucepan and whisk until no lumps remain. Place the saucepan over low medium heat and cook the mixture whisking until thicked and whisk leaves lines on the bottom of the pan, it should have almost a paste-like consistency, about 4-7 minutes depending on your burner (ours took about 6min).
If you are going to start making the Hokkaido milk bread immediately you can allow this to come to room temperature in the fridge or on your counter. If you chose the fridge the tangzhong needs to be room temperature before using so that it does not kill the yeast.
Making the Hokkaido Milk Bread Dough:
Ingredients
- bread flour
- salt
- sugar
- instant yeast
- milk powder
- milk
- egg
- butter
Grease your bread tin lightly with butter. You should try and use a high loaf pan so that you give the dough room to properly rise, we used a 21.5 x 13 x 12cm loaf pan like this. Whatever pan you use, during your final proof leave about 1-1.5 cm from the top of your loaf pan so that the bread does not spillover while baking.
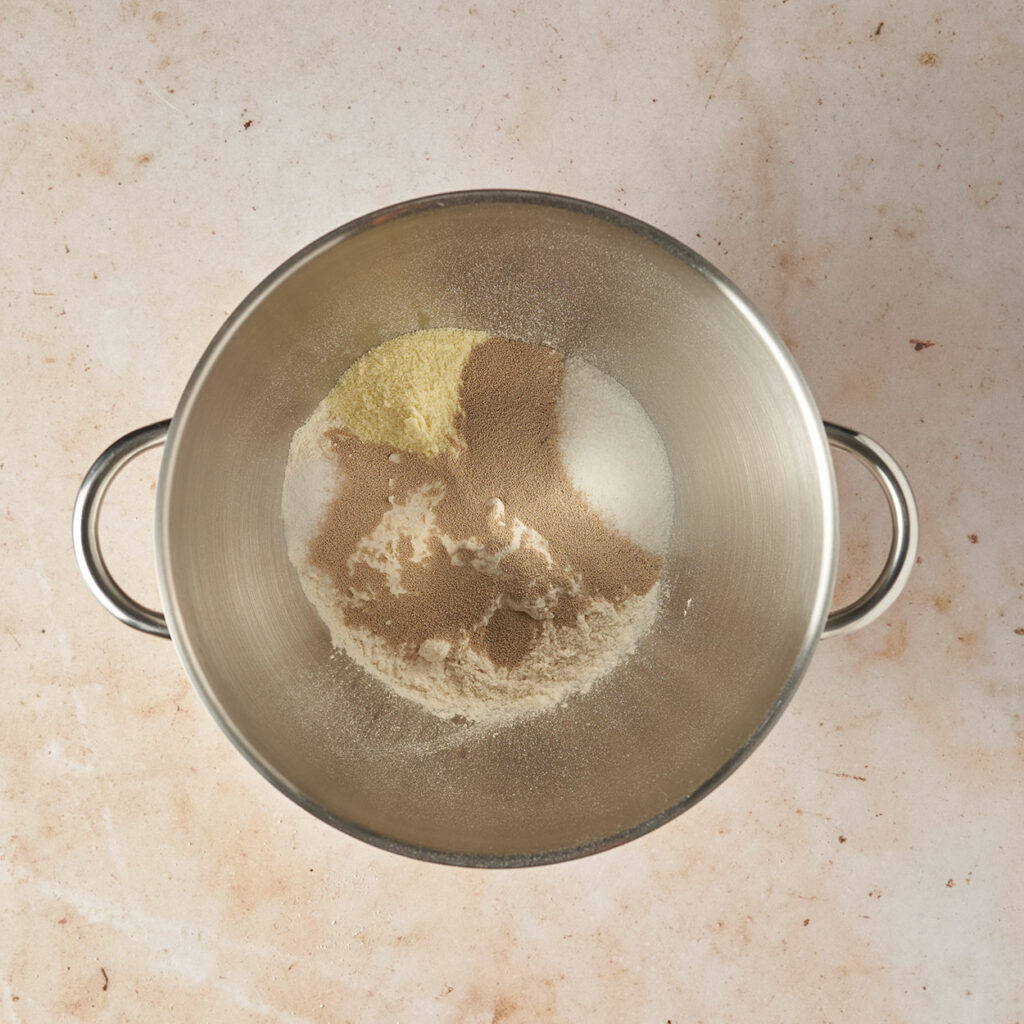
Into the bowl of your stand mixer fitted with the dough attachment add the dry ingredients;, bread flour + dry milk + salt + yeast + sugar. Mix on low to combine ingredients.
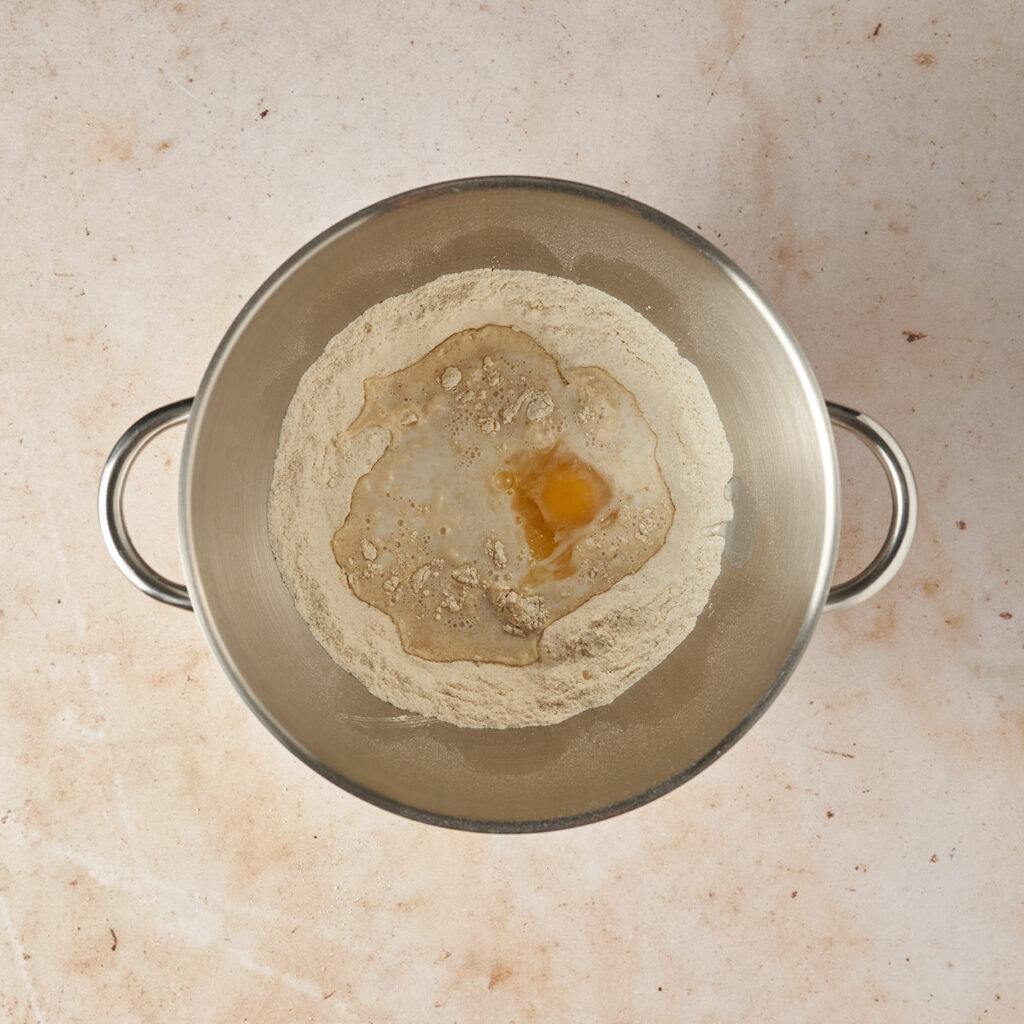
Add the wet ingredients; tangzhong + egg + milk and mix on medium until dough forms and is coming off the side of the mixing bowl.
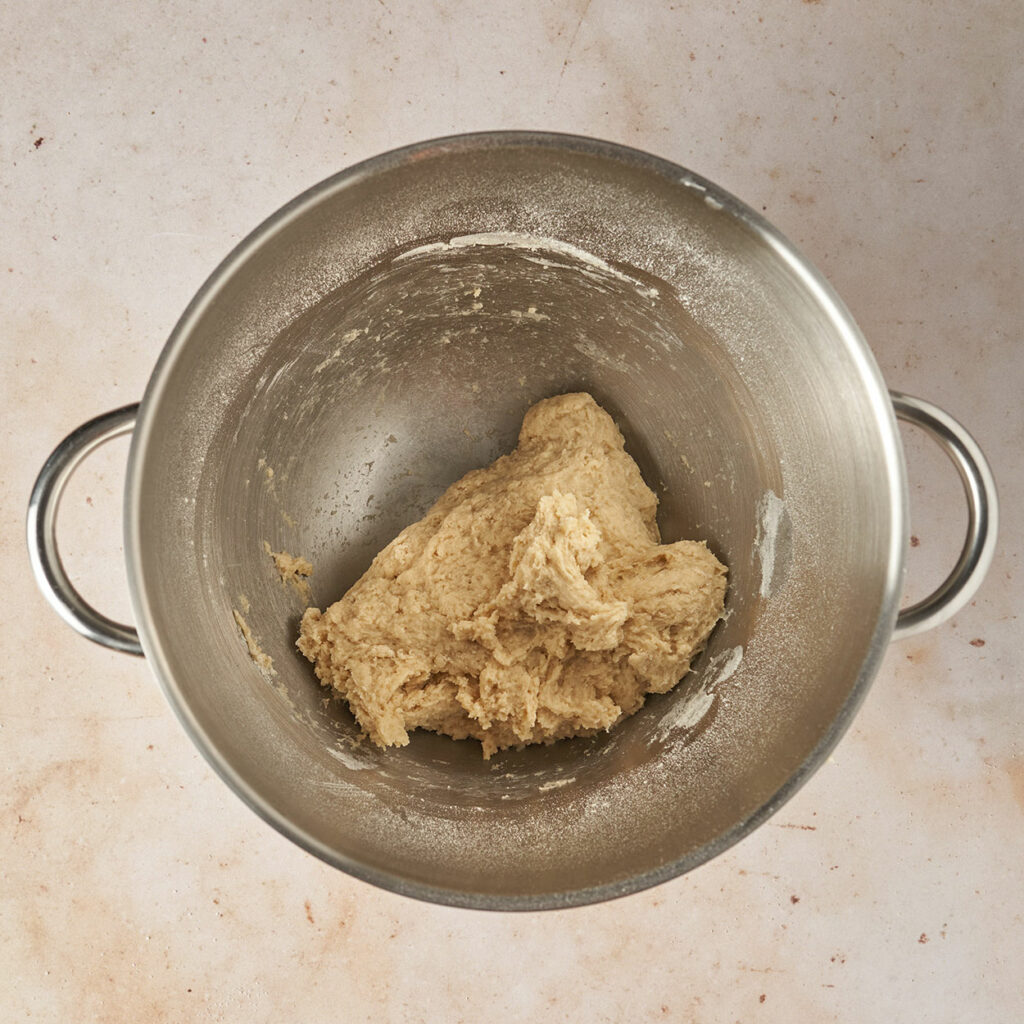
While your mixer is still on medium speed add your room temperature butter chunk by chunk, incorporating each one before adding the next. Then increase the mixer to medium-high for about 8 minutes until the dough is completely coming off the side of your mixing bowl and looks smooth. The dough should be elastic when you stretch it.
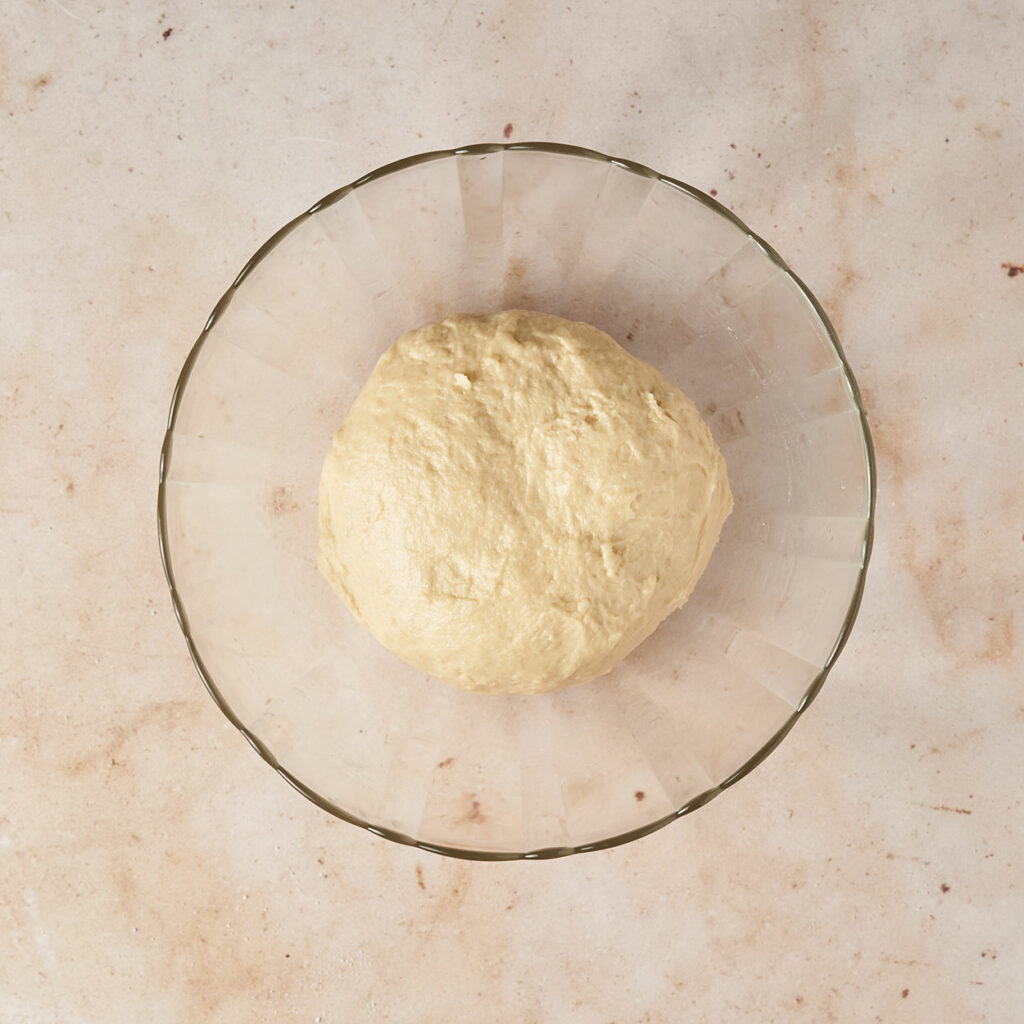
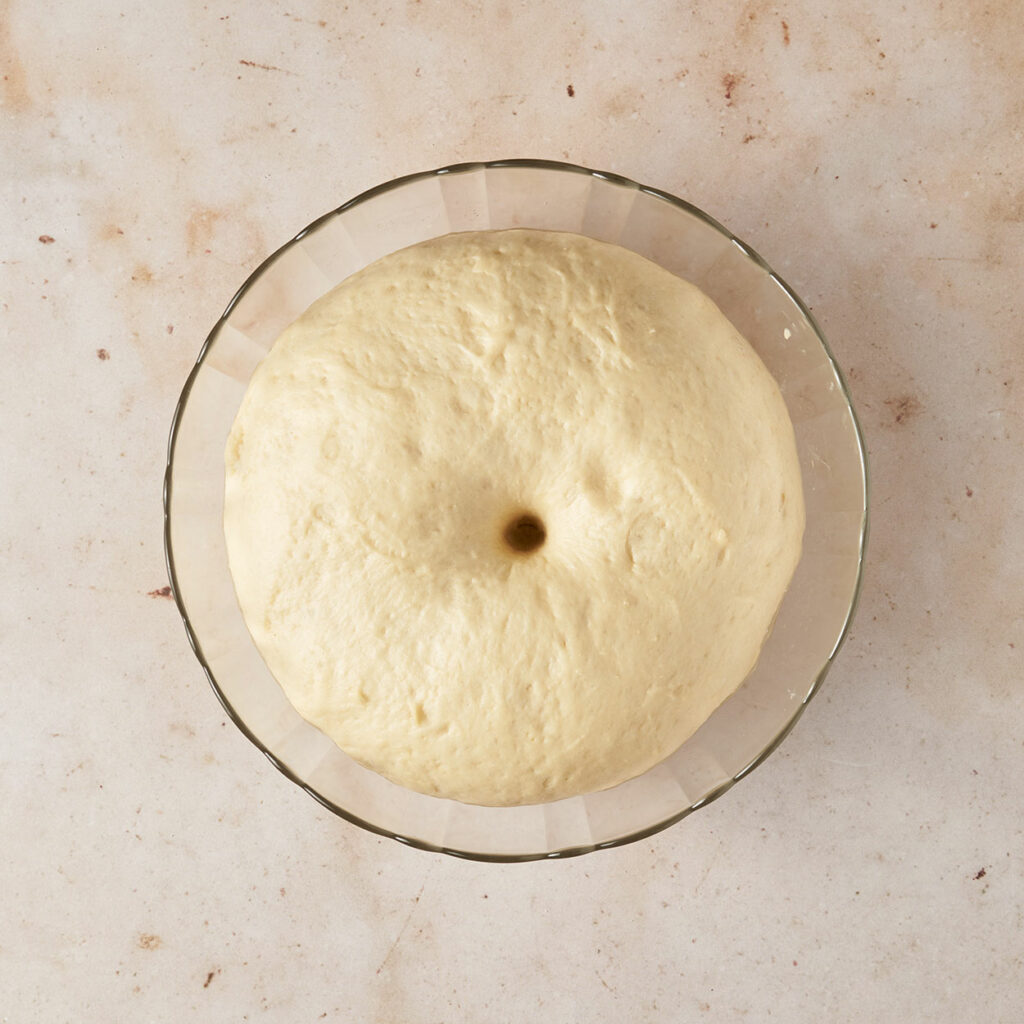
Remove from mixing bowl and form dough into a tight ball, place in a lightly greased bowl and cover with cling film or a towel. Allow to proof in a warm area for 60-90 min. The dough does not necessarily need to double in size (ours did) but should rise significantly. Poke the dough with your finger it should not spring back.
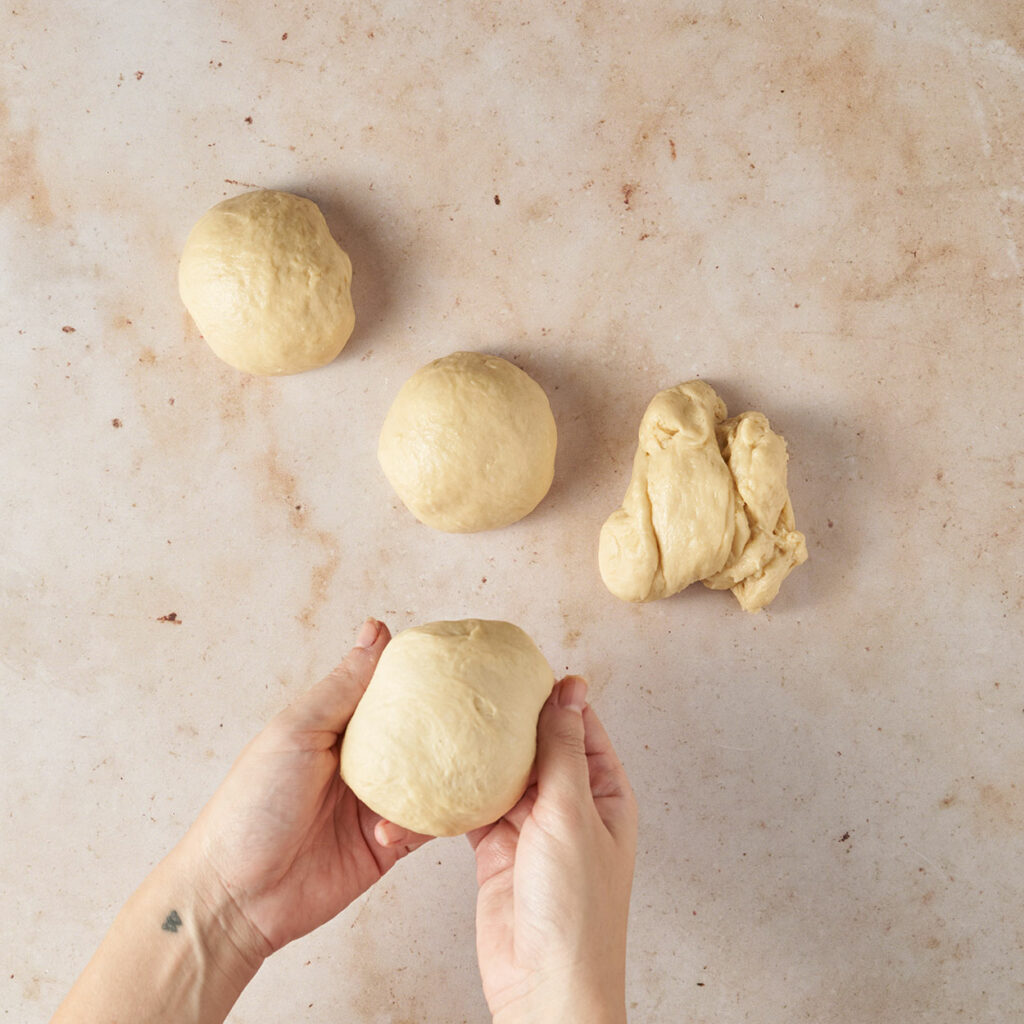
Divide dough into 4 equal pieces. We like to weigh the dough and just divide by four, it gives you a more accurate end result.
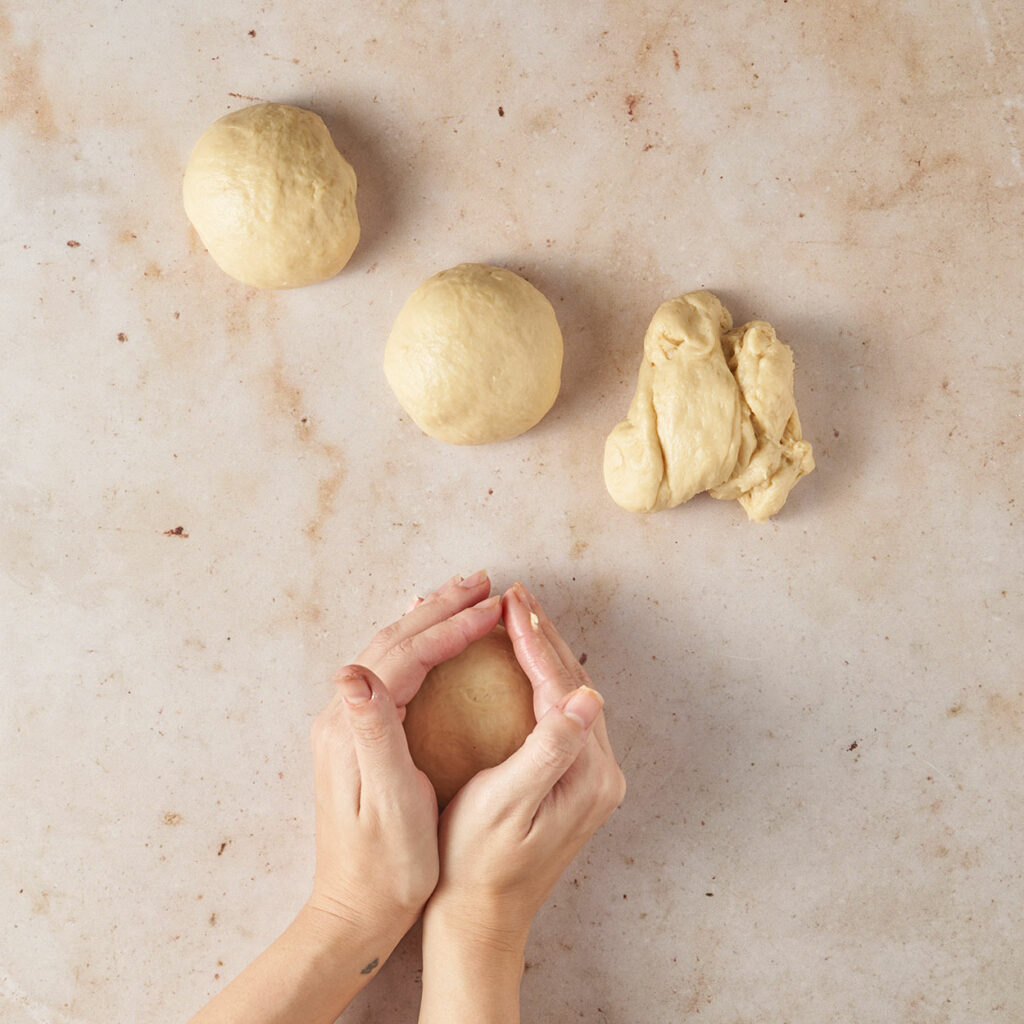
Grab one piece of your dough and fold it on to each other to form a ball. Then using your hands and the surface of a table, roll the dough so that it is seamless. Repeat for the rest of your dough pieces.

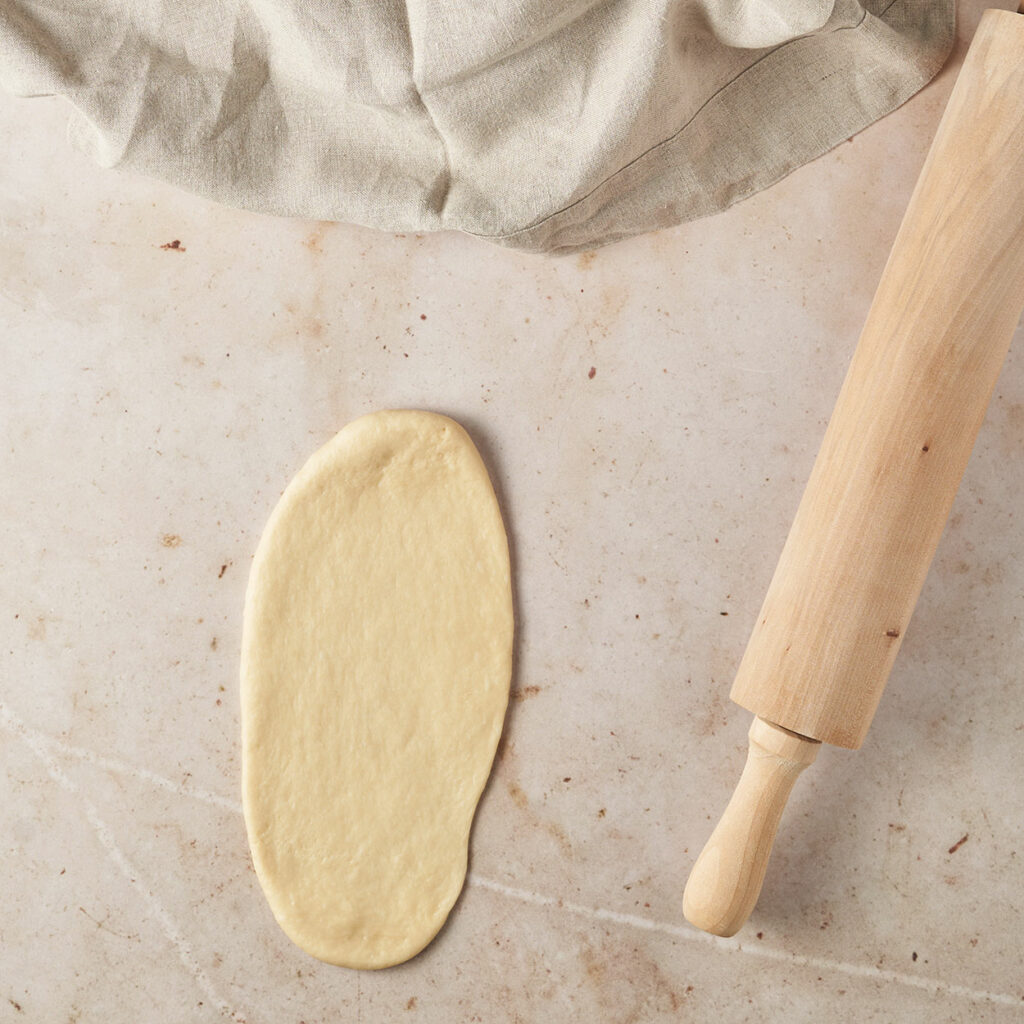
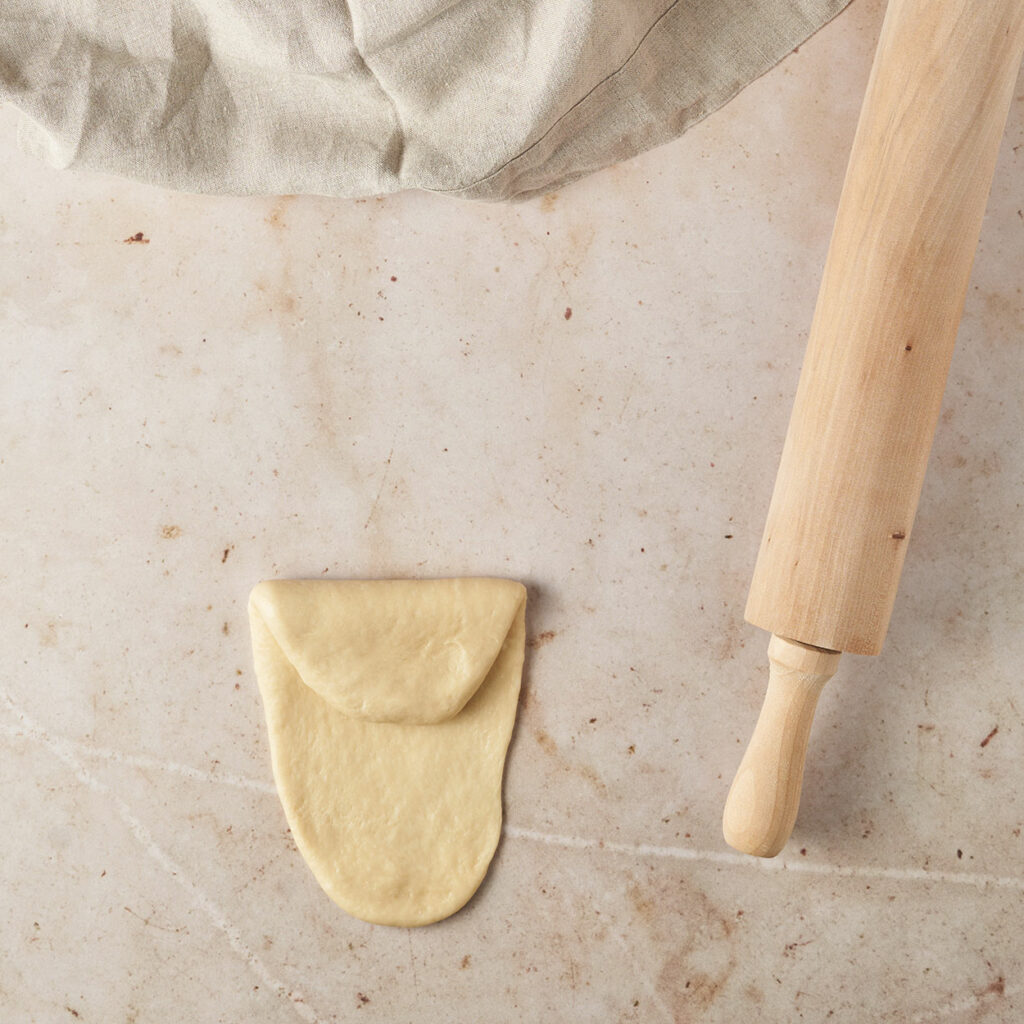
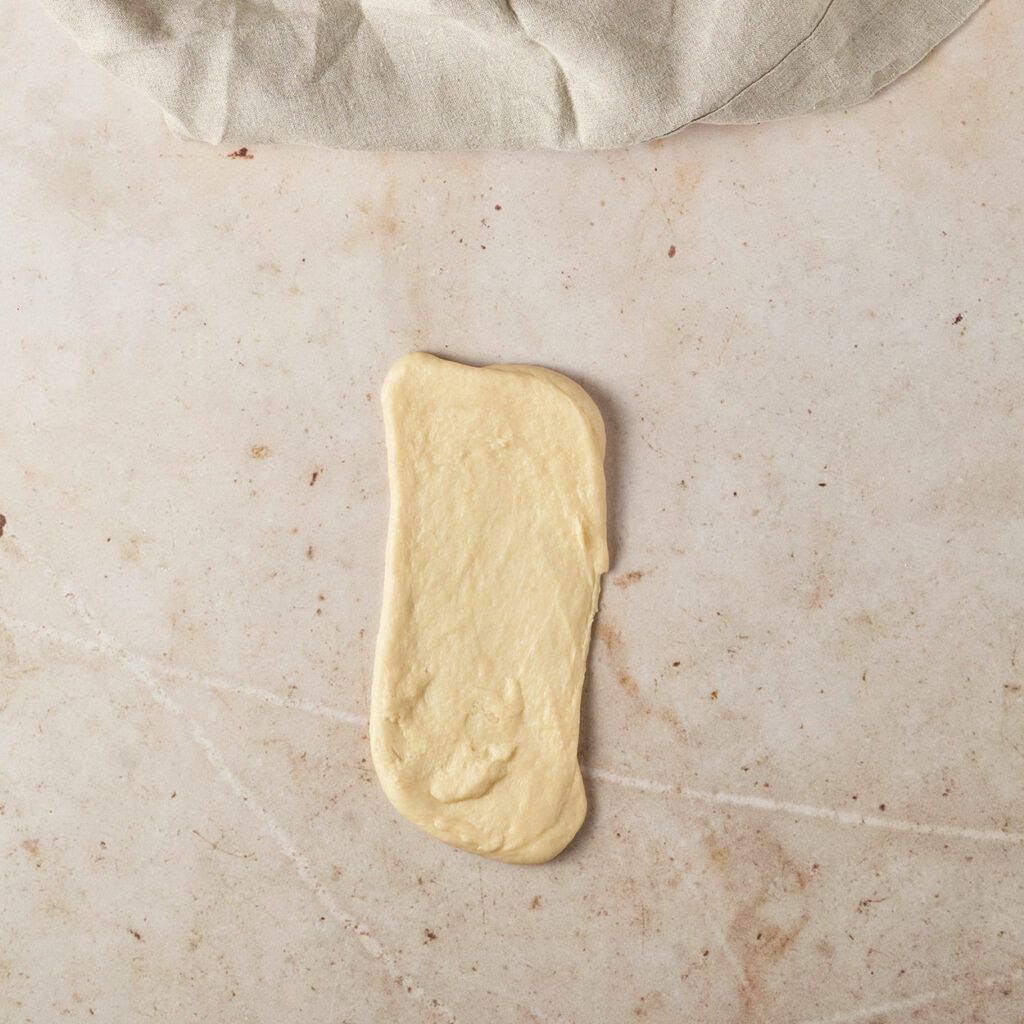
Cover the dough balls with a towel while you work on each one. Roll out your dough ball gently into an oval shape around 25 x 10 cm, it does not need to be exact. Take the top part and fold downwards to the center. Then take the bottom part and fold upwards like you are folding a letter.
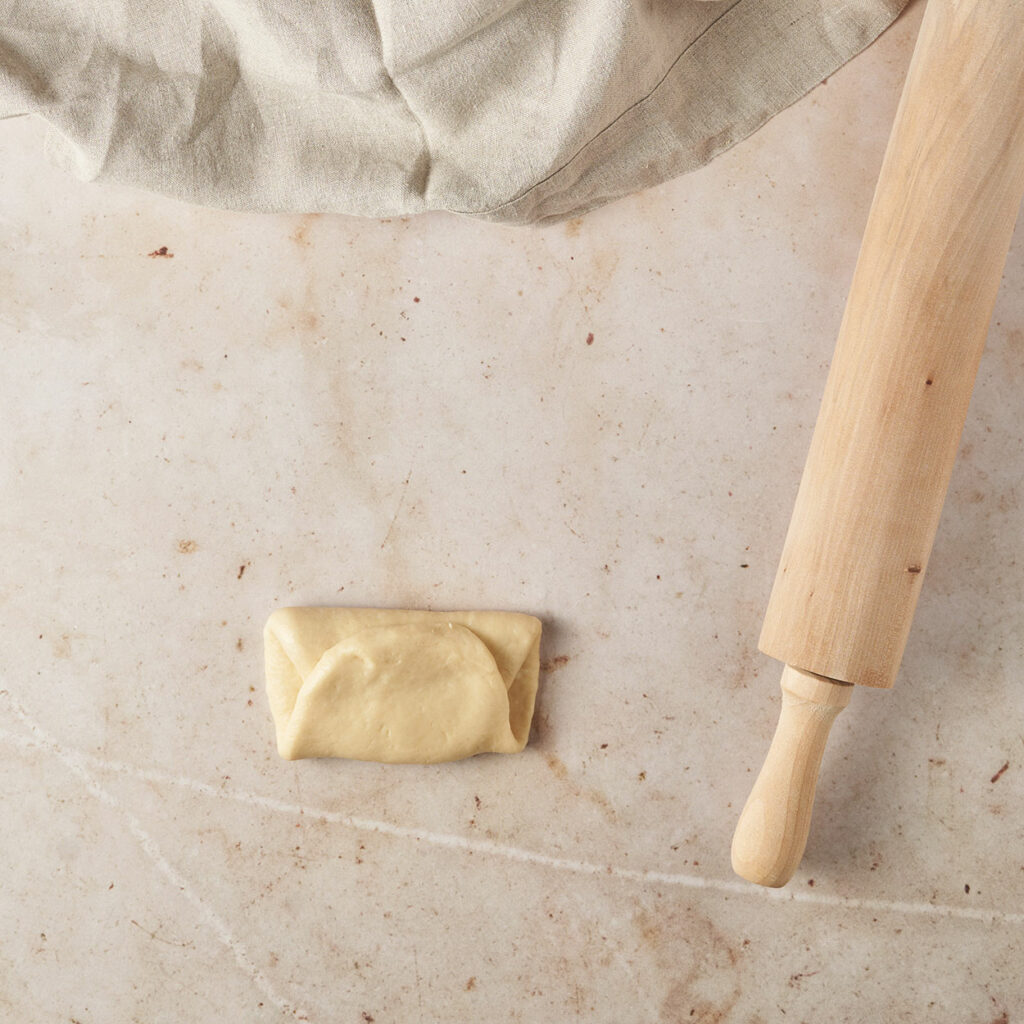
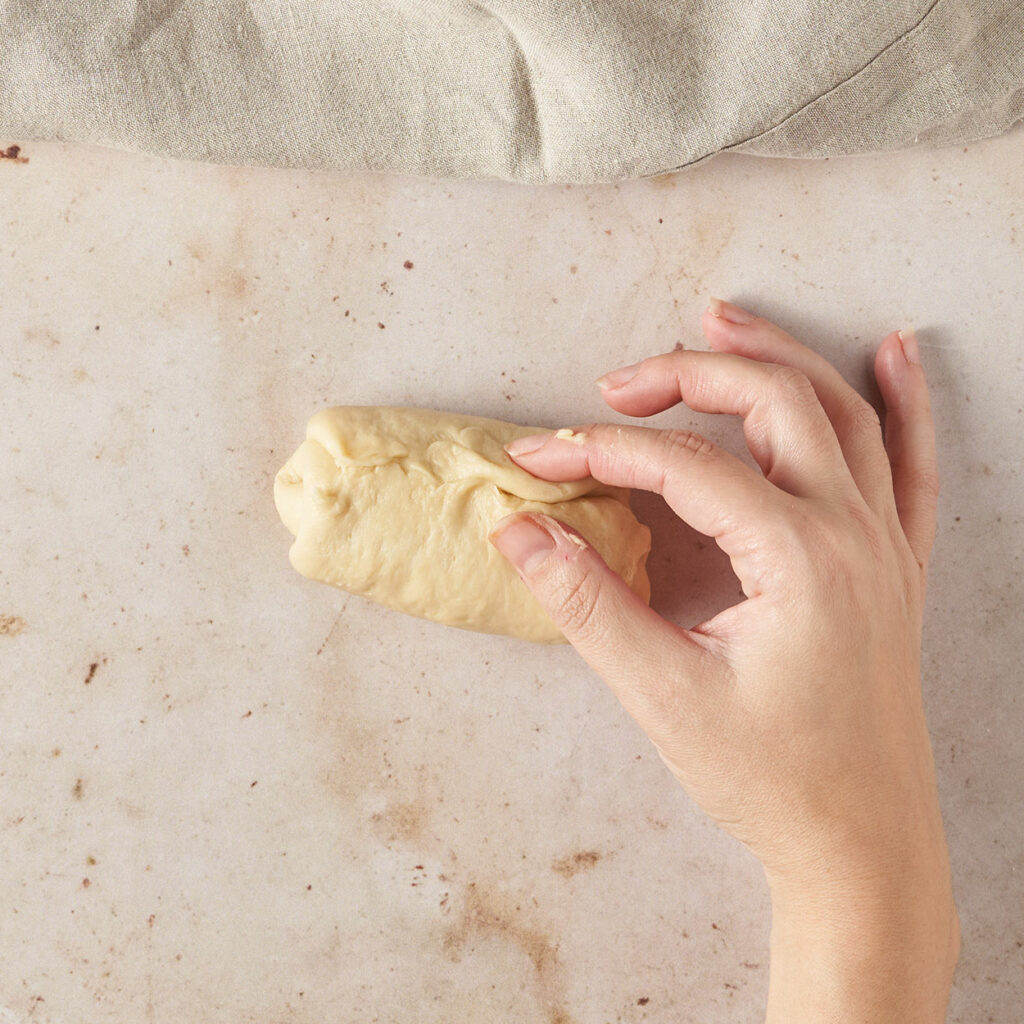
Turn your dough to the side so that the seem is now vertical. Roll out again to the same shape. Roll up your dough into a log shape.
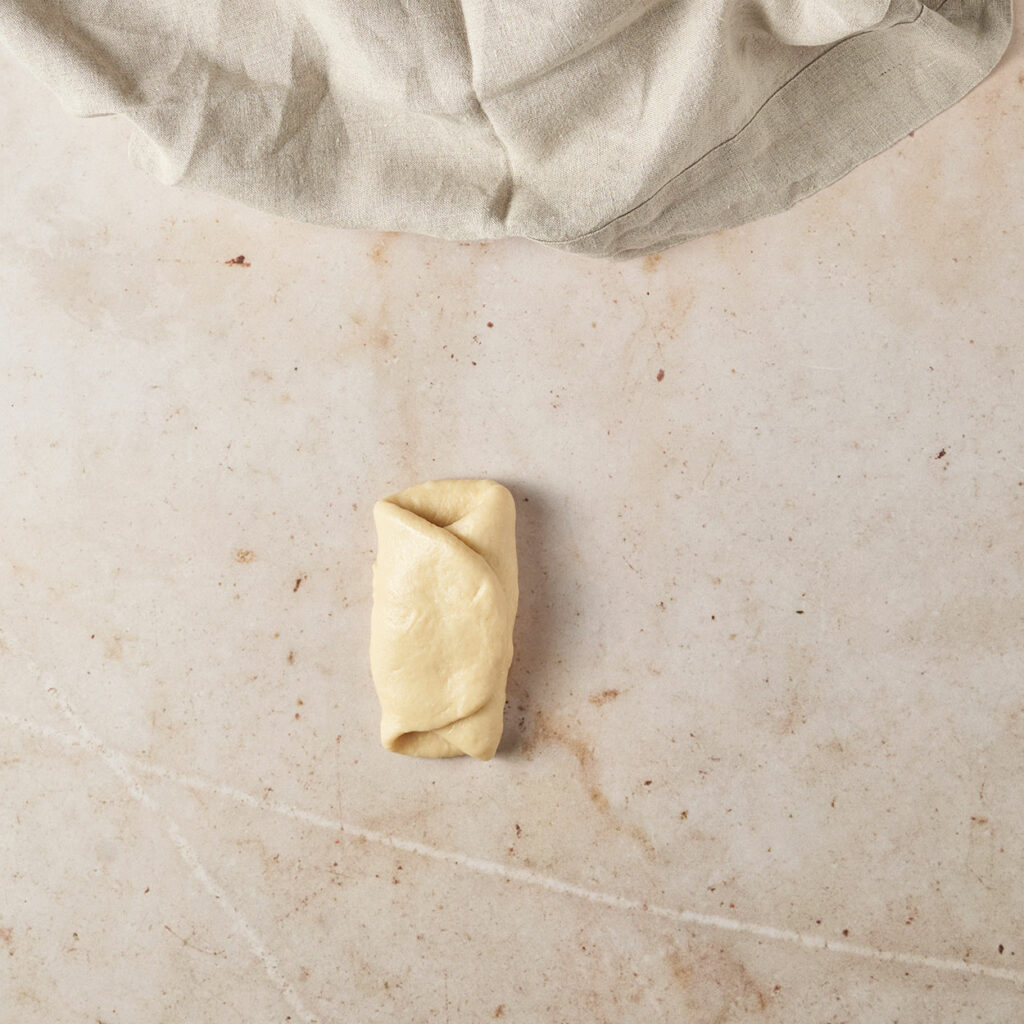

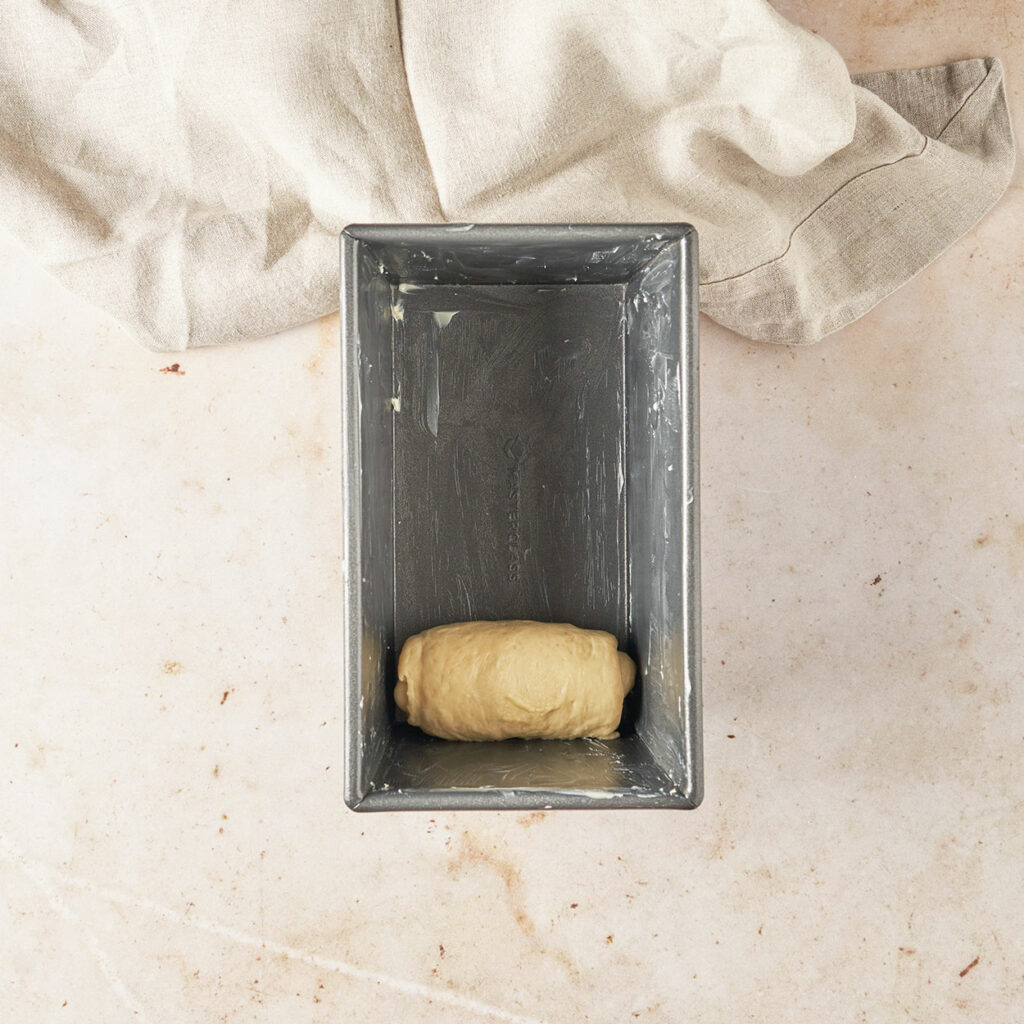
Pinch the seam to close. Place the dough seam down into your greased bread tin. Reprat with the rest of your dough balls, placing each seamside down into your bread tin.
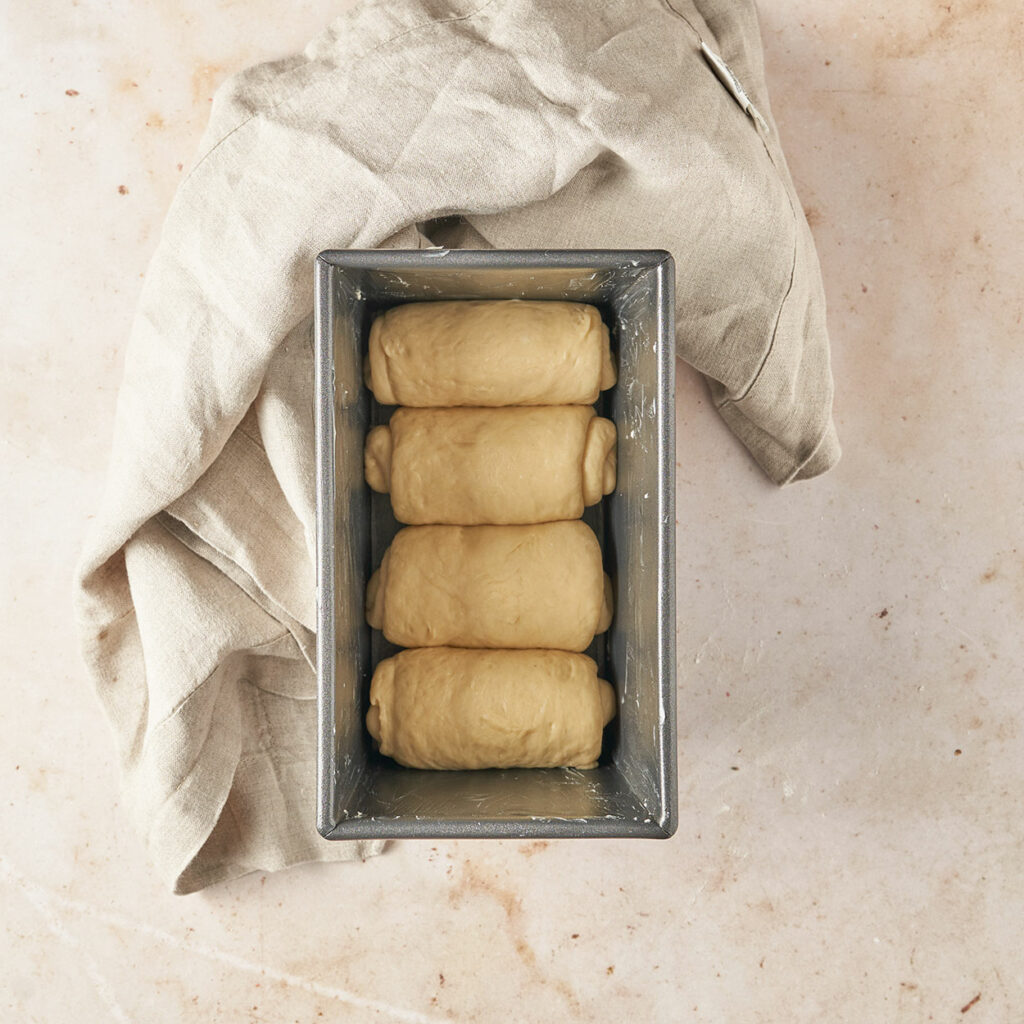
Cover with a towel or cling film and let your dough proof for another hour or more until it almost fills your bread tin (leave 1 – 1.5 cm from the top of your tin). While the dough is proofing in the tin, Preheat your oven to 175°C.
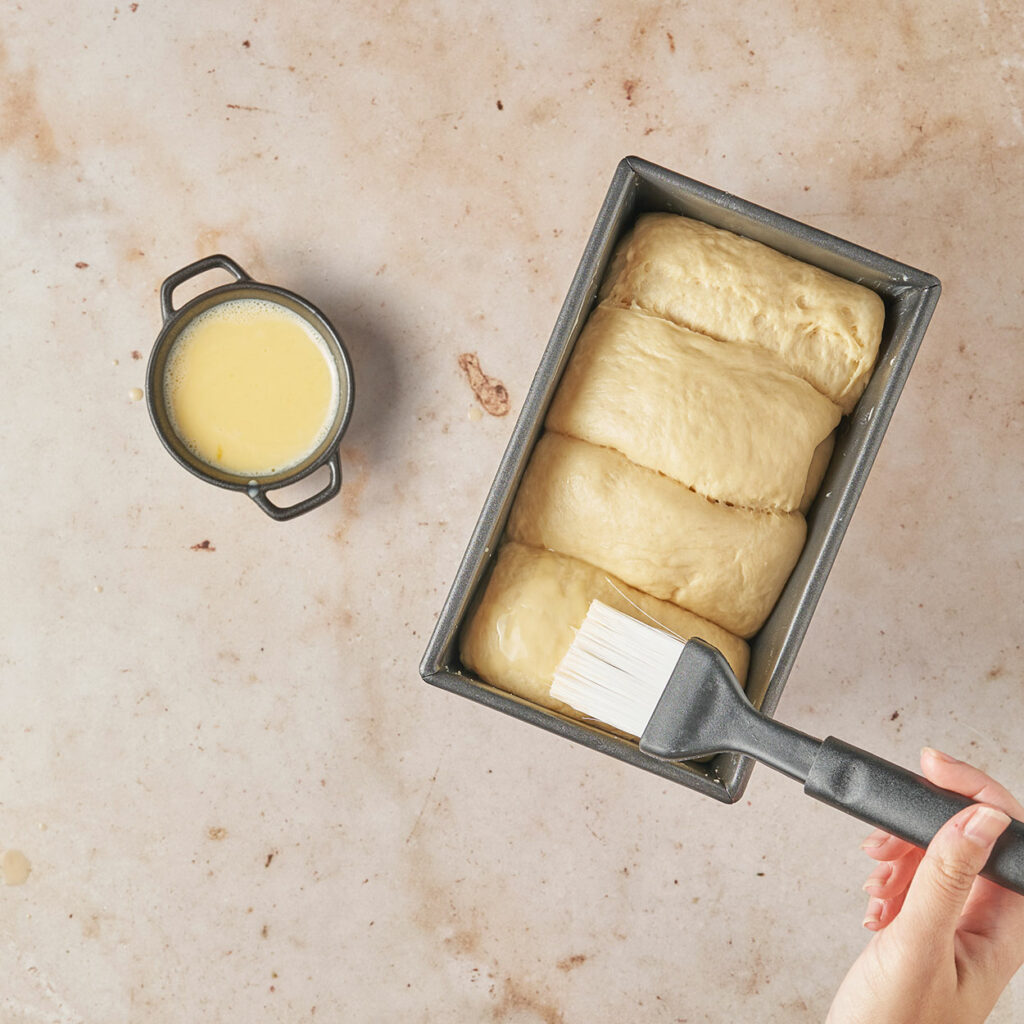
When your dough has proofed gently brush the top of your dough with your milk-egg wash (1 egg mixed with 1 tbsp milk).
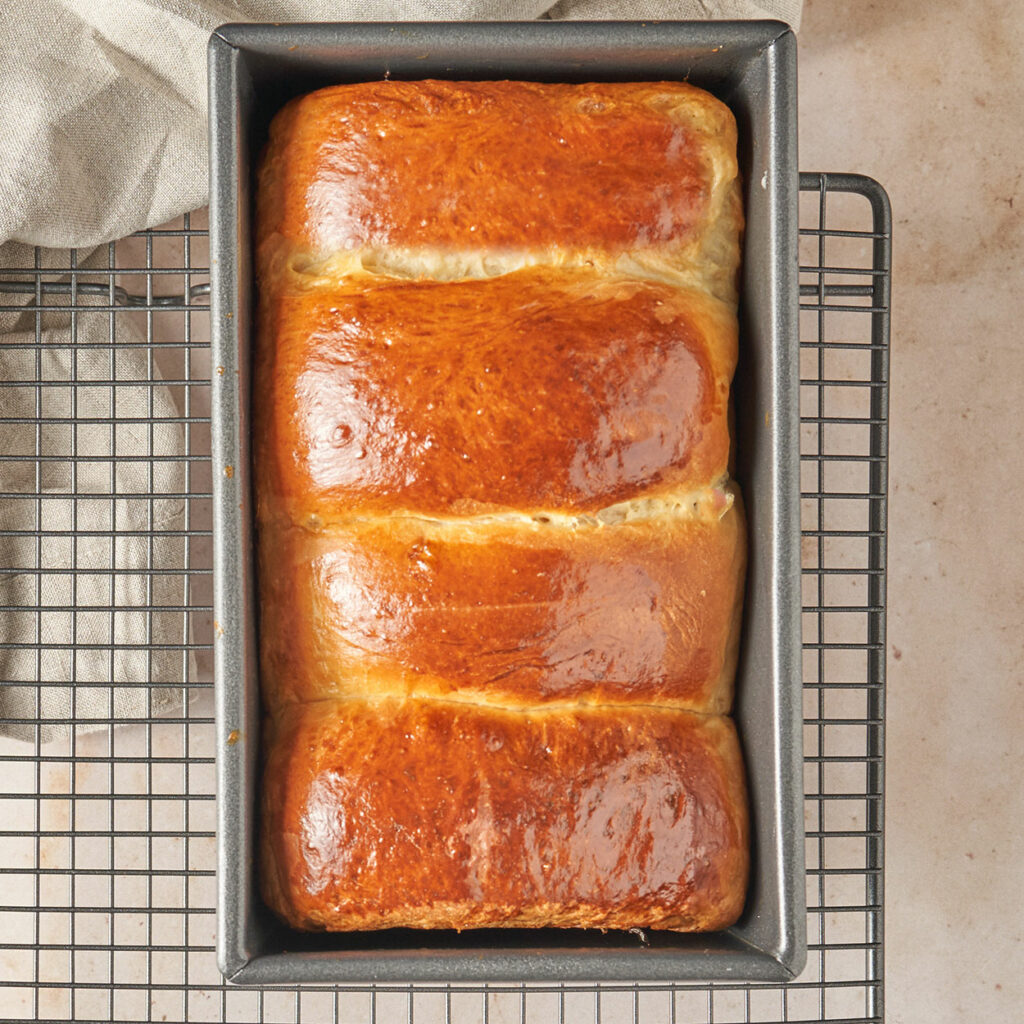
Place in your oven to bake for 25-30 minutes (ours took 27min), an instant-read thermometer inserted into the center of your loaf should read 87.7°C (190°F)
Remove your loaf tin and let your milk bread cool in the tin on a cooling rack for 10 min. Invert bread onto a cooling rack. After cutting cover in cling wrap to keep it fresh.
Shaping your Milk Bread
This dough can be made into many different shapes. Diana made it into circles for dinner rolls. Just divide the dough by 9 instead of four, skip the log shaping above. Just proceed to roll each piece of bread to a circle, then grease a 22x22cm (9x9in) cake pan and place them in rows of 3 leaving room between each. Allow to proof and bake.
You can also use a circular pan using a 20-22cm (8-9in) round pan, divide your dough into 8 pieces. Grease your cake pan, place one dough ball in the center and the other 7 around it leaving a bit of room between each. Allow to proof then bake.
If you make this Hokkaido (Japanese) Milk Bread let us know! Leave a comment, rate it, and don’t forget to tag a photo #thetablediaries on Instagram. We love seeing all the recipes you and your family enjoy.
Hokkaido (Japanese) Milk Bread
Ingredients
Tangzhong (starter)
- 43 grams water 3 tbsp
- 43 grams whole milk 3 tbsp
- 14 grams bread flour 2 tbsp
Dough
- 298 grams bread flour 2 ½ cups spooned and leveled
- 14 grams dry milk 2 tbsp
- 50 grams sugar ¼ cup
- 1 tsp salt
- 1 tbsp instant yeast
- ½ cup milk
- 1 egg
- 57 grams unsalted butter room temperature 4 tbsp
Milk Egg Wash
- 1 tbsp milk
- 1 egg
Instructions
For the tangzhong
- Combine water, milk, and flour in a small saucepan and whisk until no lumps remain.
- Place the saucepan over low medium heat and cook the mixture whisking until thicked and whisk leaves lines on the bottom of the pan. It should have almost a paste-like consistency about 4-7 minutes.
- Put in fridge or on your countertop and allow to cool to room temperature . You can keep it in the fridge for up to 6 hours just make sure to allow the mixture to come to room temperature before using.
For the Dough
- Grease your bread tin lightly with butter. We used a 21.5 x 13 x 12cm loaf pan.
- Into the bowl of your stand mixer fitted with the dough attachment add the dry ingredients;, bread flour + dry milk + salt + yeast + sugar. Mix on low to combine ingredients.
- Add the wet ingredients; tangzhong + egg + milk and mix on medium until dough forms and is coming off the side of the mixing bowl. Scrape down the sides of the bowl.
- While your mixer is still on medium speed add your room temperature butter chunk by chunk, incorporating each one before adding the next. Then increase the mixer to medium-high for about 8 minutes until the dough is completely coming off the side of your mixing bowl and looks smooth. The dough should be elastic when you stretch it.
- Remove from mixing bowl and form dough into a tight ball, place in a lightly greased bowl and cover with cling film or a towel. Allow to proof in a warm area for 60-90 min. The dough does not necessarily need to double in size (ours did) but should rise significantly. Poke the dough with your finger it should not spring back.
- Divide dough into 4 equal pieces.
- Grab one piece of your dough and fold it on to each other to form a ball. Then using your hands and the surface of a table roll it so that it is seamless. Repeat for the rest of your dough pieces.
- Cover the dough balls with a towel while you work on each one.
- Roll out your dough ball gently into an oval shape around 25 x 10 cm, it does not need to be exact. Take the top part and fold downwards to the center. Then take the bottom part and fold upwards like you are folding a letter. Turn your dough to the side so that the seem is now vertical. Roll out again to the same oval shape. Roll up your dough into a log shape, and pinch the seam to close. (refer to blog post or images)
- Place seam down into your greased bread tin.
- Repeat with the rest of your dough balls, placing each seam-side down into your bread tin.
- Cover with a towel or cling film and let your dough proof for another hour or until it almost fills your bread tin. Leave 1-1.5cm from the top of your tin, so that dough has room to rise when baking. (Proof time will depend on the temperature of your kitchen). The cooler it is the longer it will take for your dough to fill your tin).
- Preheat your oven to 175°C. If you have an electric oven use the fan option.
For the Milk Egg Wash
- Whisk 1 tbsp of milk with 1 egg until very well incorporated. If you are out of eggs you can also use just plain milk.
Baking your Dough
- When your dough has almost filled your tin, gently brush the top of your dough with your milk-egg wash using a pastry brush.
- Place in your oven to bake for 25-30 minutes, an instant-read thermometer inserted into the center of your loaf should read 87.7°C (190°F).
- Remove your loaf tin and let your milk bread cool in the tin on a cooling rack for 10 min.
- Invert bread onto a cooling rack. After cutting cover in cling wrap to keep it fresh.