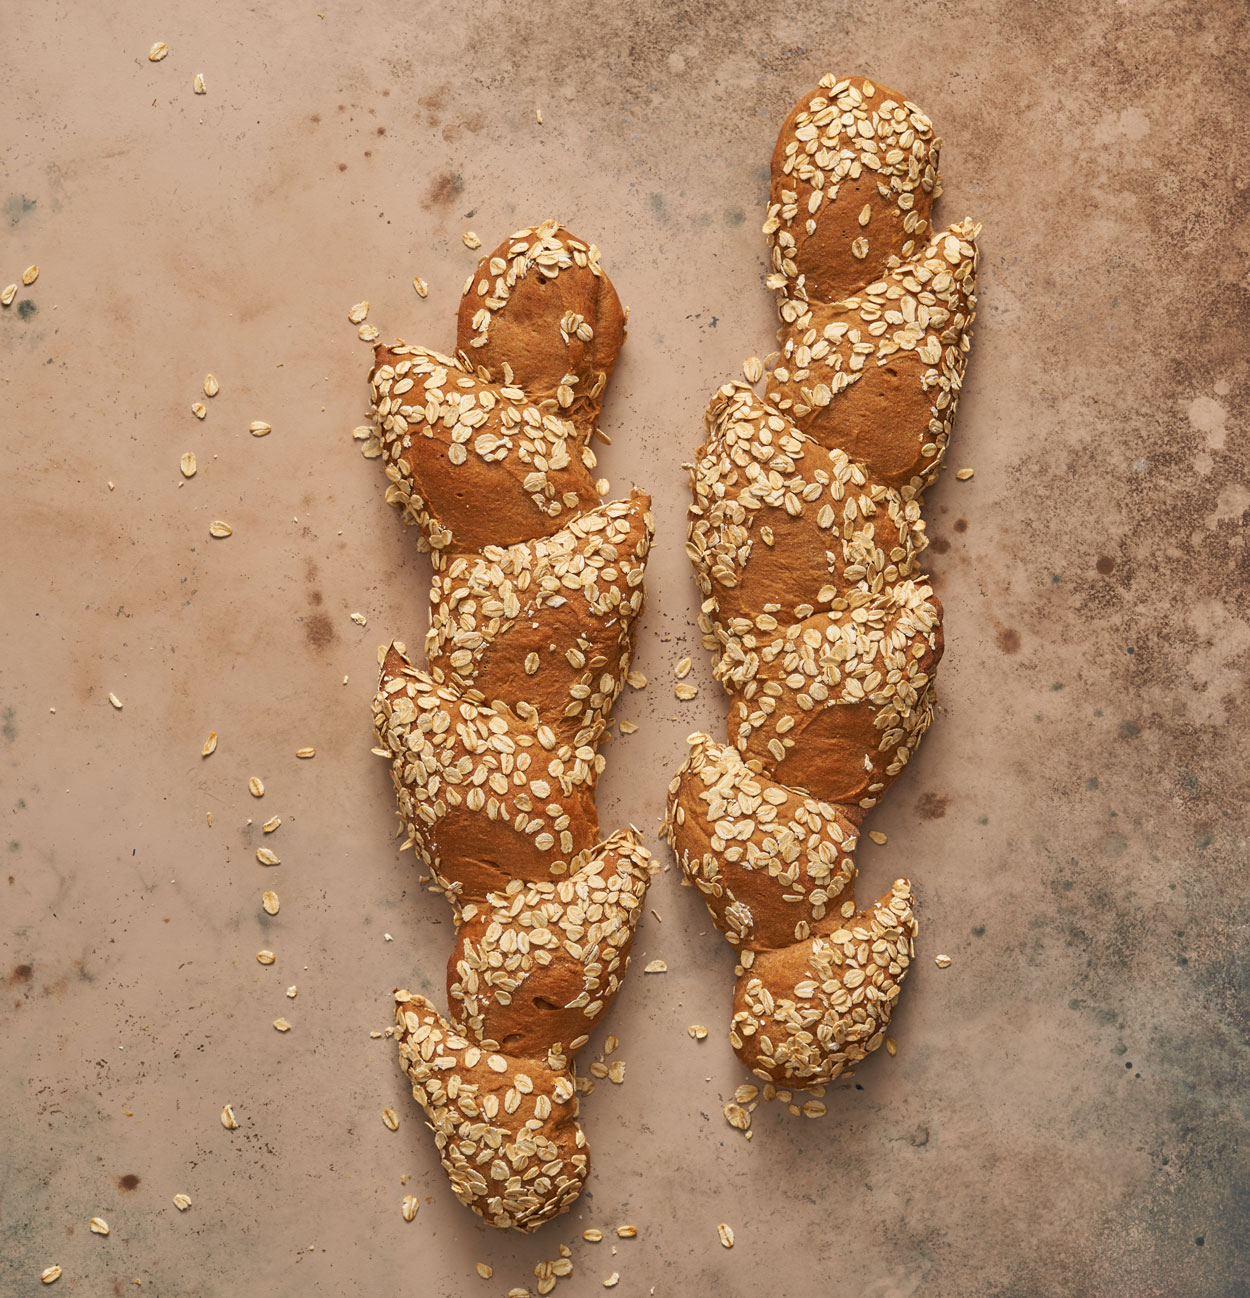
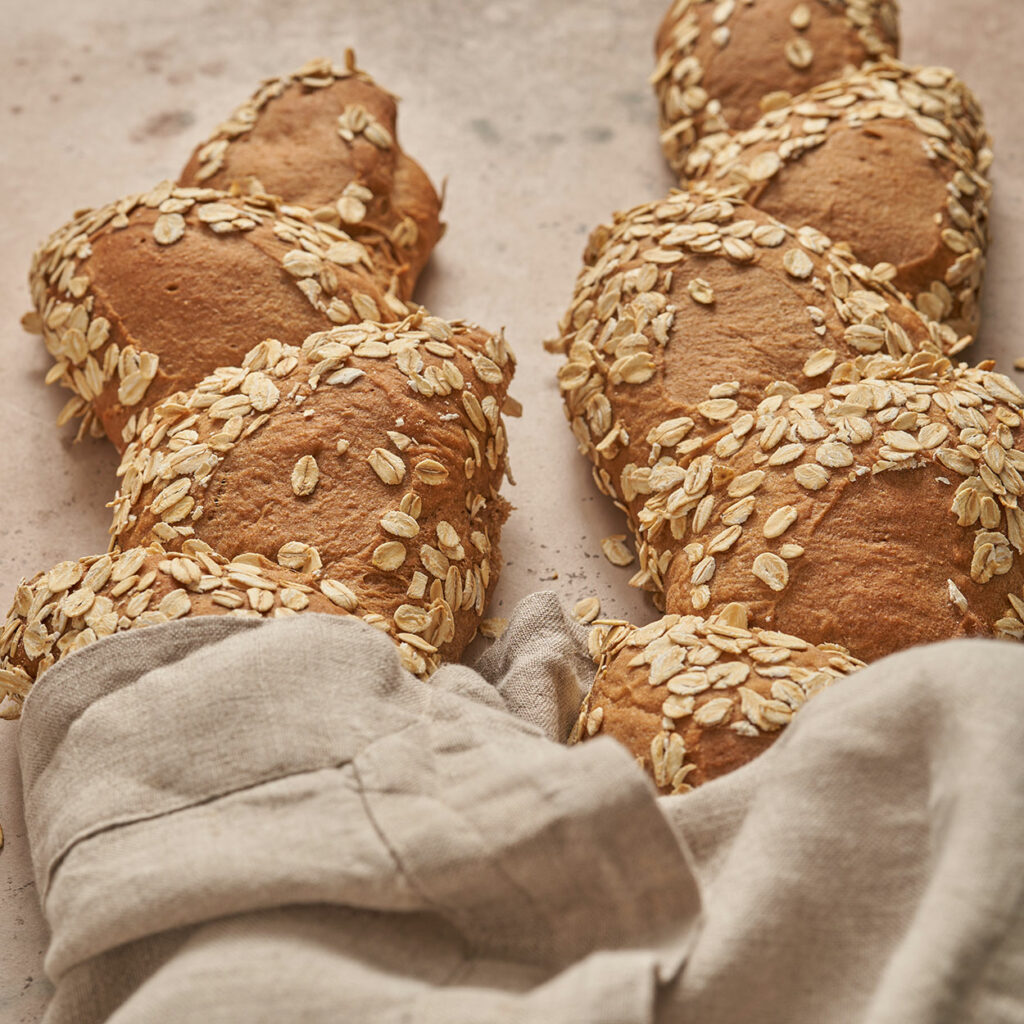
We are so excited we share this amazing Honey Wheat Bread with you. You know that warm brown bread at Cheesecake Factory they serve once you sit down with slabs of butter. This bread tastes exactly like that, super addictive, soft, squishy and sooooo good. Its the only time we happily will devour the brown bread over the white. Serve this bread warm right out of the oven with slabs of butter and sea salt. Yummy !!!
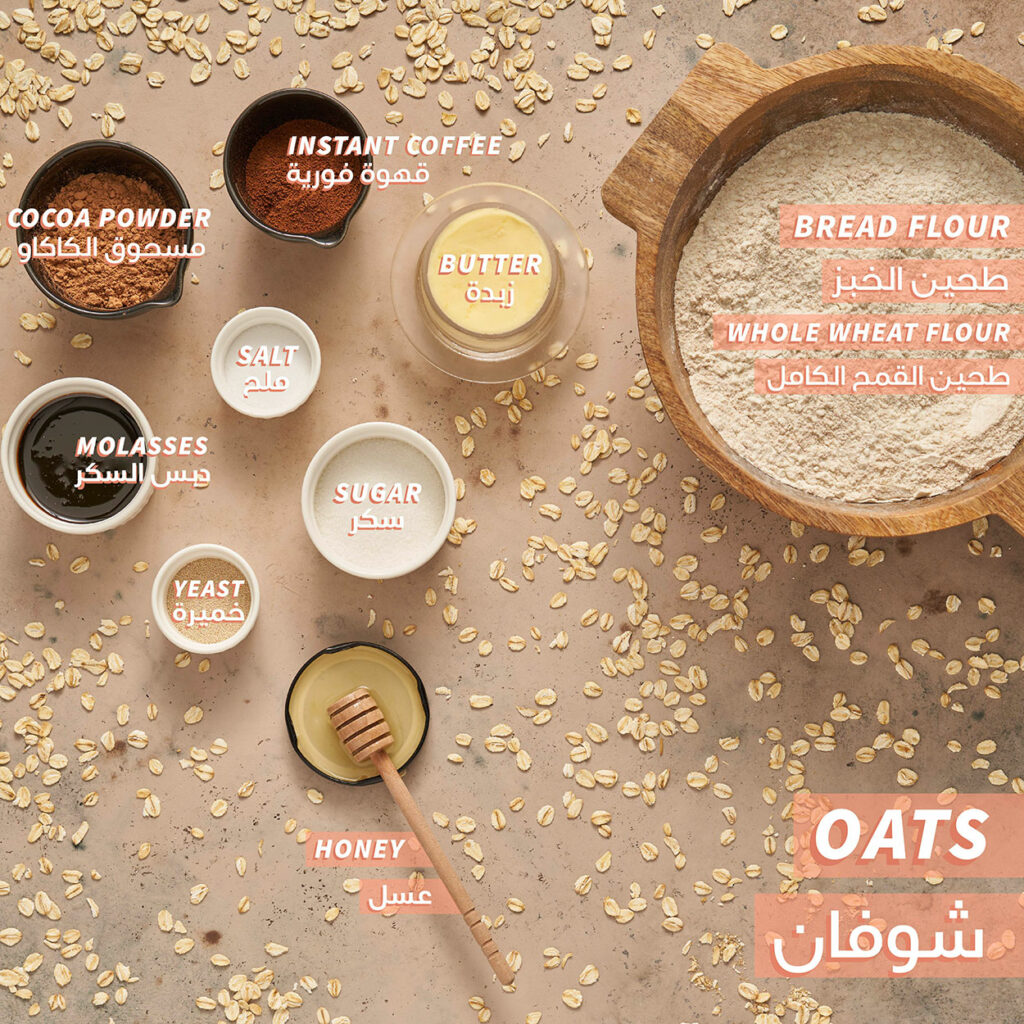
What you will need to make this Honey Wheat Bread
Making your Honey Wheat Dough
There are some weird ingredients in this bread, don’t leave anything out all of these help develop the layers of flavor in this bread.
Ingredients :
- Cocoa powder: Use unsweetened, natural, or dutch cocoa powder.
- Honey
- Molasses: Molasses is what gives this bread its slightly bitter taste it’s great, but if you can’t find this ingredient just replace it with honey.
- Instant Coffee: Any instant coffee (Nescafe) or espresso powder will do.
- Yeast
- Whole Wheat Flour
- Bread flour: I know not everyone has bread flour in their pantry, but you really should. It helps with the development of gluten and flavor so much. It really is worth it to have.
- Salt
- Sugar
- Unsalted Butter (Room Temperature)
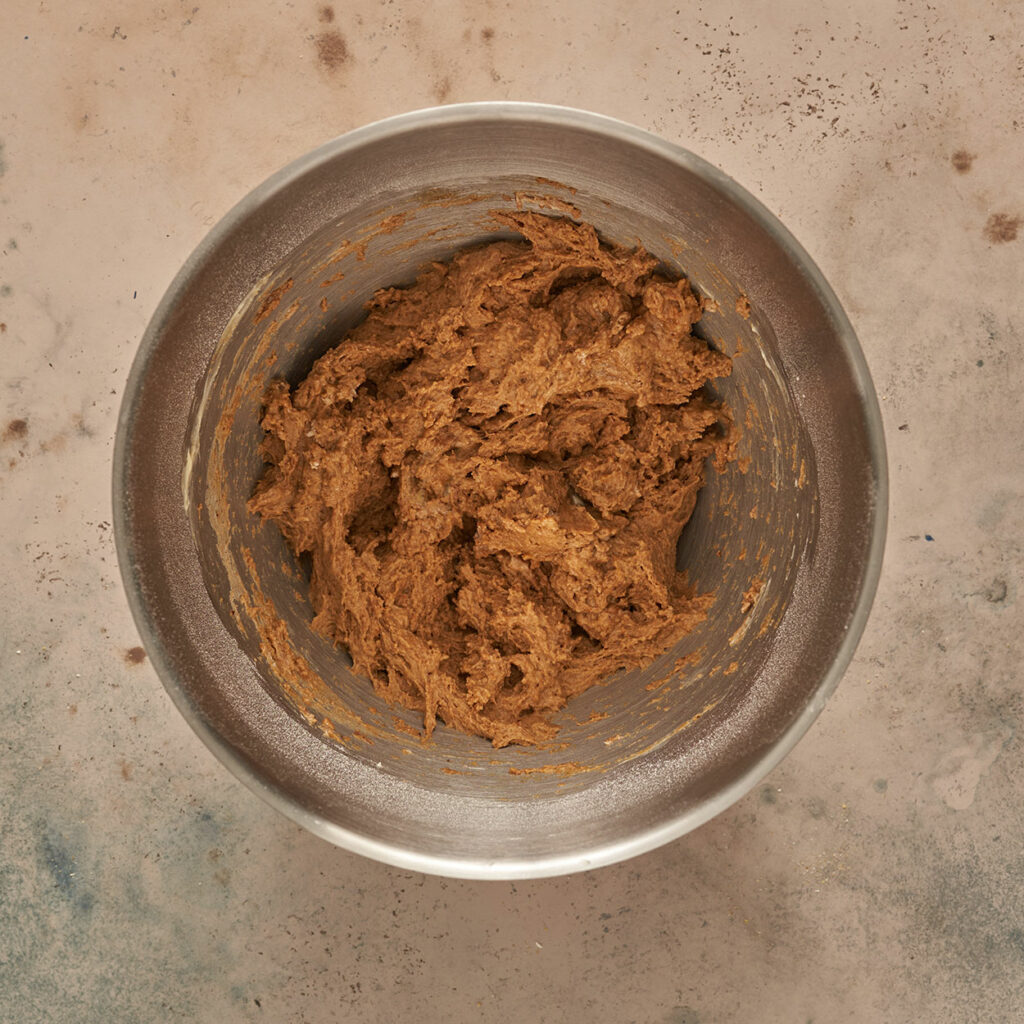
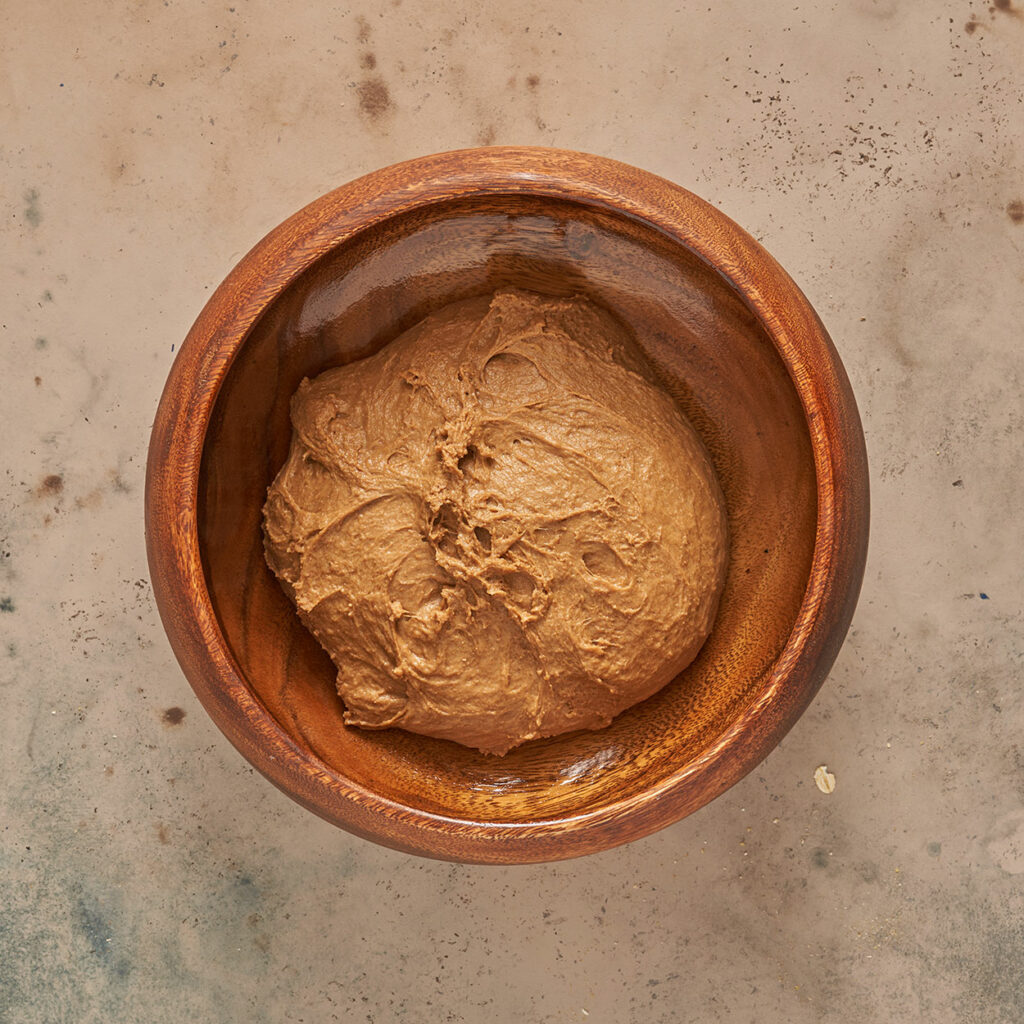
This dough is really easy to make. It is a little sticky that’s fine, later when we start to handle it we can use some flour to help with shaping.
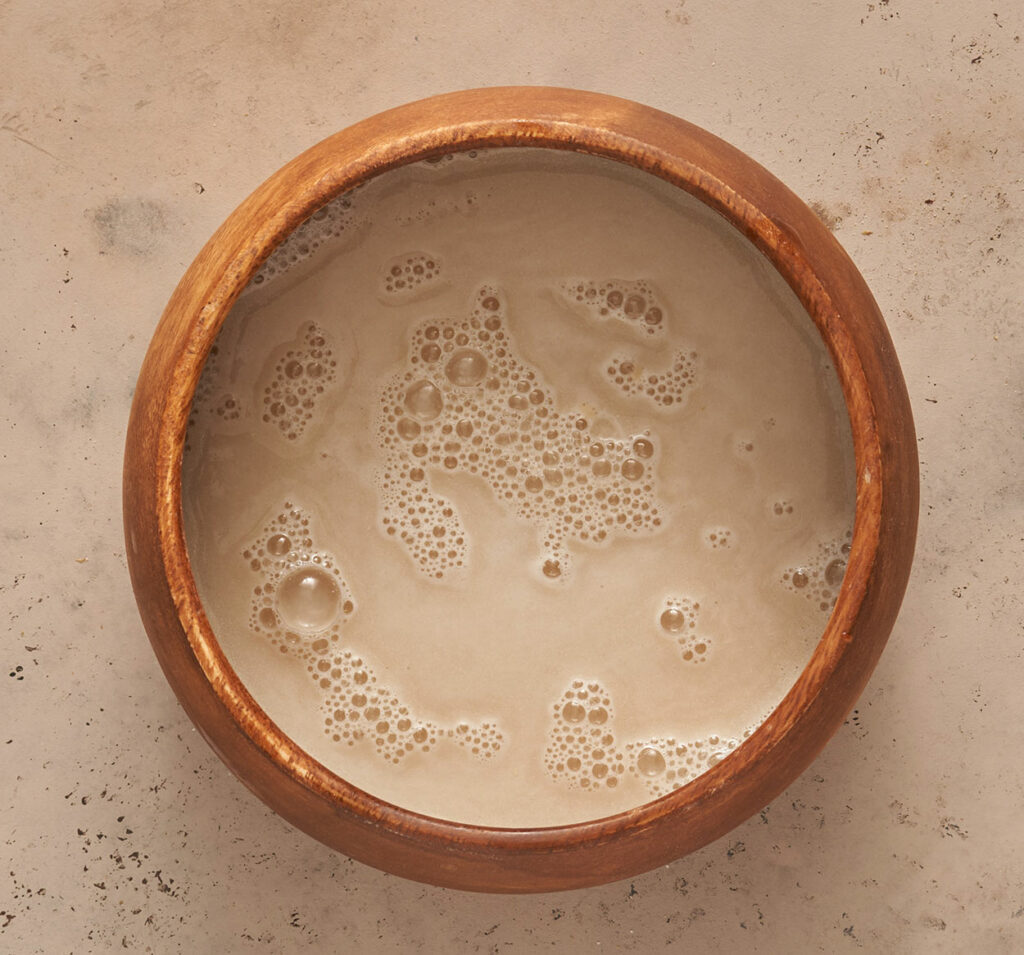
In a small bowl add lukewarm water, yeast, and sugar. Whisk together to combine and let proof for 10 minutes.
Meanwhile in the bowl of your stand mixer fitted with the dough attachment, add in both flours, cocoa powder, instant coffee, and salt. Mix together just to combine.
When the yeast has proofed add it to the bowl with your flour mixture, along with the honey, and molasses. Mix on low until the dough has just combined, about 2-3 minutes.
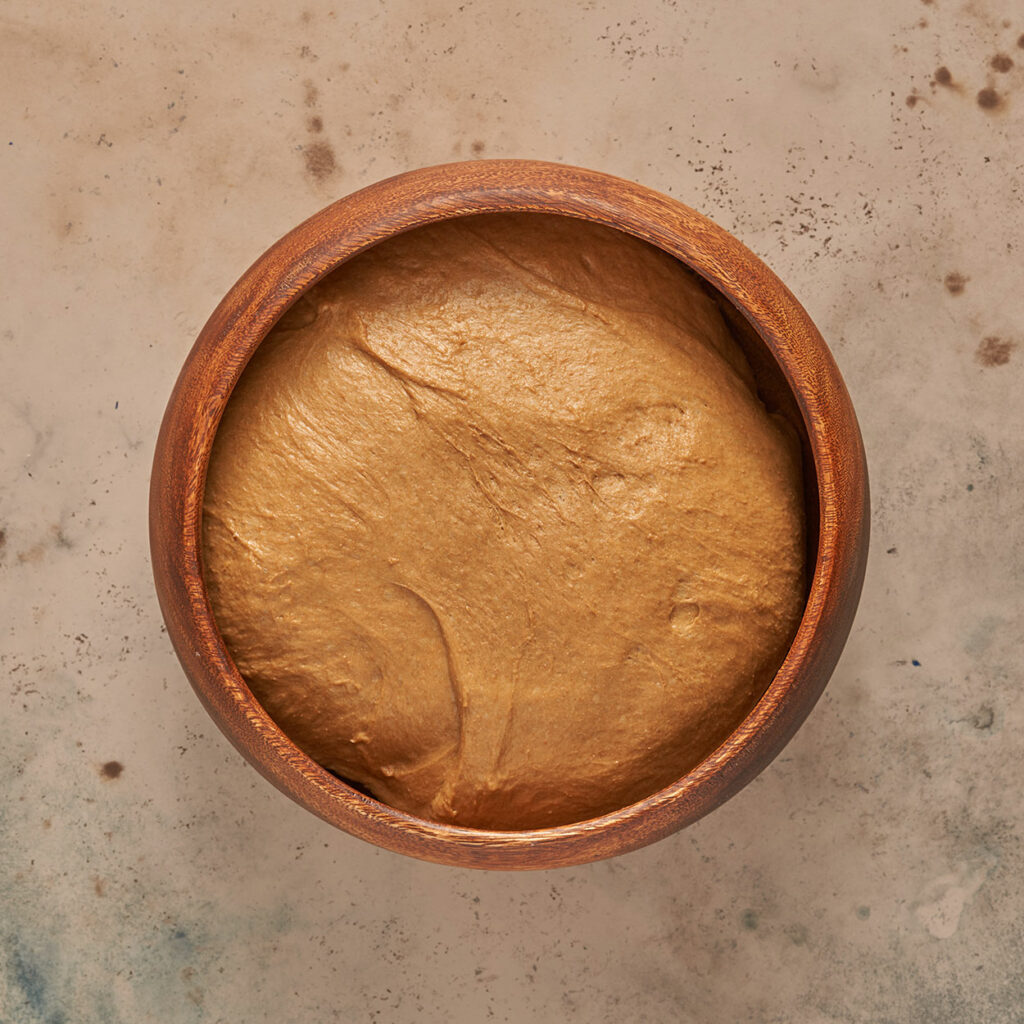
When the dough has combined add in the softened butter, increase the speed of the mixer to medium and knead the dough for 10 minutes. Grease a large bowl with some oil and place the dough inside. Cover with a towel, set that in a warm area, and allow to rise for 2 hours.
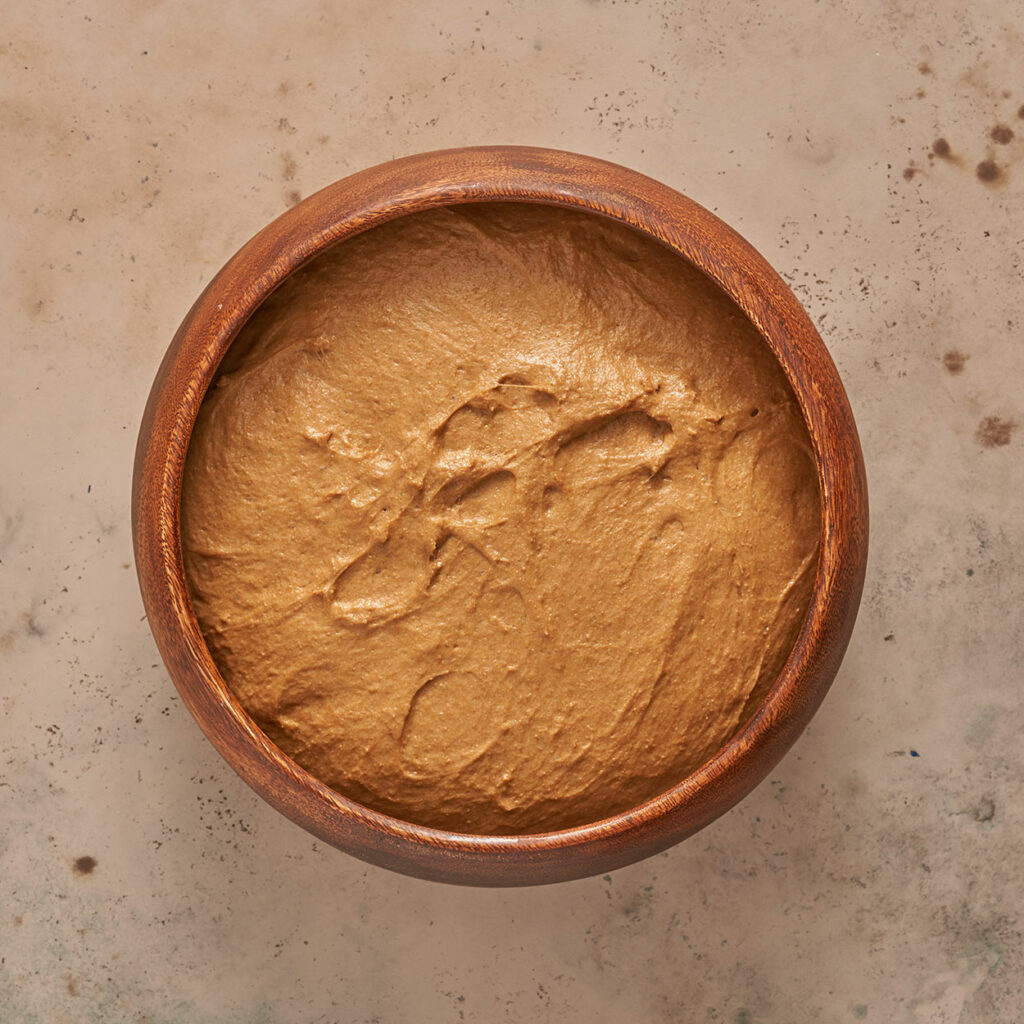
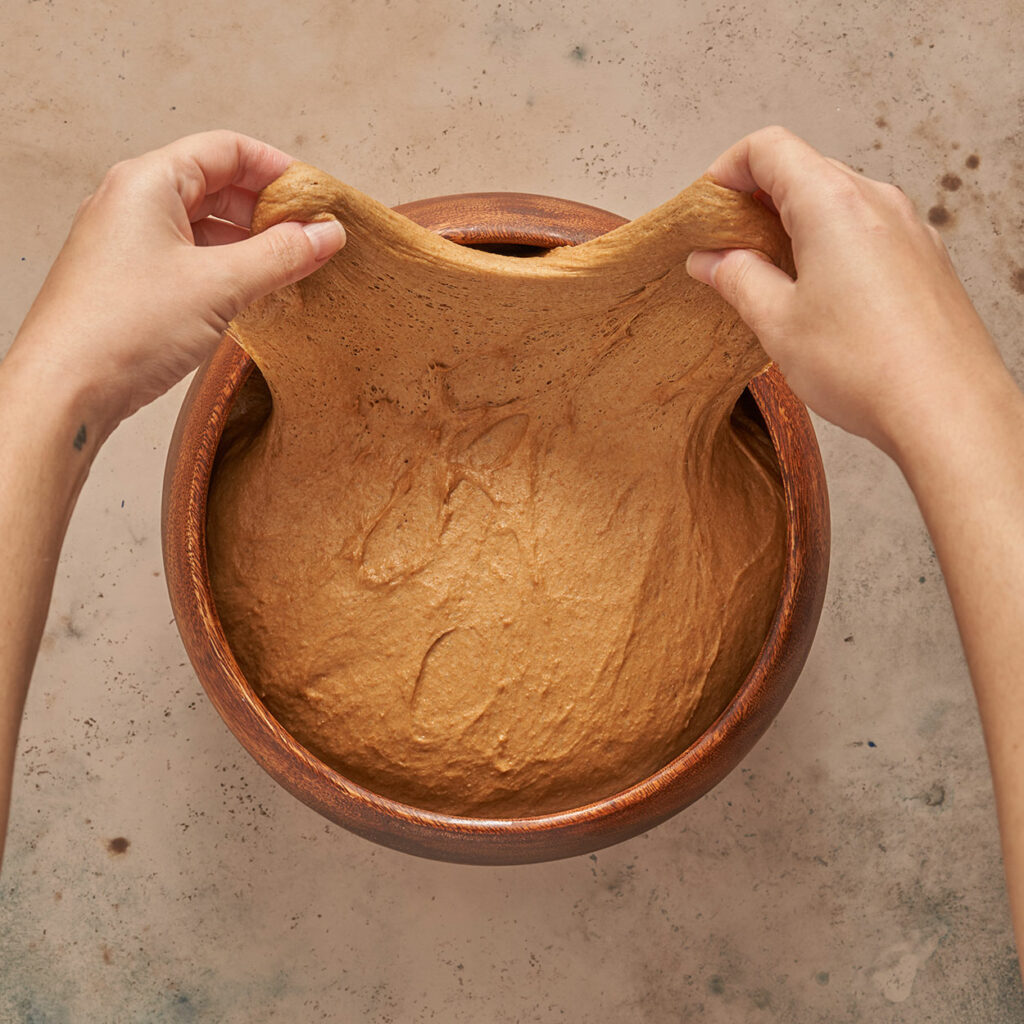
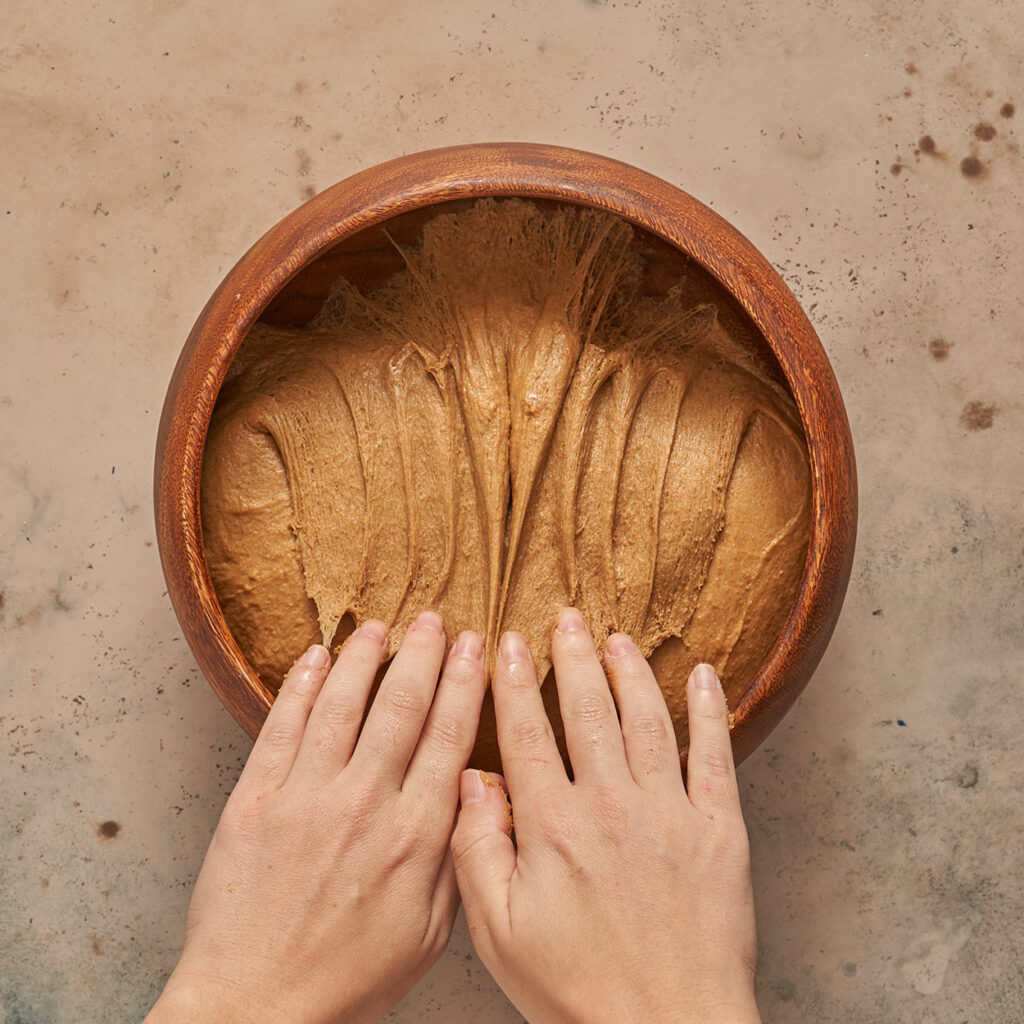
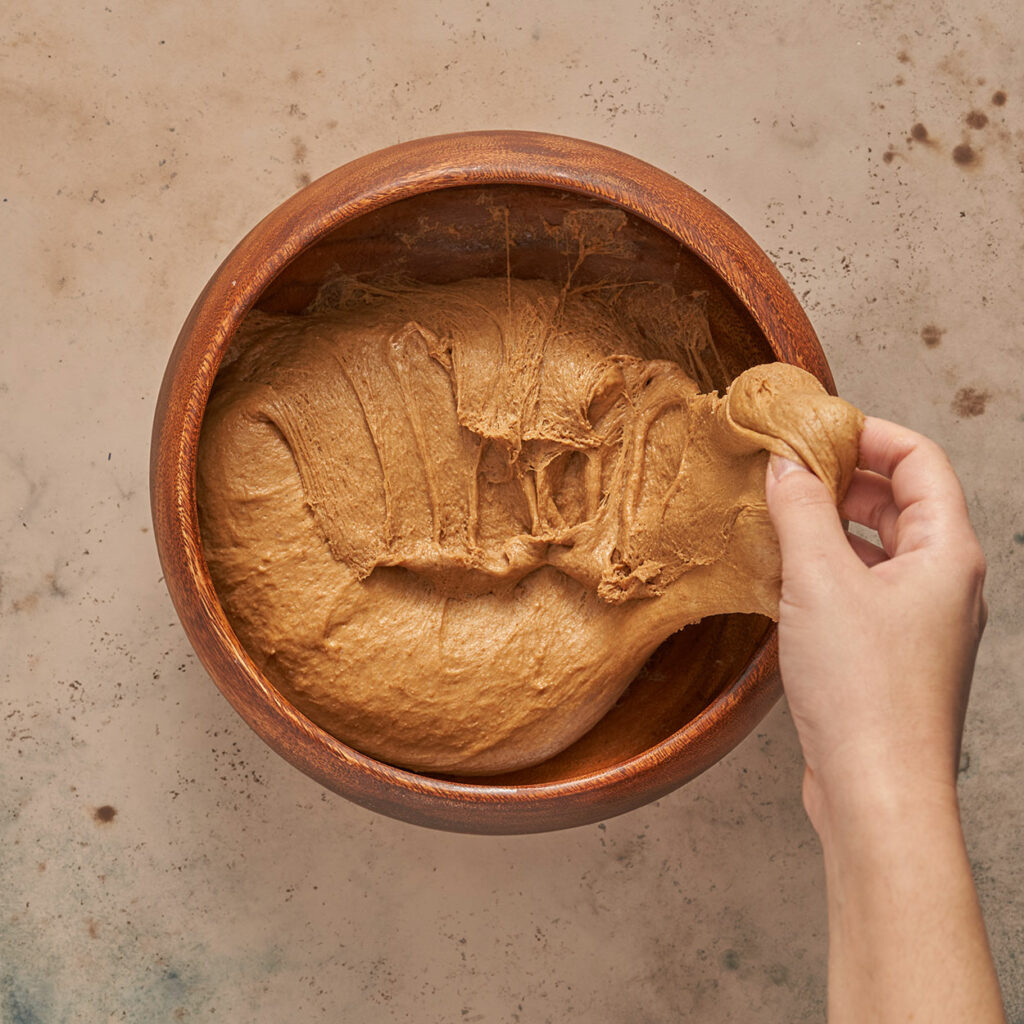
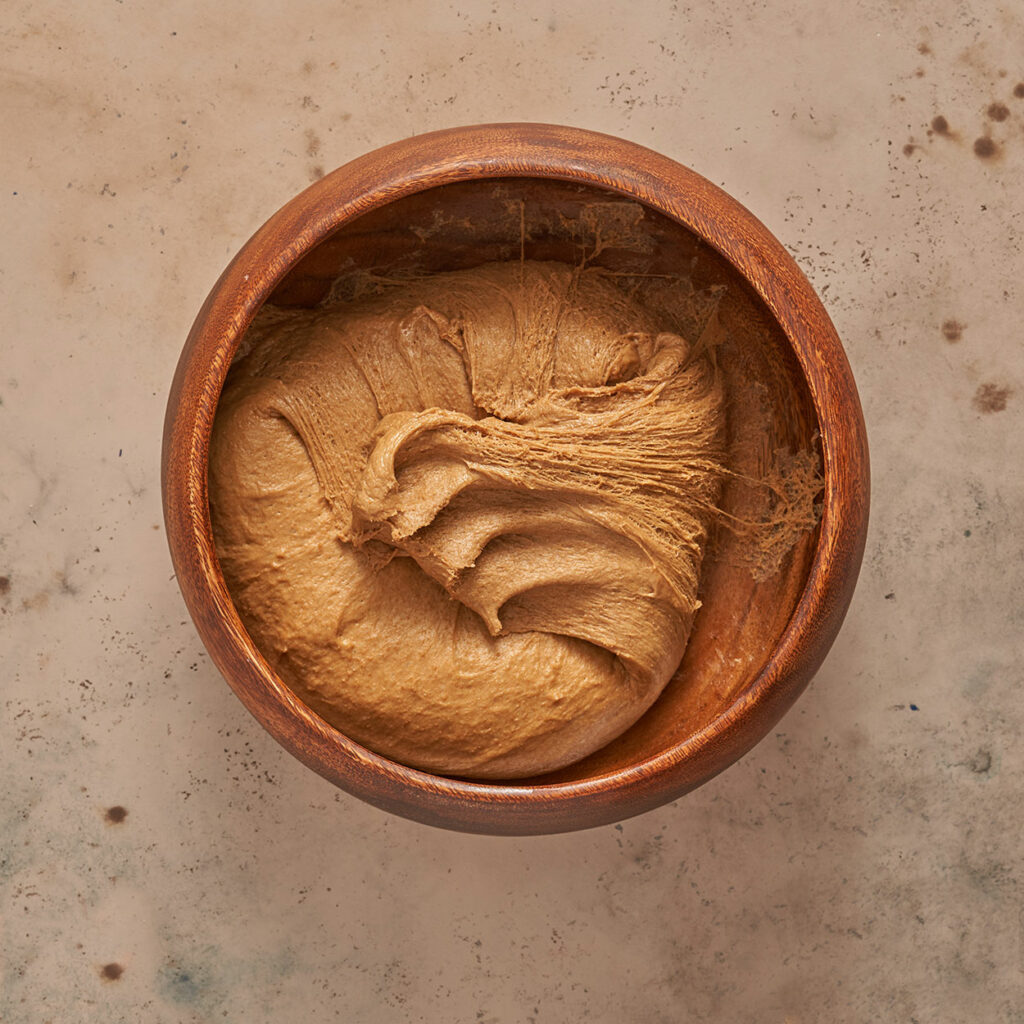
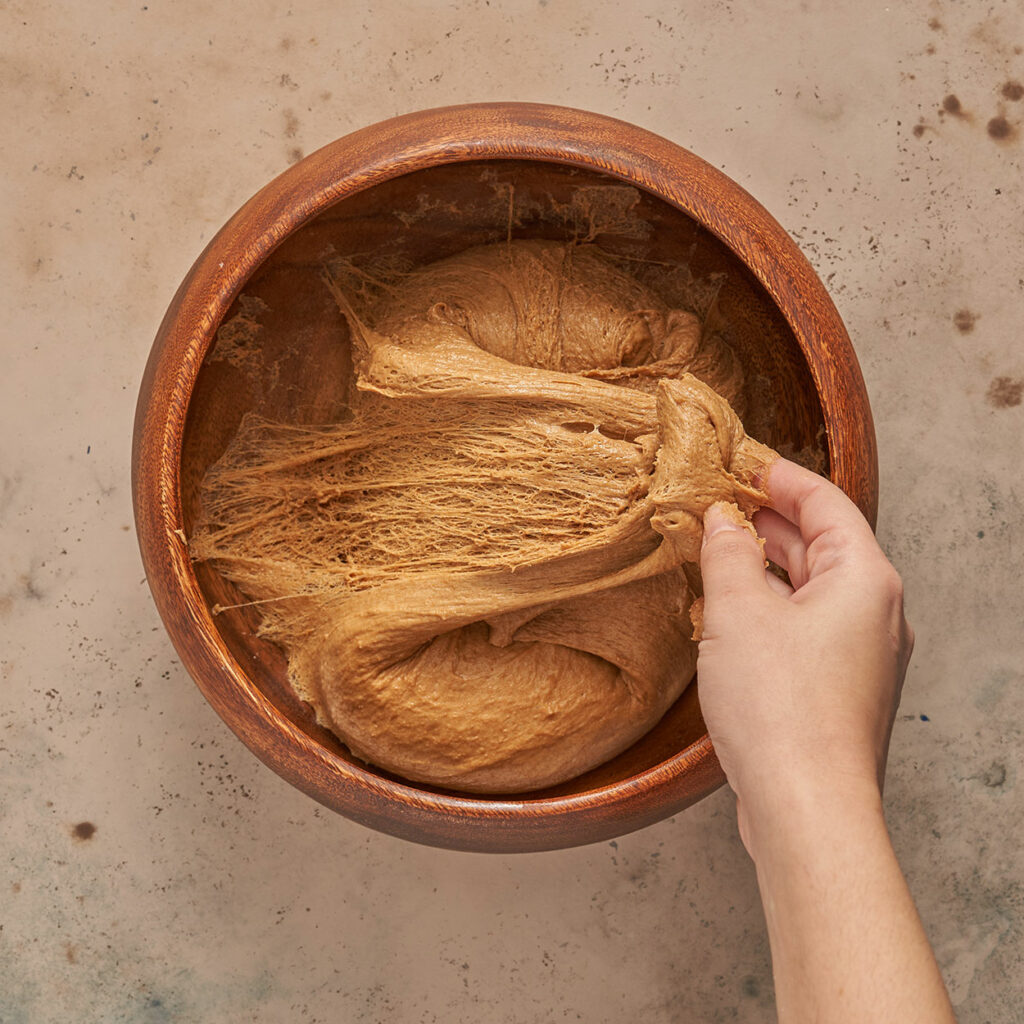
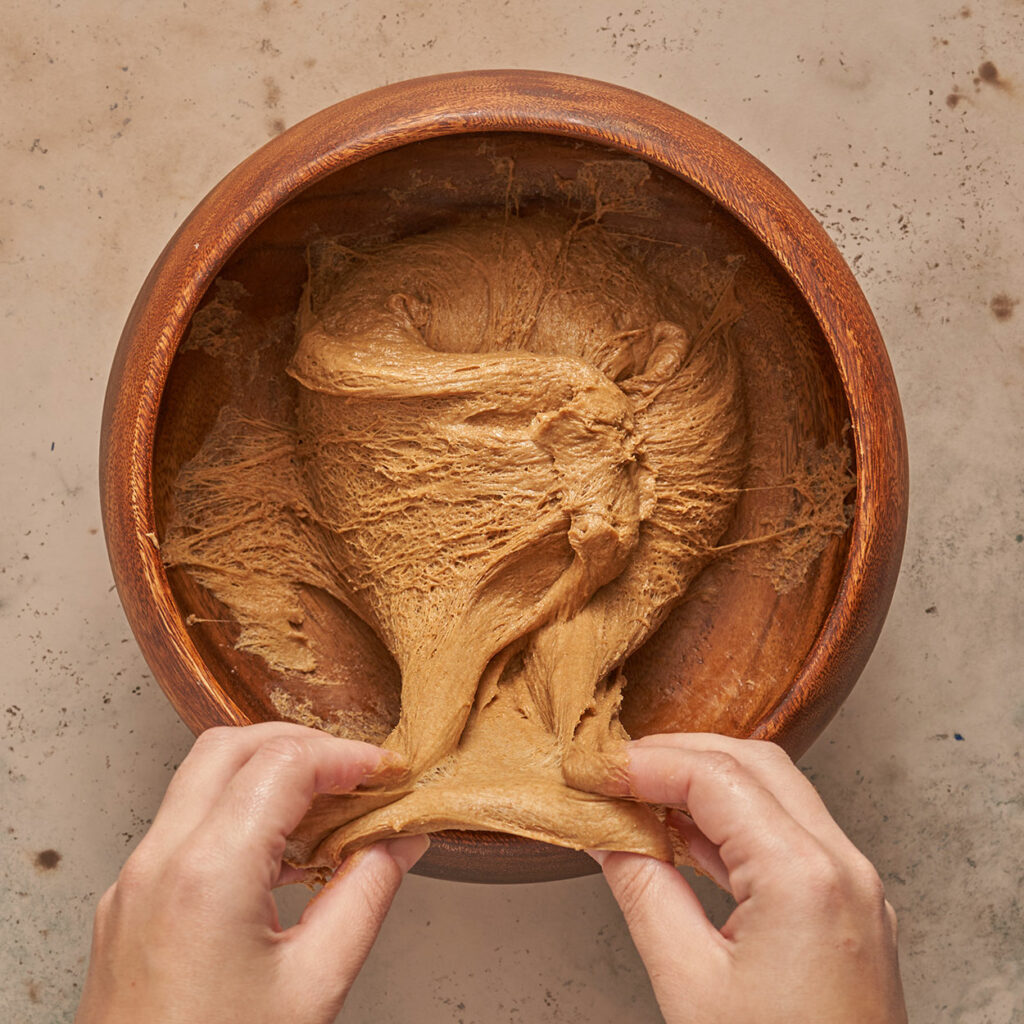
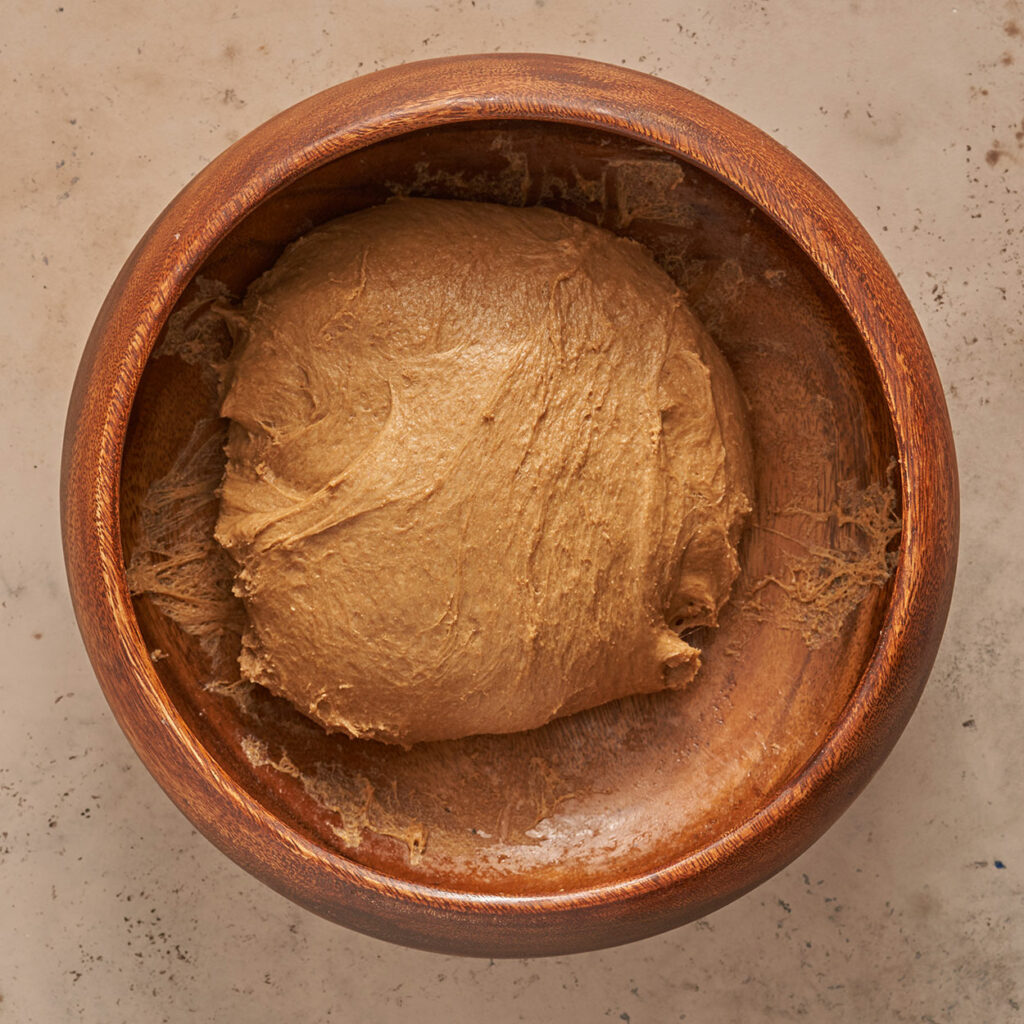
After 1 hour of rising, we will do 1 round of stretch and folds. Visualize 4 sections of your dough lift the top section, stretch it out a bit, and fold it into the center. Now proceed to the right section, stretch a piece of your dough and fold it into the center. Continue until have you completed all 4 sections of your dough. Cover and let proof for another hour.
Shaping your Dough
Flour a clean working surface. Drop your dough on top. Divide your dough into two equal portions. Feel free to flour your dough a little so it doesn’t stick to your hands.
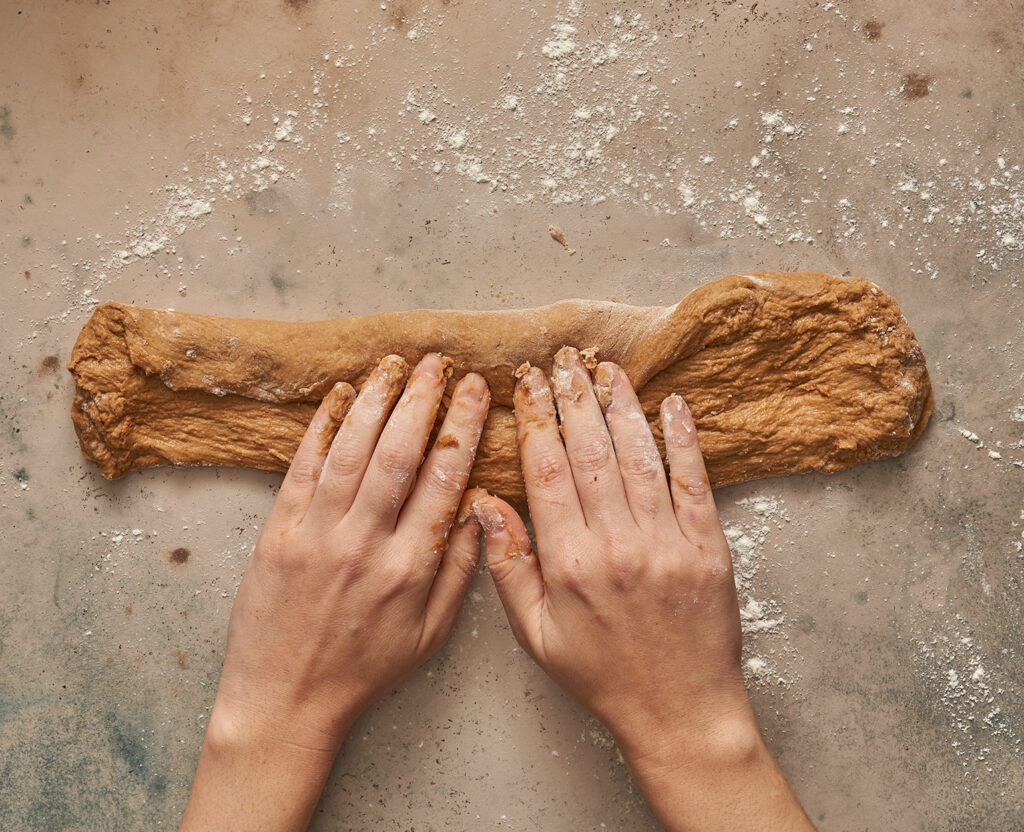
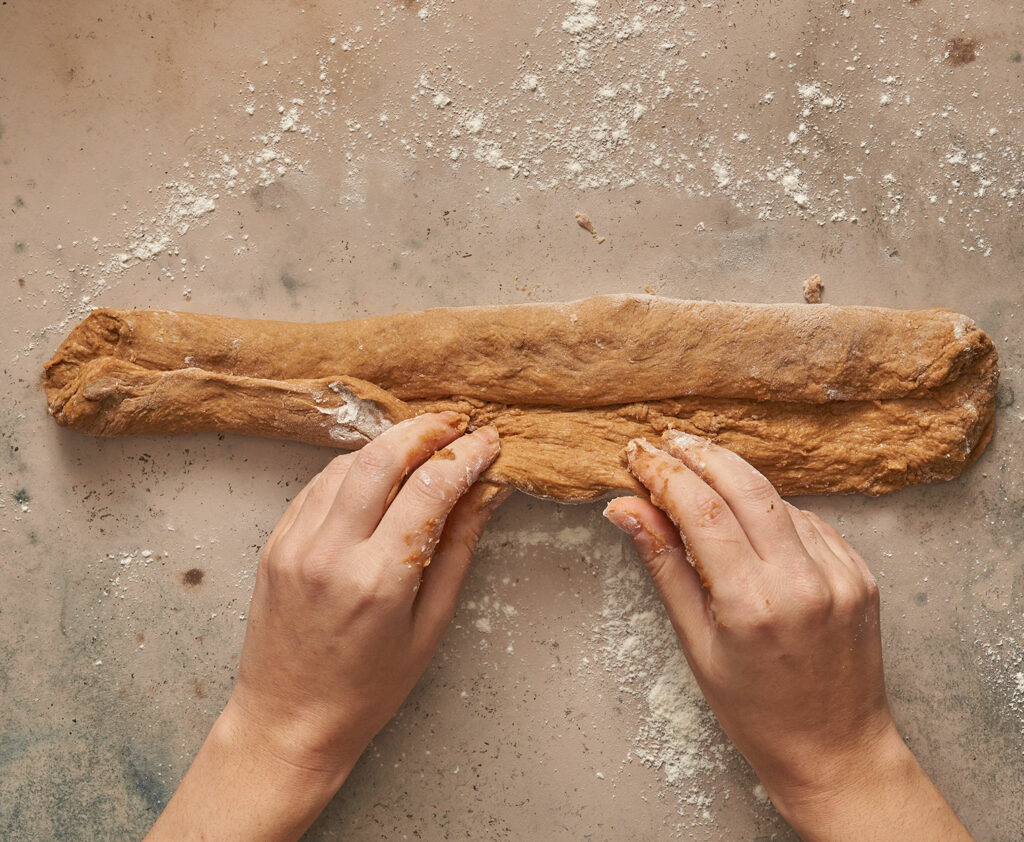
Start working on your first pieces. Use your fingers to pat down the dough into a rectangle 35 cm wide x 8 cm in height. Take the top 1/3 of your dough and fold it down into the middle, press the seem down with your fingertips. Repeat for the bottom 1/3 folding it upwards towards the center, press the seem down.
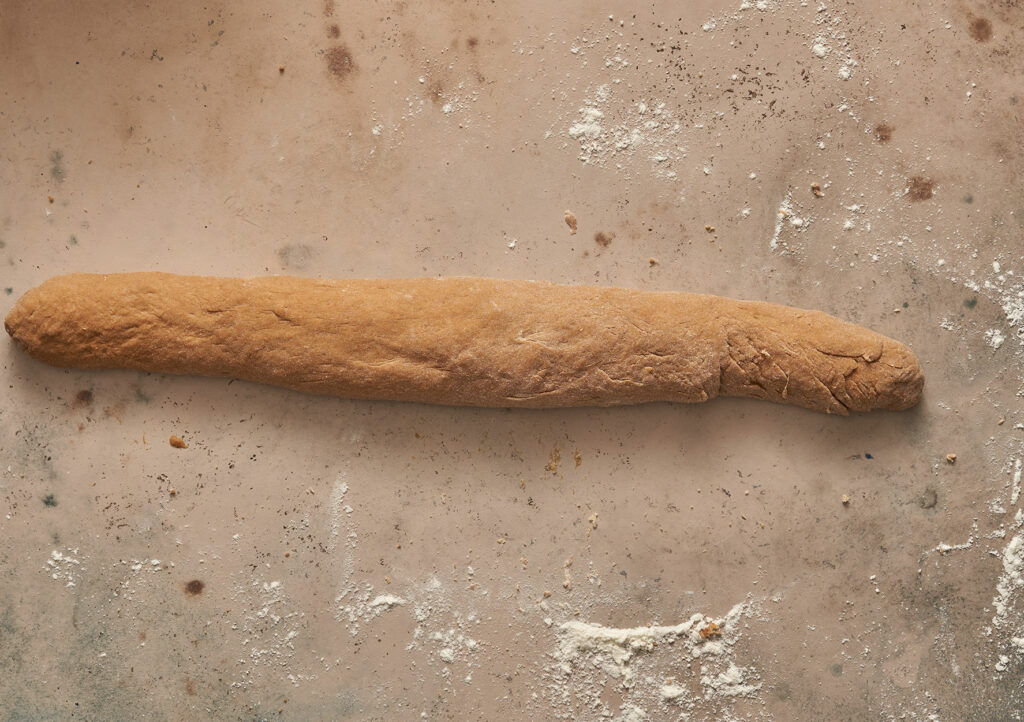
Use your fingertips to roll out the dough a bit just to taper the edges. Set onto a baking sheet lined with parchment paper (seem side down). Repeat with second pieces of dough.
Use your fingers to wet the top and sides of your formed loaf with some water. Then press on the oatmeal. Cover loosely with some cling film and let rest 30min – 1 hour until doubled in size. While the dough is rising preheat your oven to 175C.
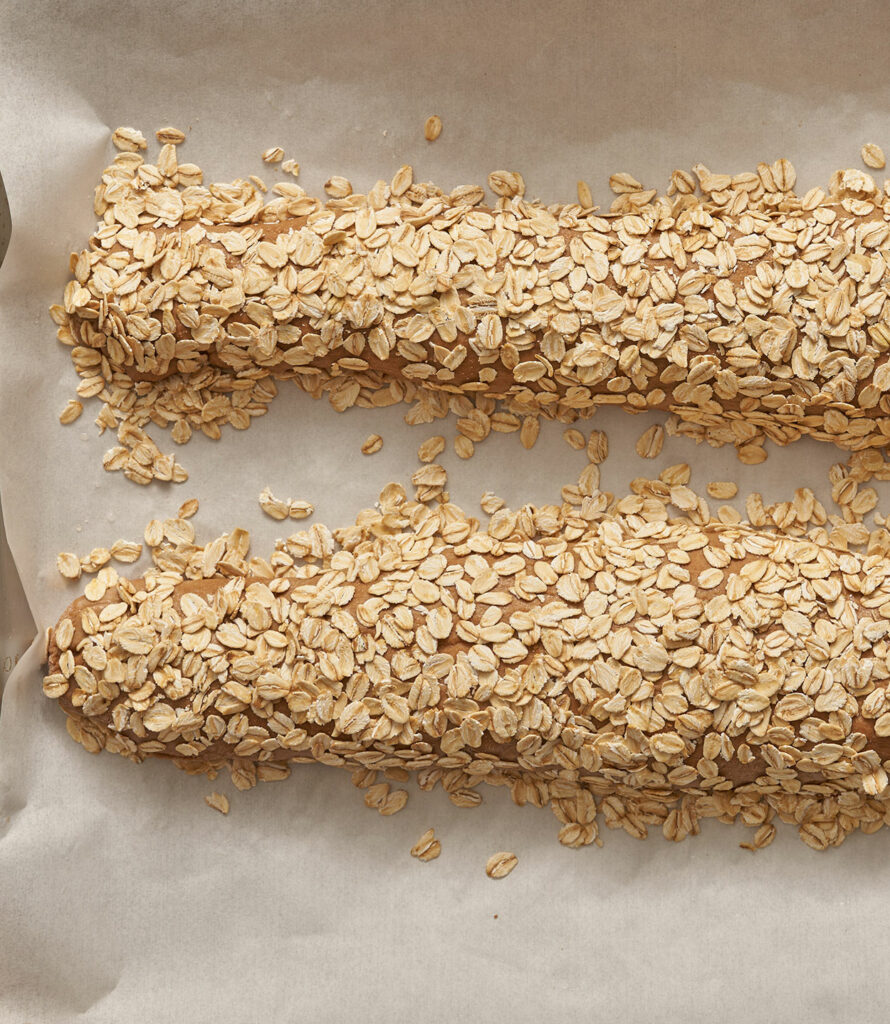
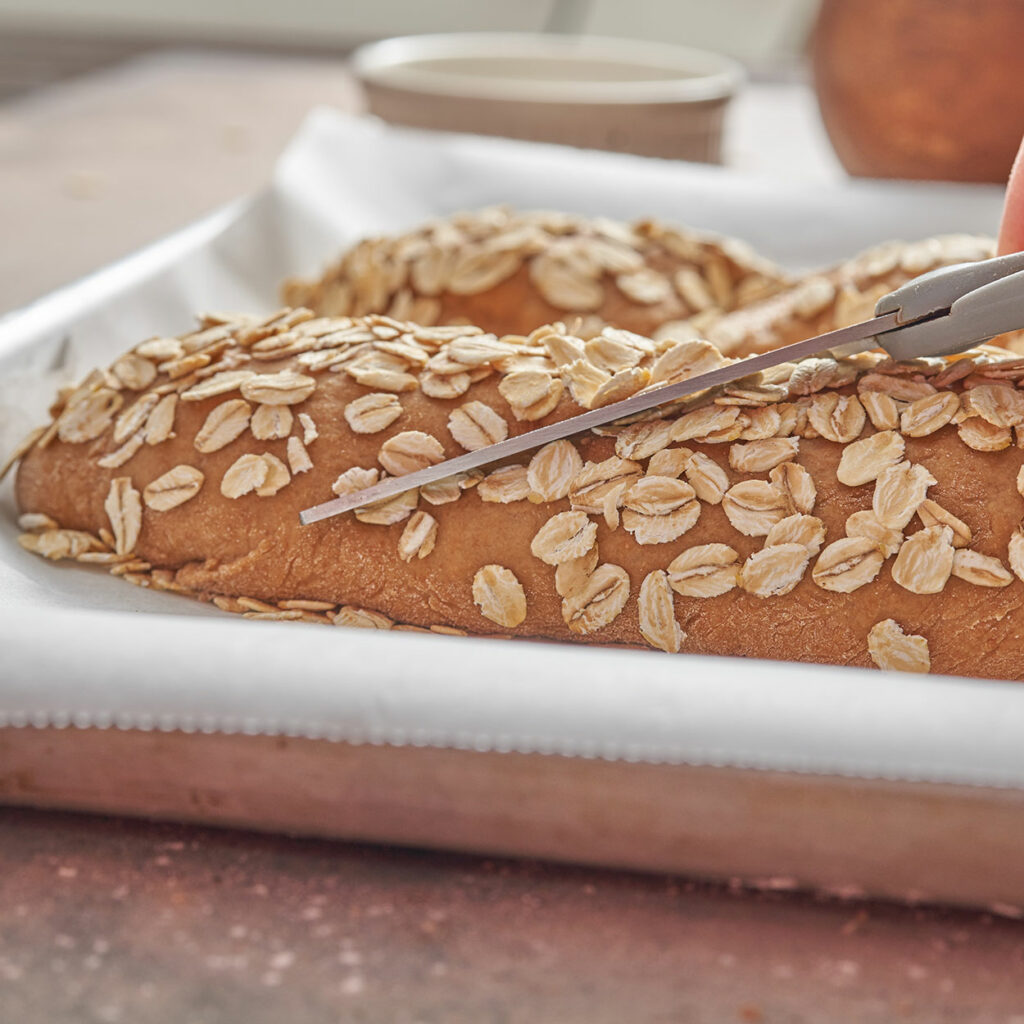
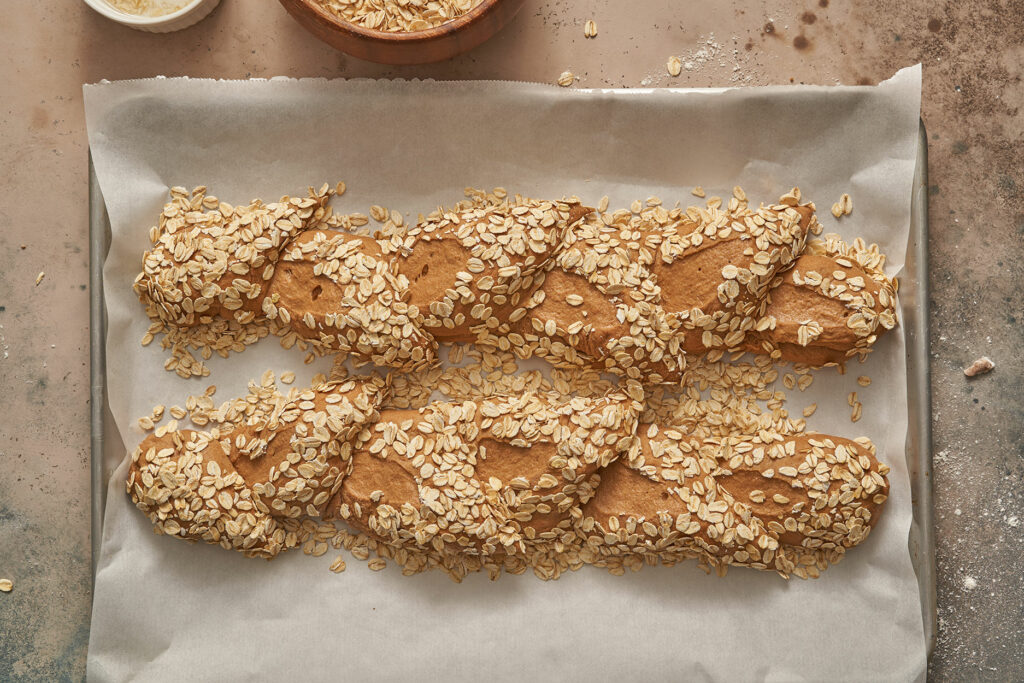
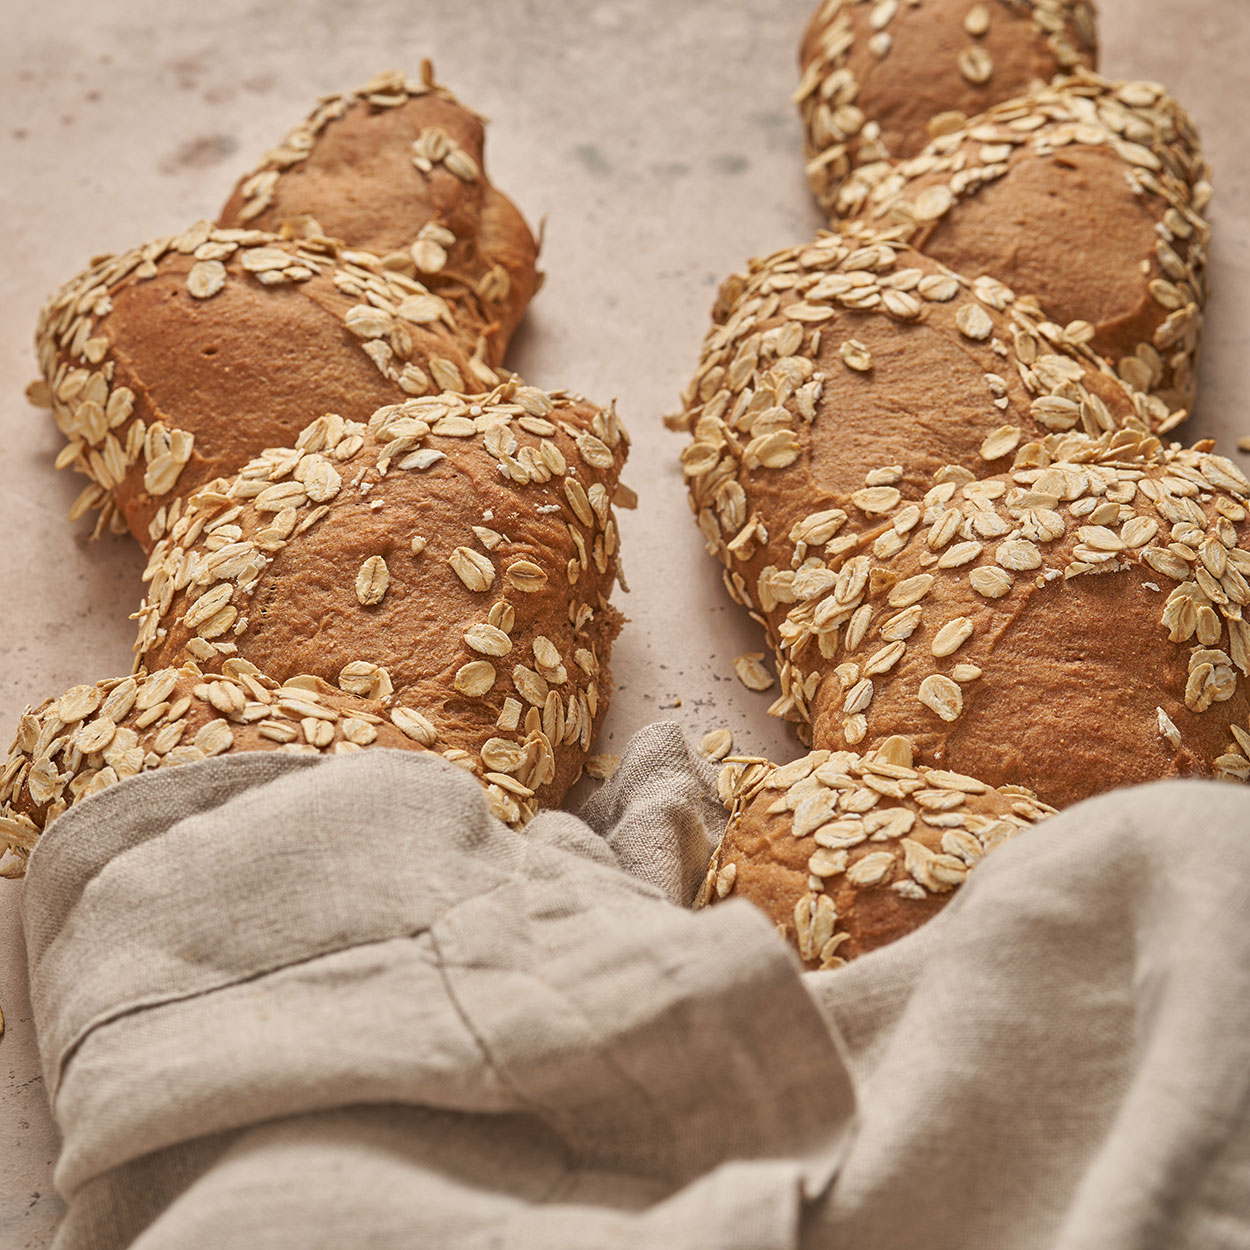
This next step is not necessary you can proceed to bake your bread as is, but we wanted to try this technique of shaping that makes the bread looks like stalks of wheat. It’s called Epi de Ble in French, you can watch this technique in more detail here.
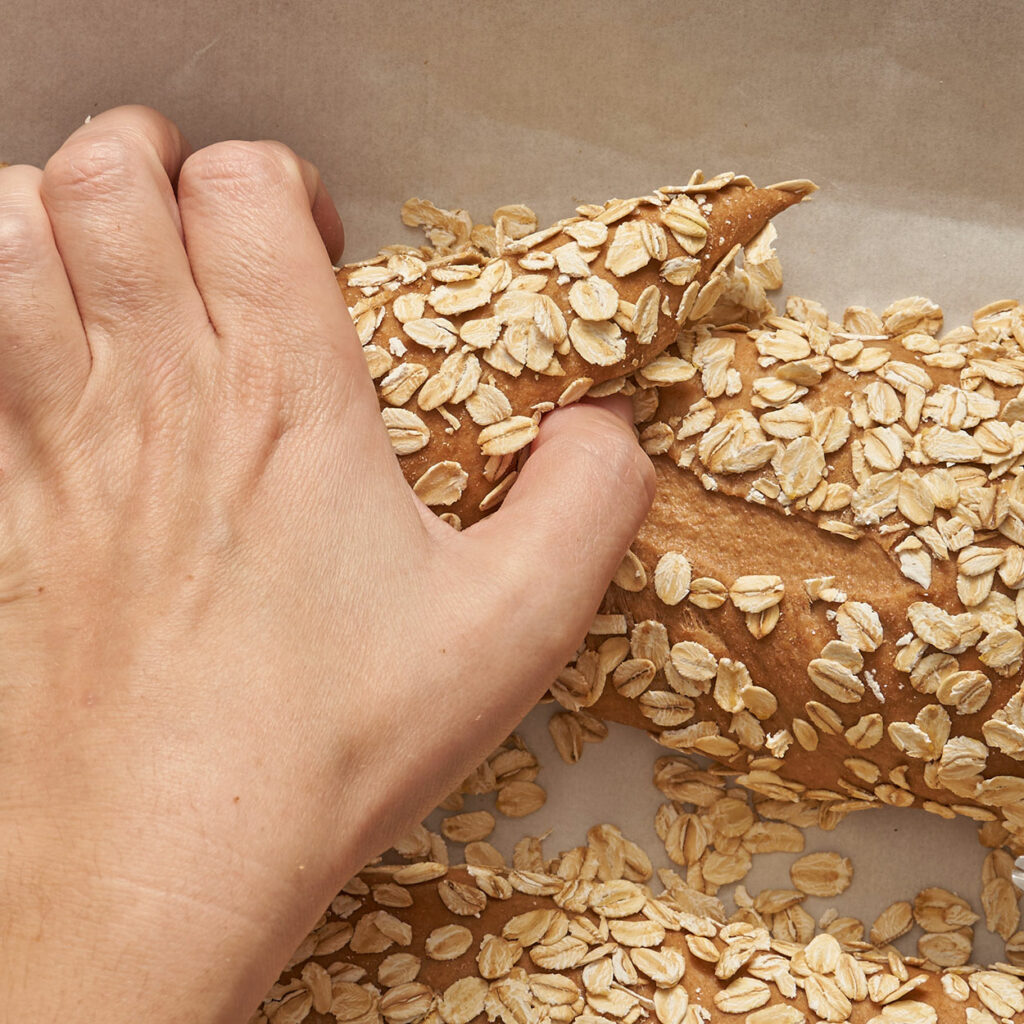
After the dough has rested, use a pair of sharp scissors, hold at a low angle and cut into your loaf. Move your cut piece gently to one side. Proceed with your next piece and move it to the opposite side. Continue all the way down the length of your loaf. Be careful not to cut through the whole loaf.
Baking
Place loaves in the oven and let bake for 25- 30 minutes (internal temperature of the dough should be 190°C).
Serve bread warm with lots of butter and sea salt. ENJOY!
For storage, once the bread has come to room temperature wrap in cling film and leave at room temperature or in the fridge. Gently warm in the oven when ready to eat.
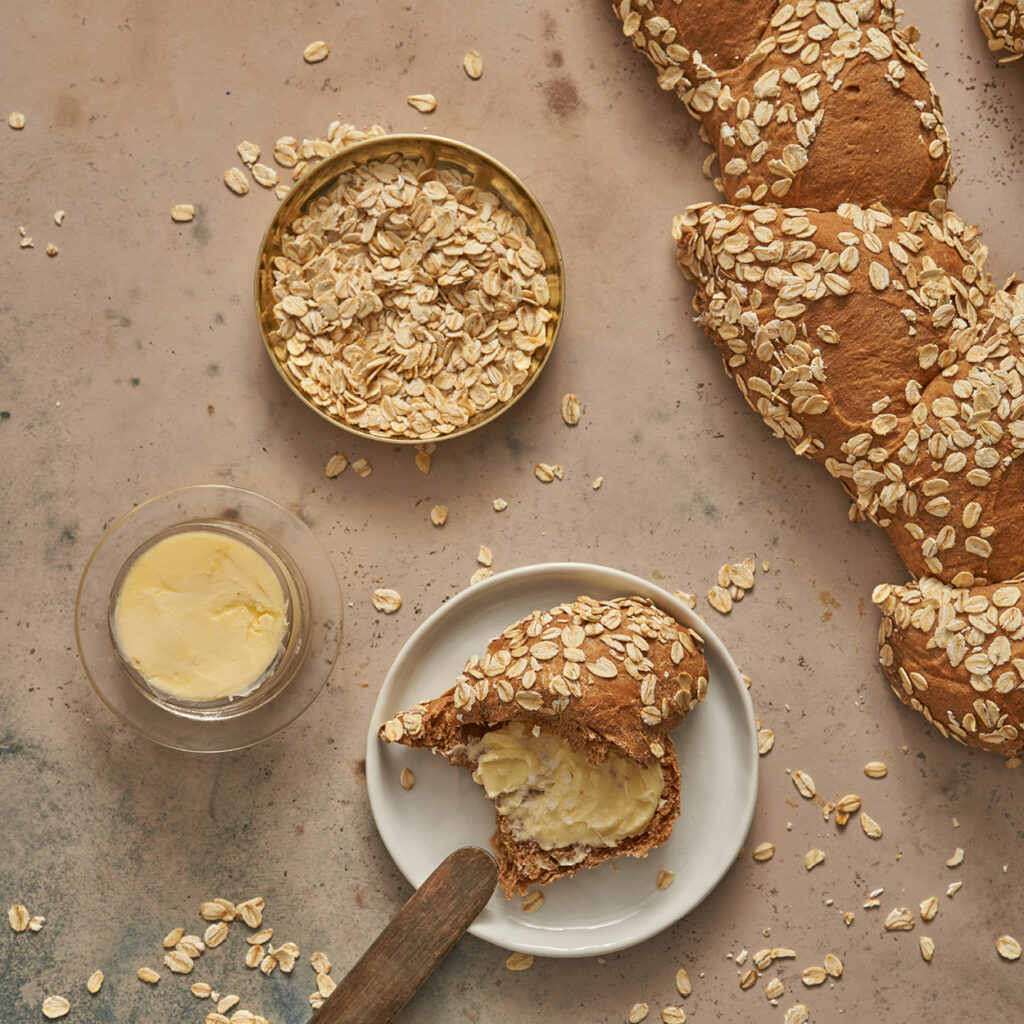
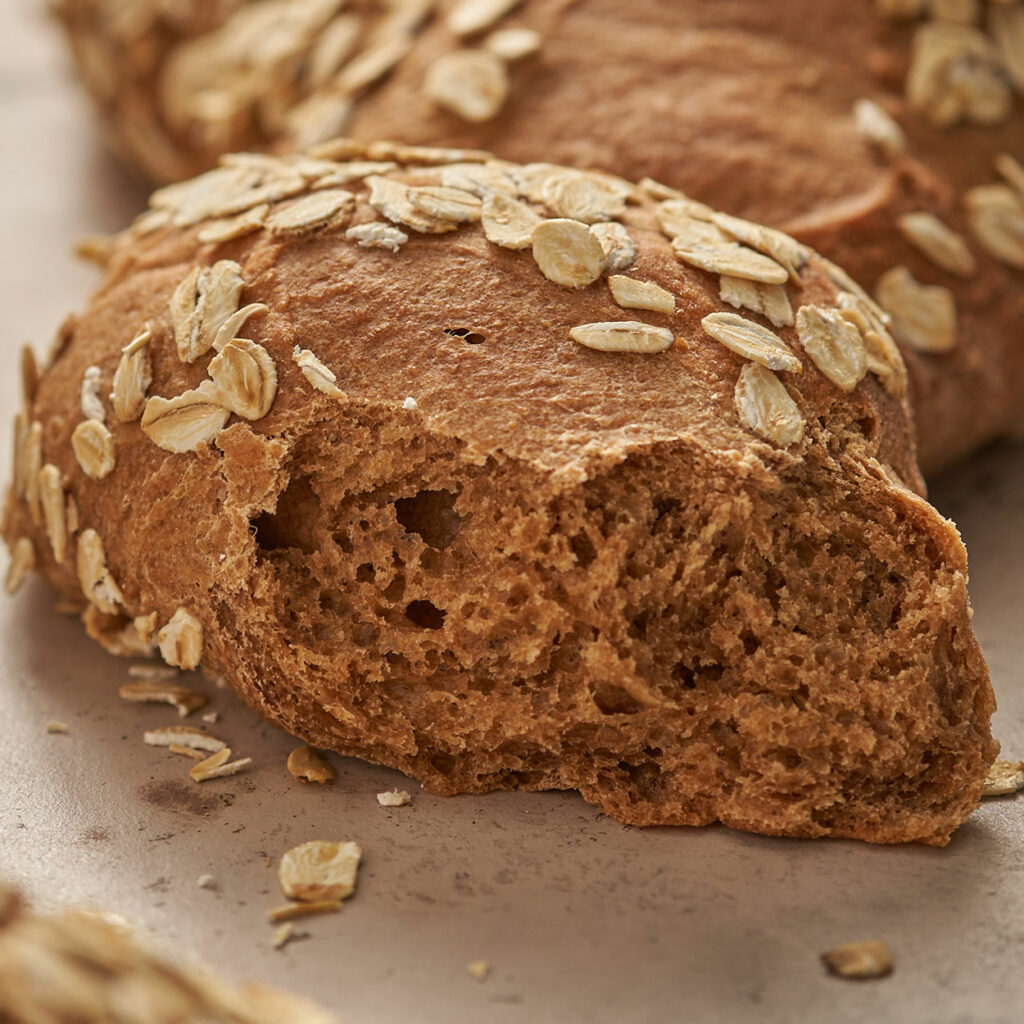
If you make this Honey Wheat Bread! Leave a comment, rate it, and don’t forget to tag a photo #thetablediaries on Instagram. We love seeing all the recipes you and your family enjoy.
Honey Wheat Bread
Ingredients
- 240 grams bread flour 2 cups spooned and leveled
- 210 grams whole wheat flour 1 ¾ cup spooned and leveled
- 1 tbsp cocoa powder
- ½ tbsp instant coffee
- ¼ cup honey
- ¼ cup molasses or honey
- 28 grams unsalted butter (room temperature) 2 tbsp
- 1½ cups luke-warm water (38°-40.5°C, °100-105°F)
- 1.5 tbsp sugar
- 2½ tsp yeast
- 1 cup oatmeal for sprinkling the loaf
- 1.5 tsp salt
Instructions
- For the Dough
- In a small bowl add lukewarm water (38°-40.5°C), yeast, and sugar. Whisk together to combine and let proof for 10 minutes.
- Meanwhile in the bowl of your stand mixer fitted with the dough attachment, add in both flours, cocoa powder, instant coffee, and salt. Mix together just to combine.
- When the yeast has proofed add it to the bowl with your flour mixture, along with the honey, and molasses. Mix on low until the dough has just combined.
- When the dough has combined add in the softened butter, increase the speed of the mixer to medium and knead the dough for 10 minutes.
- Grease a large bowl with some oil and place the dough inside. Cover with a towel, set that in a warm area, and allow to rise for 2 hours.
- After 1 hour of rising we will do 1 round of stretch and folds. Visualize 4 sections of your dough lift the top section stretch it out a bit and fold it into the center. Now proceed to the right section, stretch a piece of your dough and fold it into the center. Continue until you have completed all 4 sections of your dough (refer to images in the blog). Cover and let proof for another hour.
- Flour a clean working surface. Drop your dough on top. Divide your dough into two equal portions. Feel free to flour your dough a little so it doesn't stick to your hands.
- Start working on your first pieces. Use your fingers to pat down the dough into a rectangle 35 cm wide x 8 cm in height. Take the top 1/3 of your dough and fold it down into the middle, press the seem down with your fingertips. Repeat for the bottom 1/3 lifting it up towards the center, press down the seam with your fingertips.
- Use your fingertips to roll out the dough a bit just to taper the edges. Set onto a baking sheet lined with parchment paper (seem side down). Repeat with second pieces of dough.
- Use your fingers to wet the top and sides of your formed loaf with some water. Then press on the oatmeal.
- Preheat your oven to 175°C (350F).
- Cover your loaves loosely with cling film and let them rest for 30- 60 min (until doubled in size). You can bake your loaves as is, but if you want the stalks of wheat shape we made (Epi de Ble) then proceed with this step. After the bread has rested(right before baking), use a pair of sharp scissors, hold at a low angle and cut it into your loaf. Move your cut piece gently to one side. Proceed with your next piece and move it to the opposite side. Continue along the whole length of your dough. Be careful not to cut through the whole loaf. (Refer to images in blog)
- Place loaves in the oven and let bake for 25- 30 minutes (the internal temperature of the dough should be 190°C).
- Serve bread warm with lots of butter and sea salt. ENJOY!
- For storage, once the bread has come to room temperature wrap in cling film and leave at room temperature or in the fridge. Gently warm in the oven when ready to eat.

