If you haven’t noticed, we really love bread at The Table Diaries. So when we stumbled upon this easy 5 ingredient (including water) no-fuss crusty toasted bread that is made in about 2 hours we knew we had to share it with all of you ASAP. There’s something so fulfilling about baking your own bread. No, it is not a sourdough loaf with flavor allowed to develop over hours and hours. But for a quick crusty style bread on the dinner table on the same day, this is damn near amazing. We jazzed the original recipe up with some roasted garlic because nothing is ever boring on The Table Diaries. Feel free to leave out the garlic for a plain loaf or experiment with different herbs and cheeses to make it your own.
Easy Crusty Roasted Garlic Bread Rundown
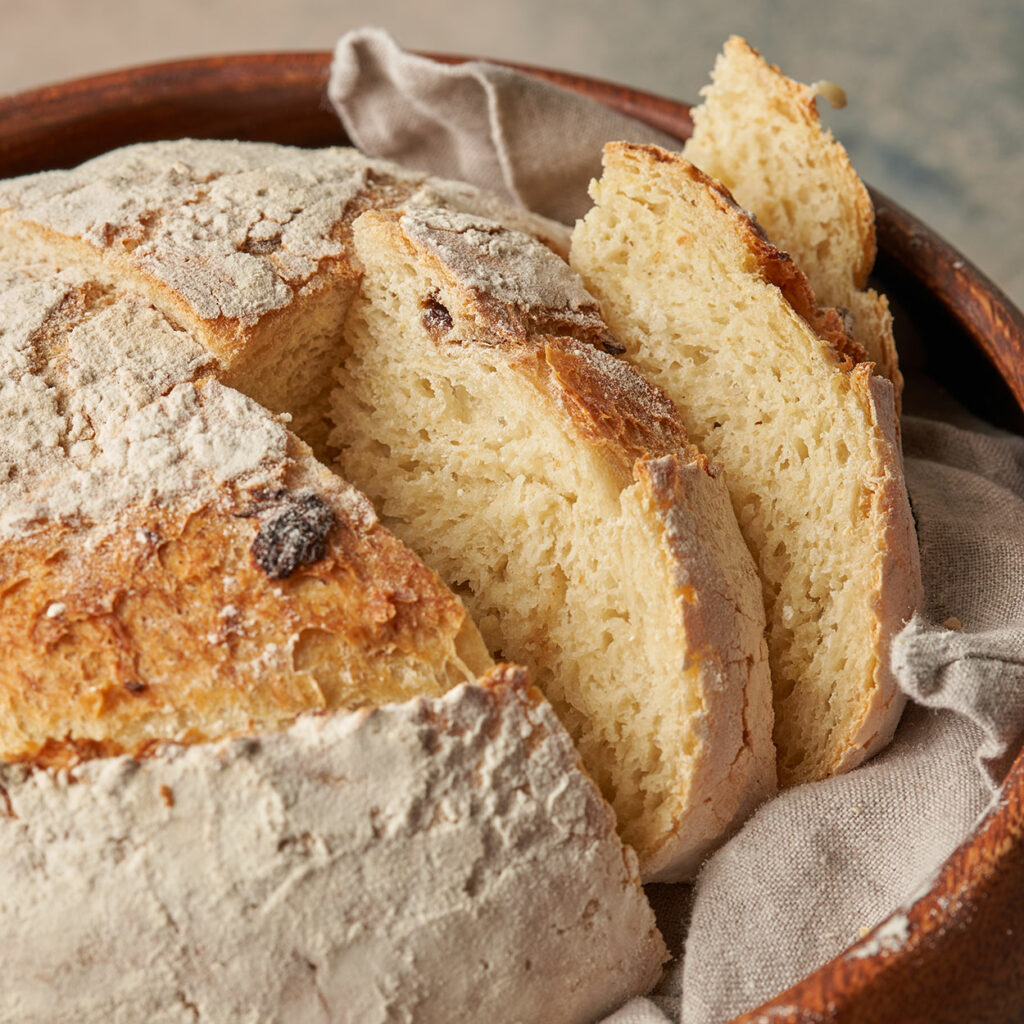
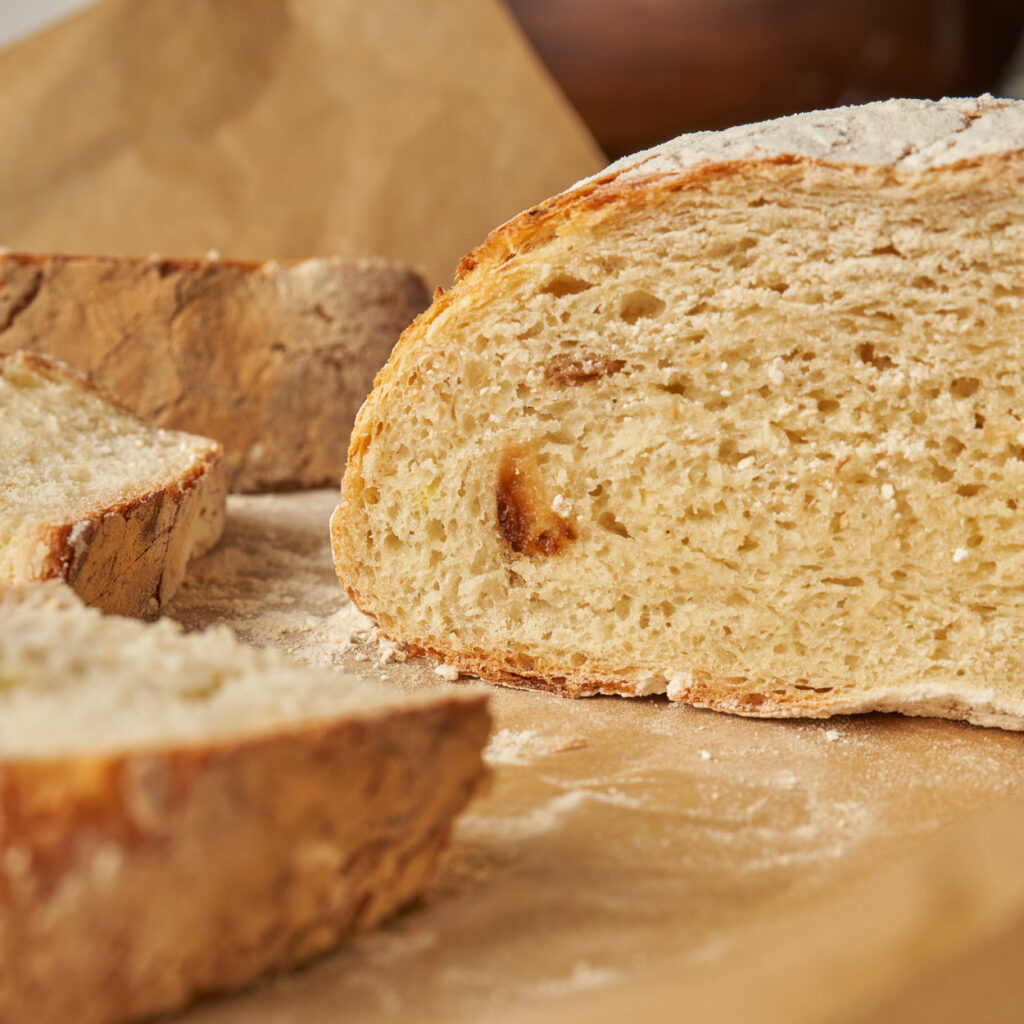
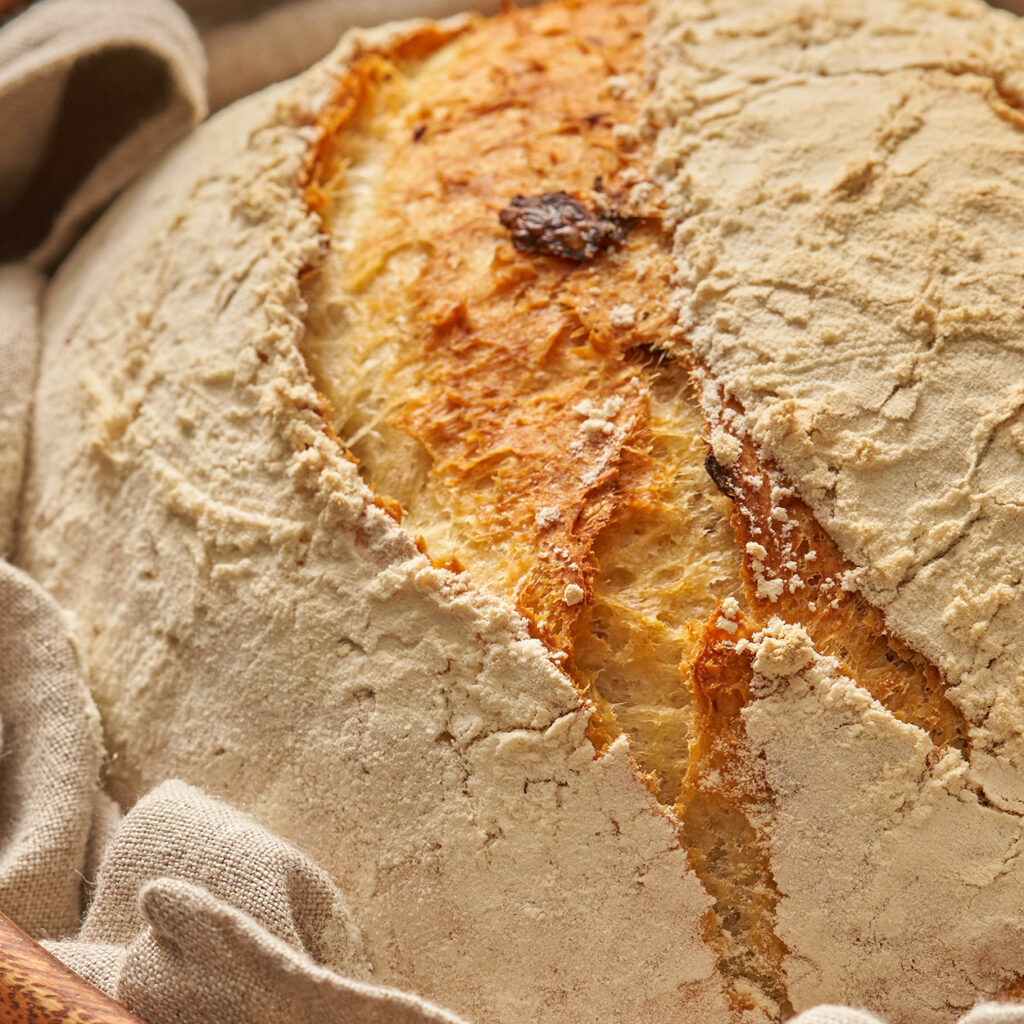
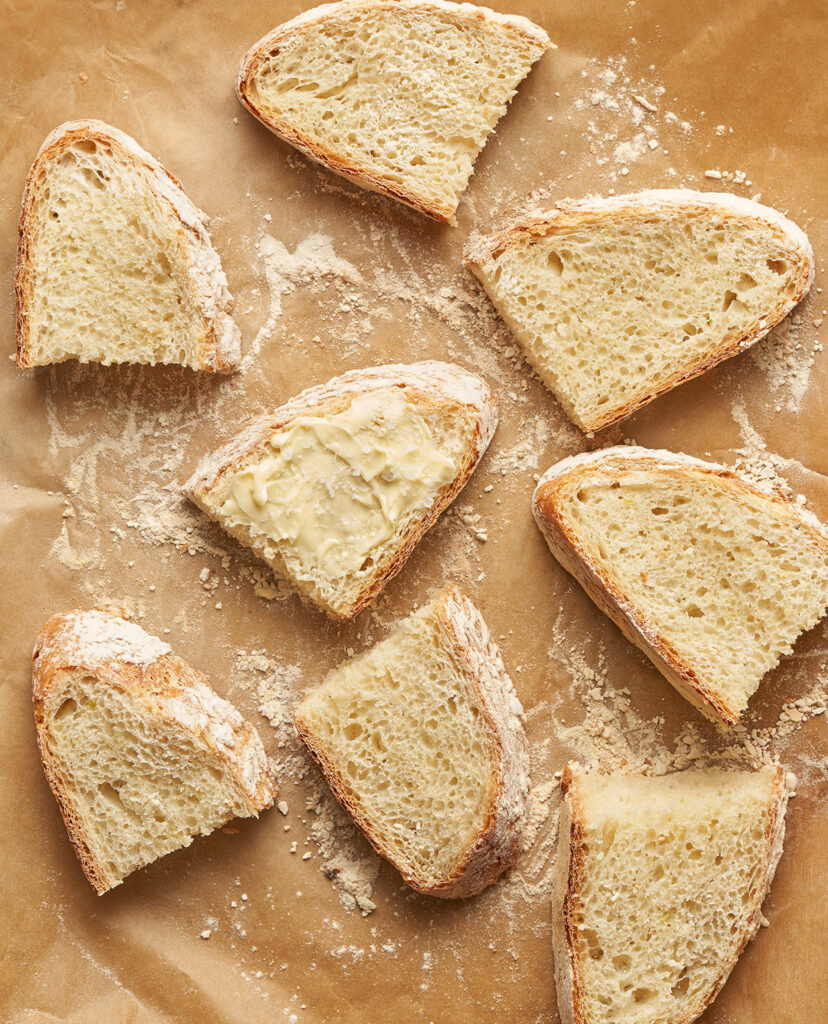
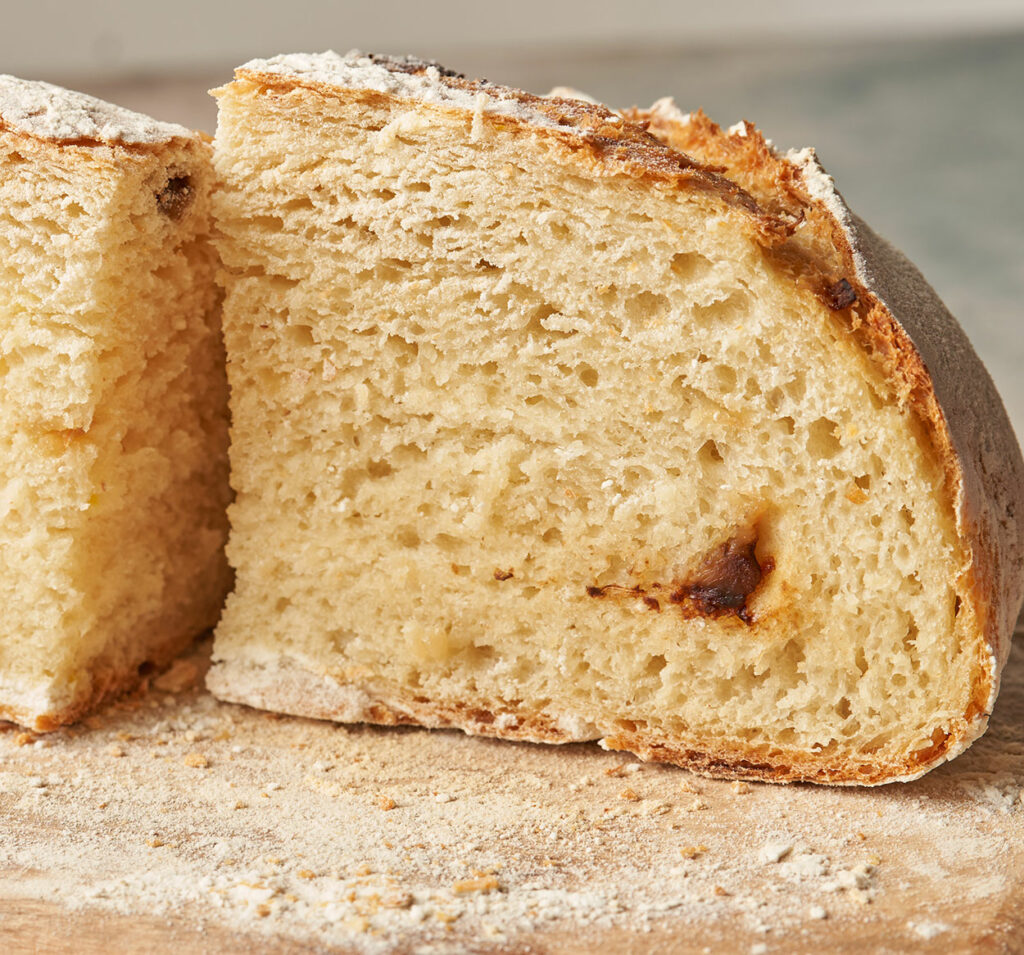
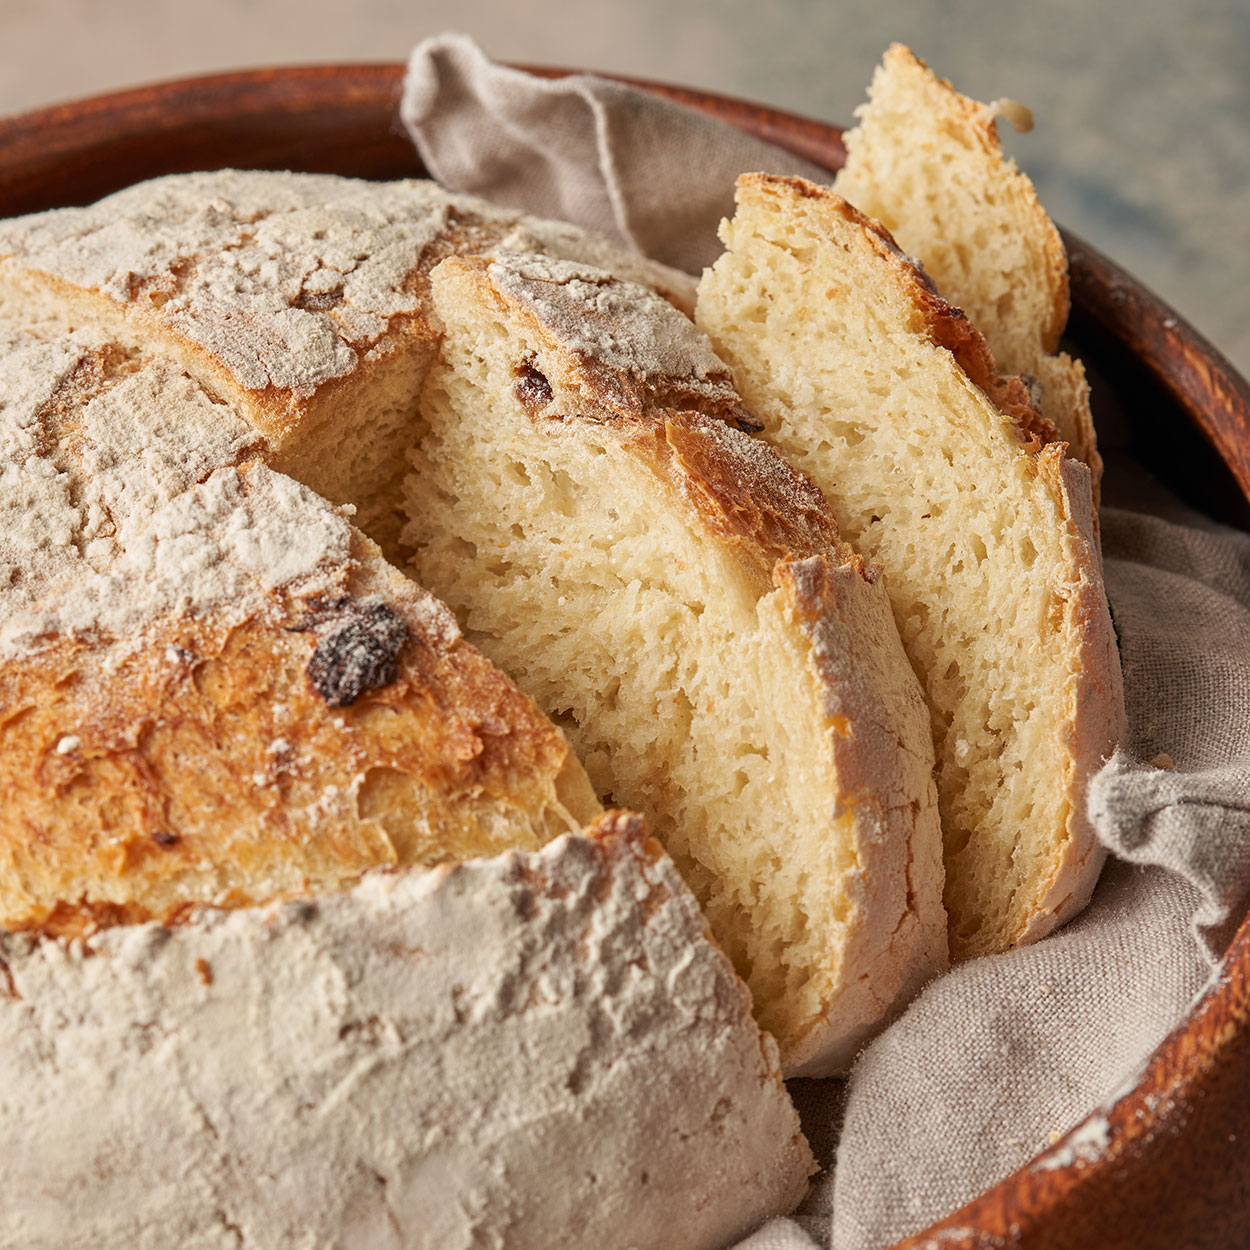
What to expect? Truly an old fashioned bread with a crackling thin crust and soft airy interior, so good and it goes with everything! Have it with soup, sandwiches, salads, or our favorite butter with sea salt!
Process: This is easy as it gets folks. The dough comes together in about 10minutes. Just something to note, the dough is pretty wet (sticky). It will not come away from the mixer bowl completely. Don’t freak out that’s how it’s supposed to be, it will come together more and have more elasticity once the gluten has a chance to develop. Saying this, don’t be afraid to use flour it is your friend in this recipe, be generous always.
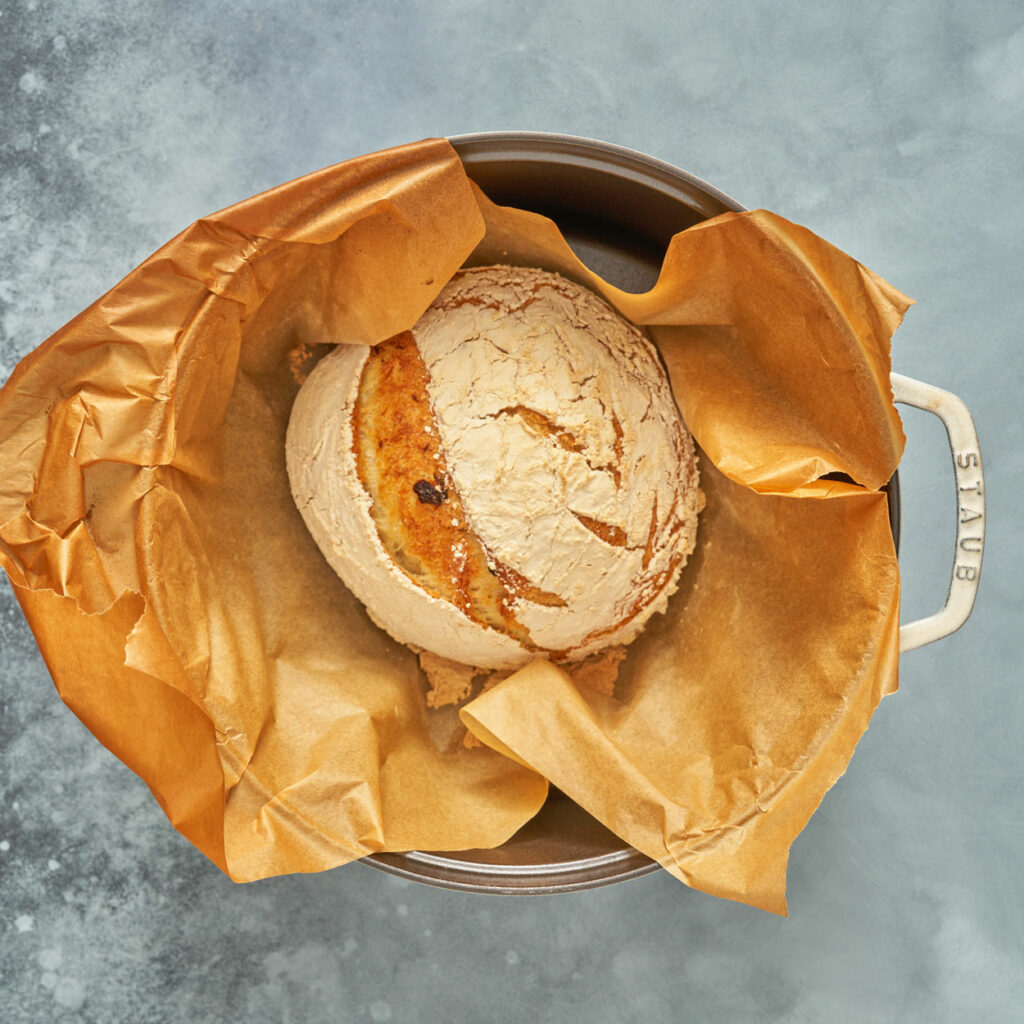
Baking: Ideally this should be baked in a 4.7 – 5.6 Liter (5-6 quart) dutch oven that has been allowed to preheat along with the oven. If you do not have a dutch oven (GET ONE) you can use a 4.7 – 5.6 Liter (5-6 quart) oven-safe pot with high sides. If the lid of your pan is tight-fitting, and oven safe, and has no holes for steam to escape feel free to use it. If not, then cover your pot with a baking sheet instead to trap the steam.
And yes, we would do this over and over again!
Why we need a Dutch Oven for making this Bread?
The use of a Dutch oven and Steam: we use a Dutch oven to get the perfect crust. What’s the science behind this? The lid of the Dutch oven traps steam as the bread starts to bake. This steam prevents the crust from hardening early on and allows the bread to fully rise. It also prevents the over-browning of the crust before the interior gets a chance to fully cook. If you do not have a Dutch oven we got you covered. Use a 4.7 – 5.6 Liter (5-6 quart) oven-safe pot with high sides (20-25 cm). If your pan’s lid is tight-fitting, and oven safe, and has no holes for steam to escape feel free to use it. If not, then cover your pot with a baking sheet instead to trap the steam.
Let’s make Crusty Bread
We have included beautiful roasted garlic in our dough so this recipe starts with roasting garlic. If you do not want the garlic in your bread then skip down to the dough making part.
Roast the Garlic
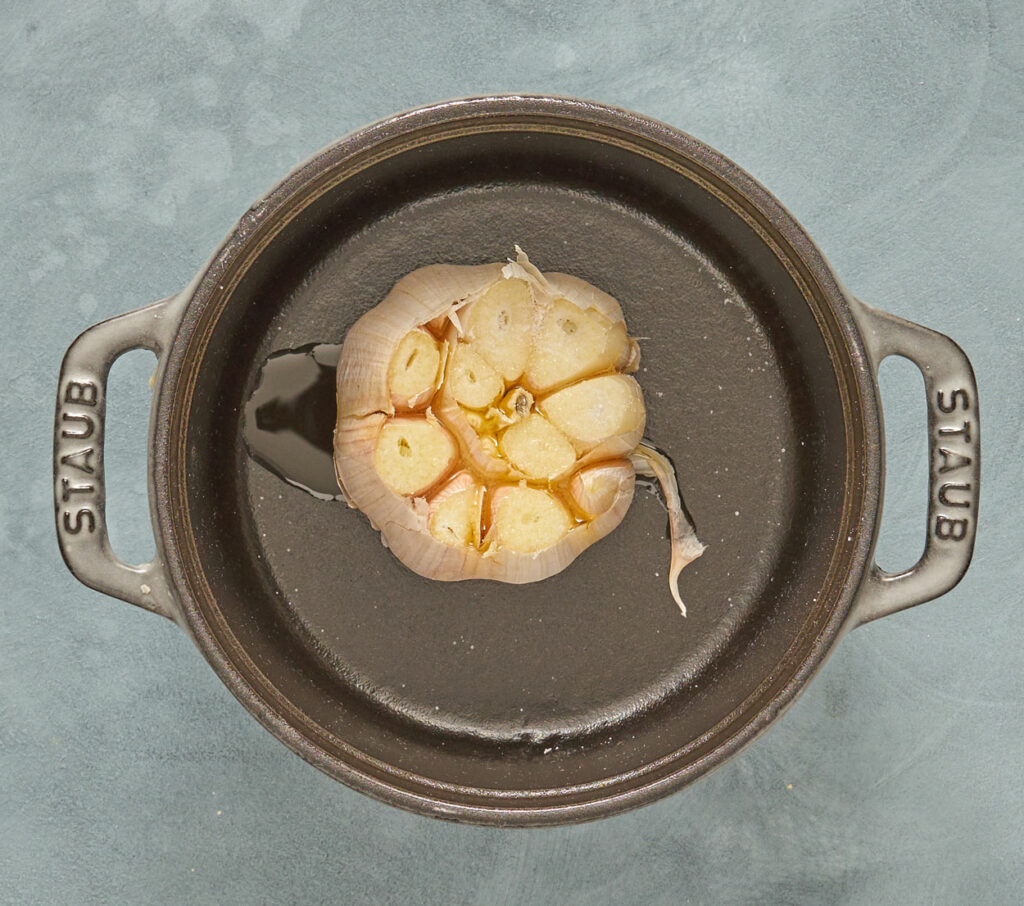
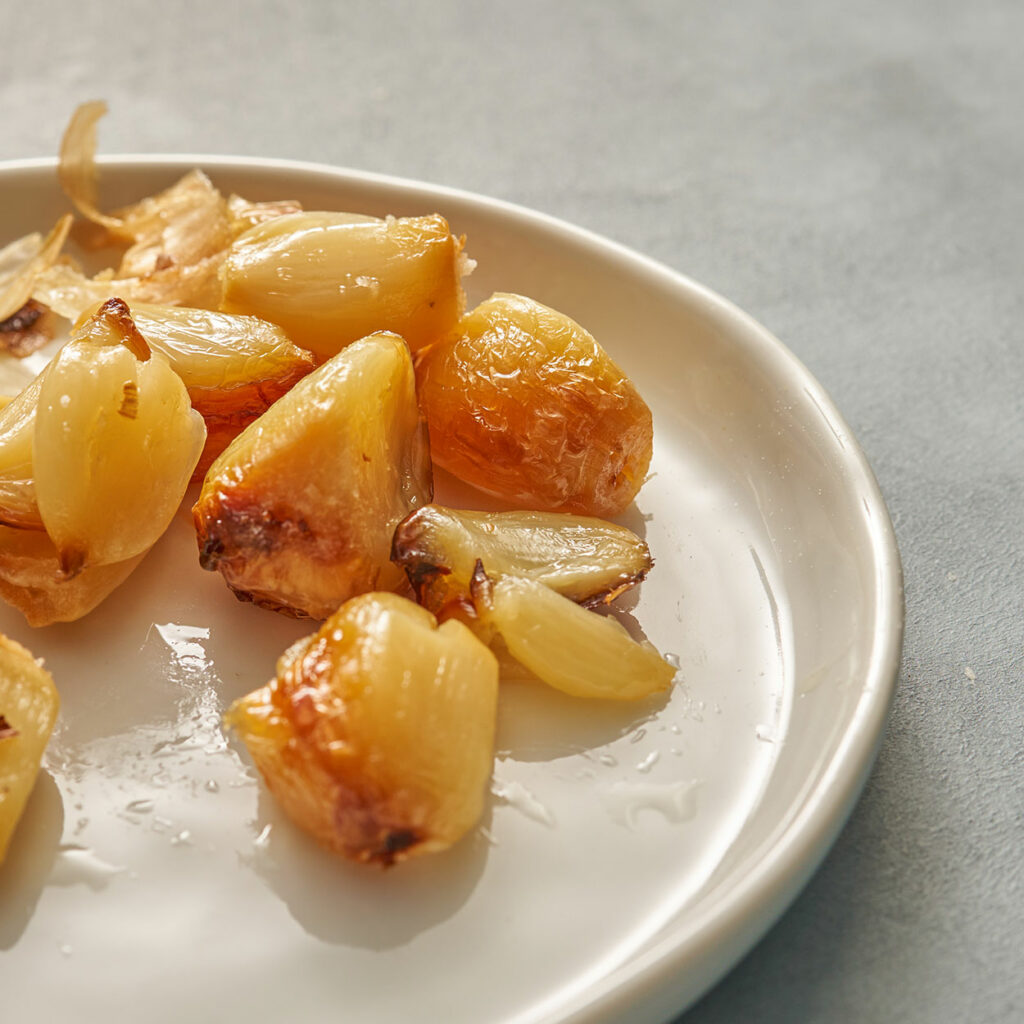
Preheat your oven to200 C. Keep the garlic bulb whole and with a sharp knife cut the tip of the bulb to expose the cloves. Sprinkle with a 1 tbsp of olive oil and a sprinkle of salt. You can bake it in a small pot with a lid or wrap it in aluminum foil and place in the oven for 40-50 minutes or until the cloves are light brown and soft when pressed. Squeeze the cloves out of the bulb and allow them to cool slightly while we start the dough.
Make the dough
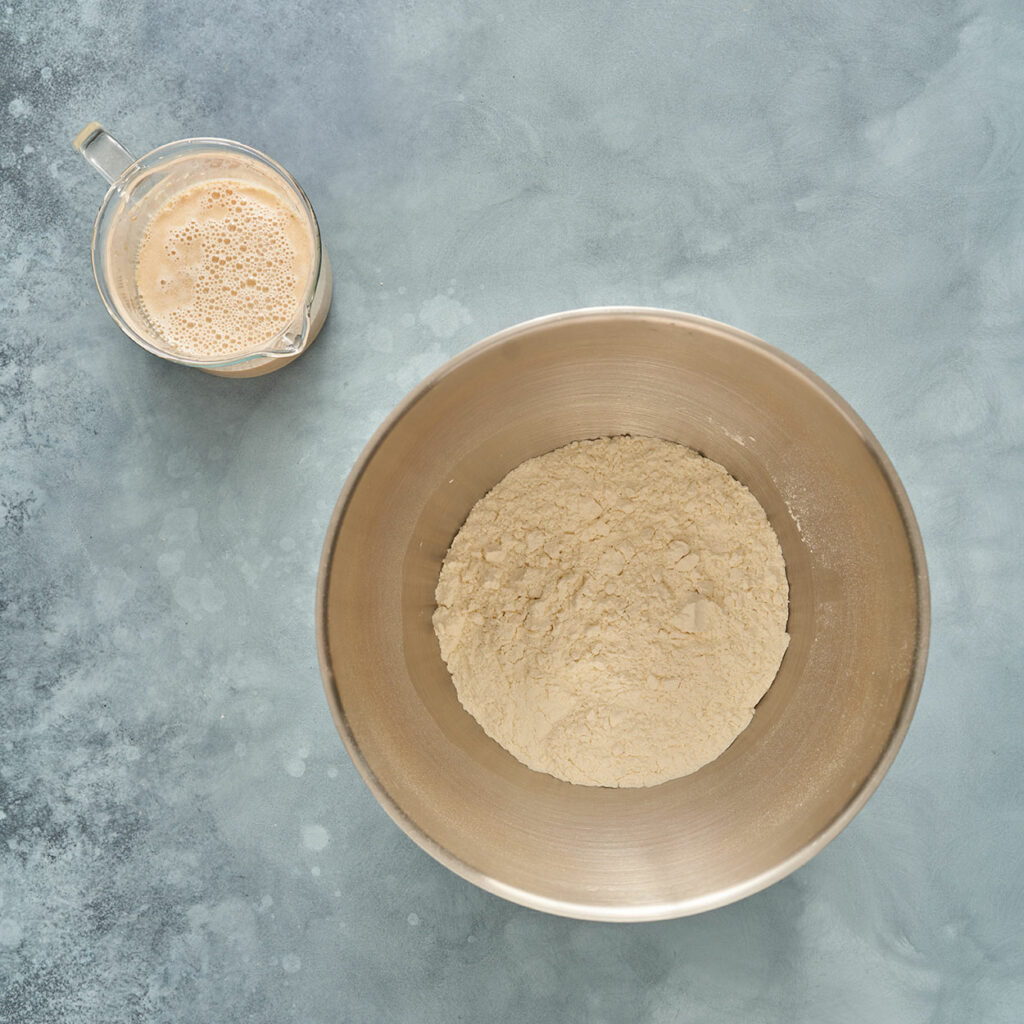
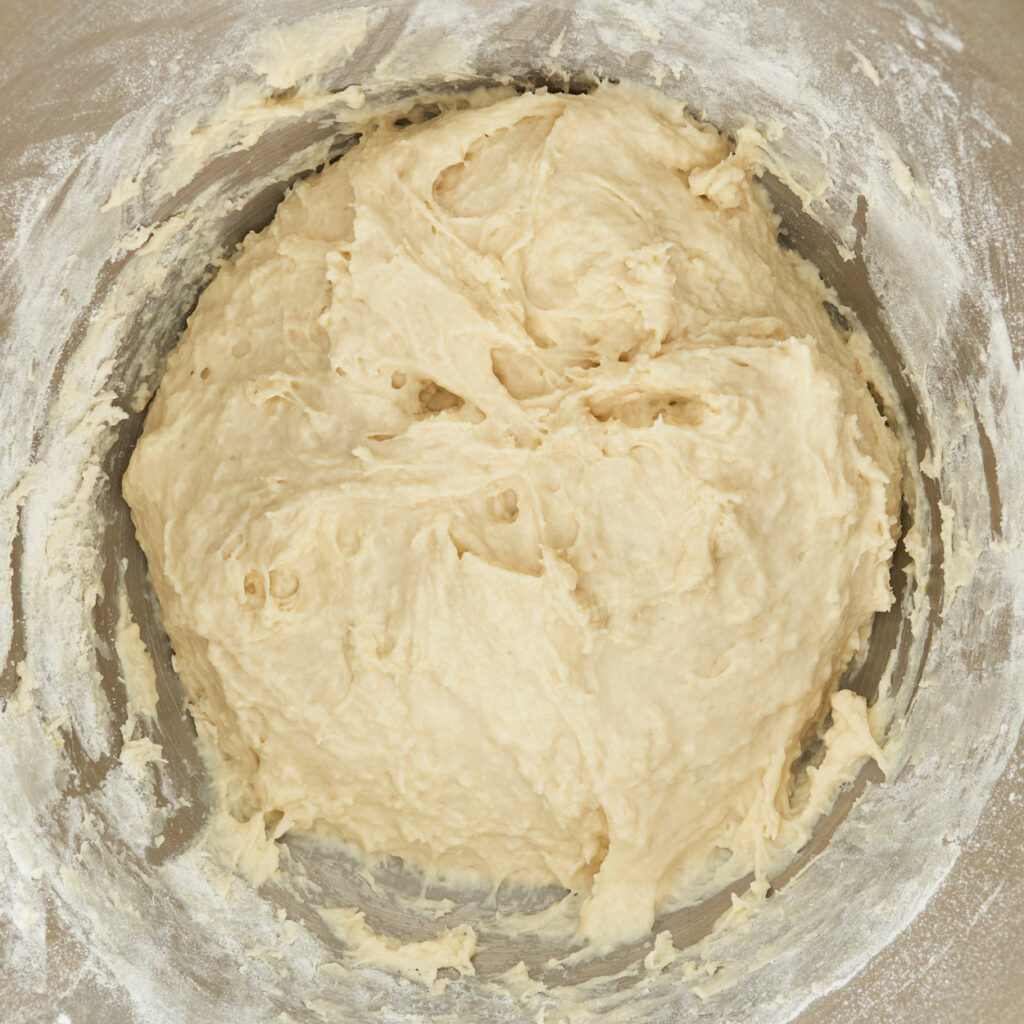
In a measuring cup or a bowl add the warm water, yeast and sugar (or honey). Stir and let that sit for 5-10 minutes until bubbly.
In a stand mixer fitted with the dough attachment add the flour and salt give it a quick mix on low speed or combine. While the mixer is still on low start adding the water yeast mixture. Add in the garlic cloves (if using) and continue to mix until all the flour has incorporated and the dough starts to come away from the sides slightly. This should not take more than 5 minutes. The dough will be wet and sticky that’s fine.
The First Rise (1 hour)
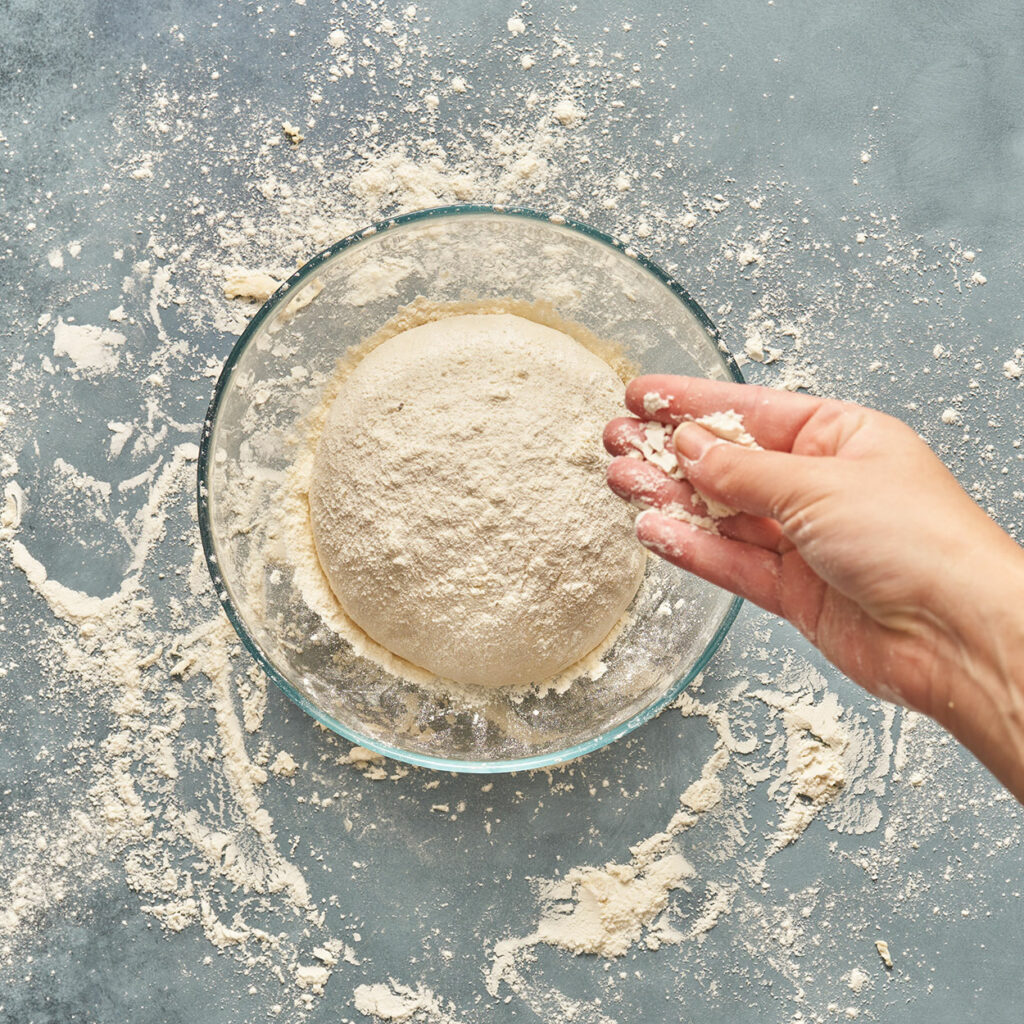
Lightly flour the top of your dough and pat the flour down (do not mix it in). Using your hand flip the dough onto the other side and repeat. We want to make sure there is flour on all sides so that it helps prevent the dough from sticking. Cover it with a kitchen towel and let that rise for an hour. If your kitchen is cold turn on the oven’s light and place it inside to proof.

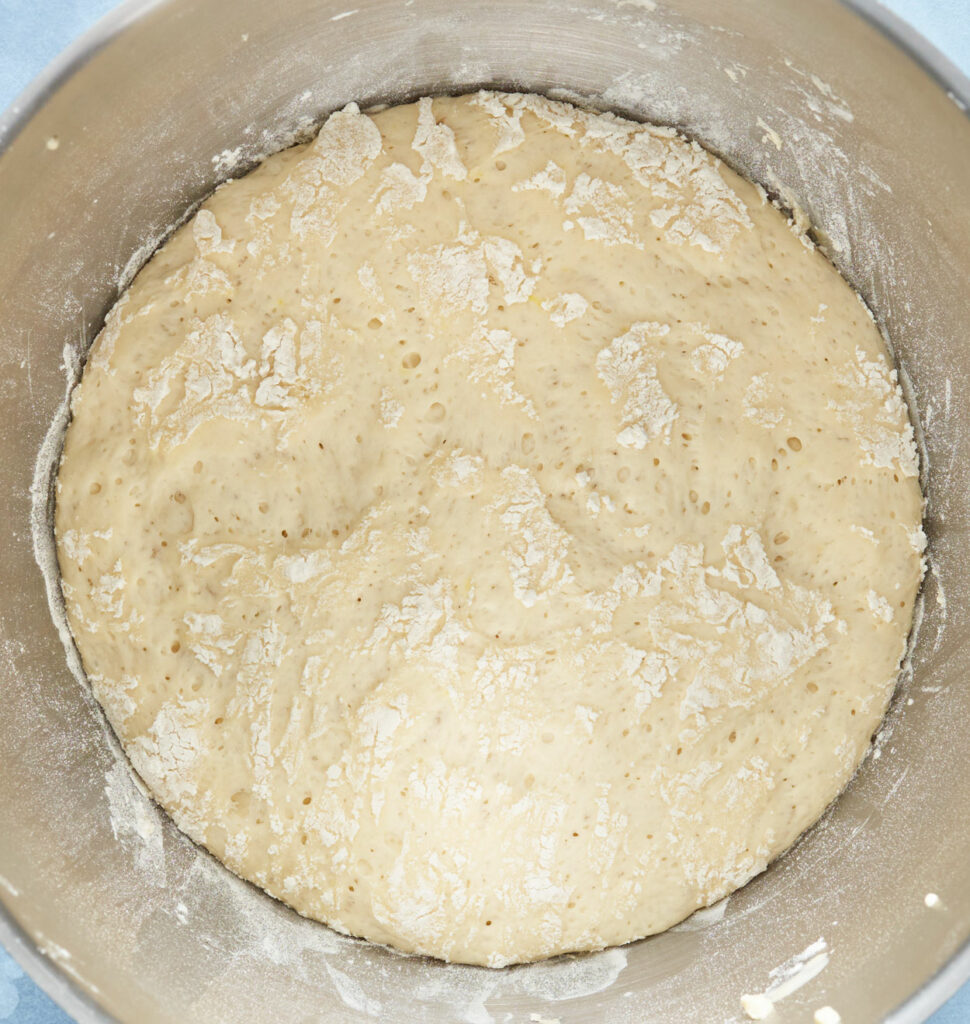
After First Rise
Shaping and Second Rise (30 minutes)
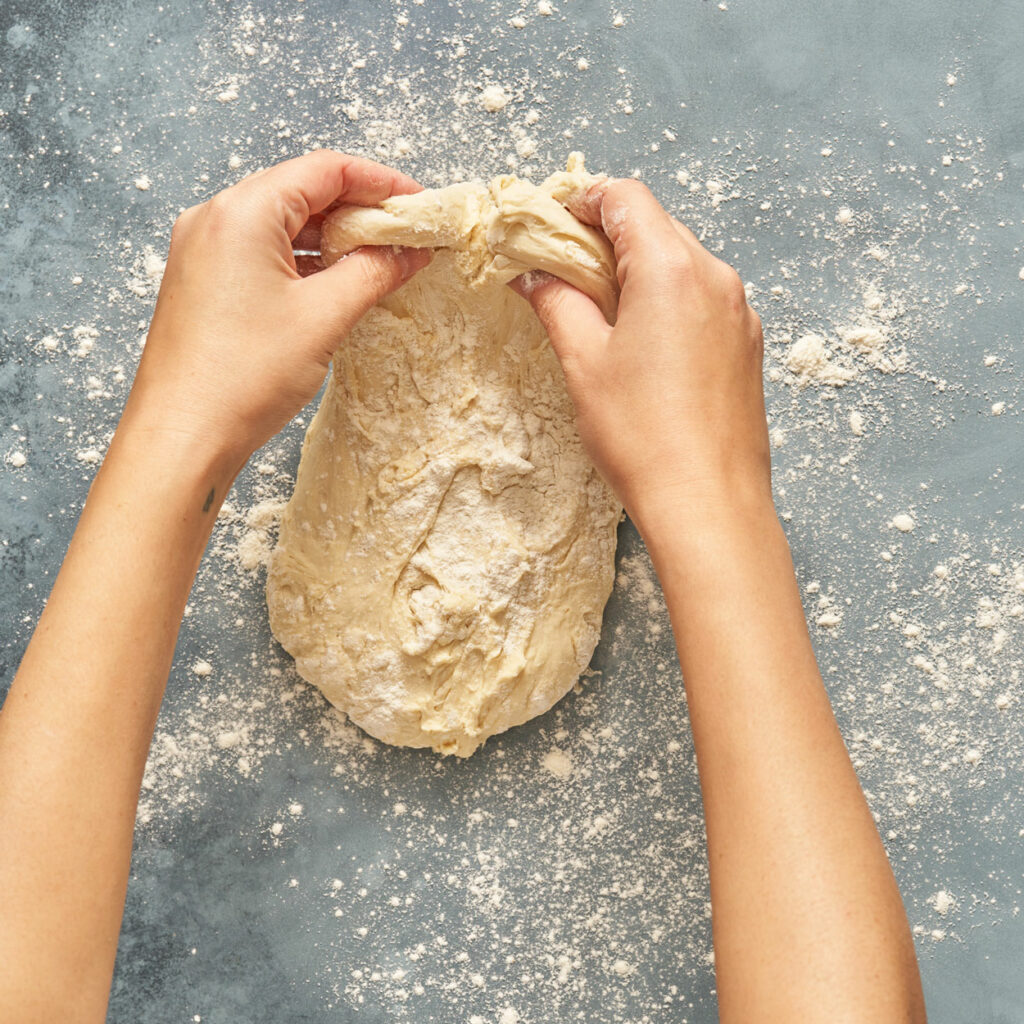
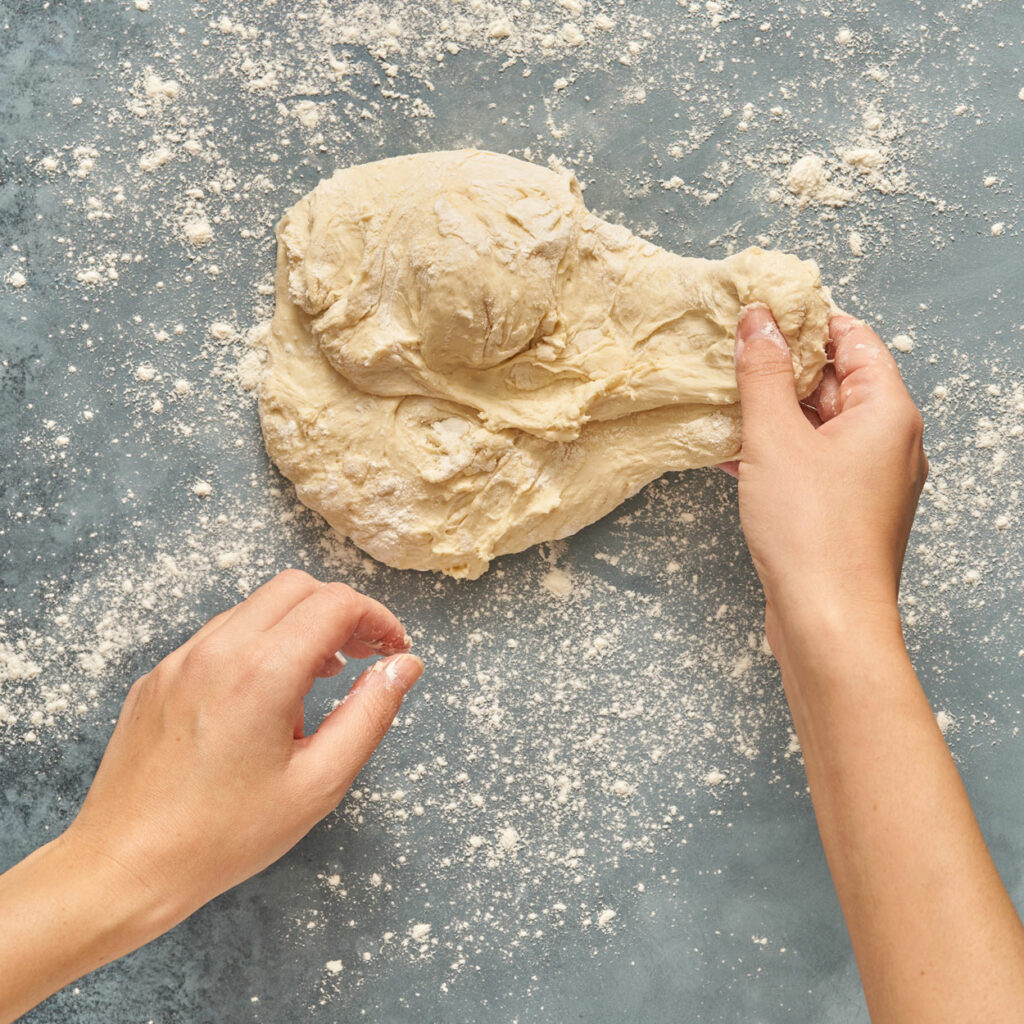
Flour your working surface well and drop your dough on it, if it’s stuck use your hand to pull it out in one piece as gently as you can. Do not punch the dough as we want to preserve the air-pockets created during the rest.
Dust the top of the dough with flour and pat the flour down gently. Flip over and repeat. Make sure to get some flour on the sides too.
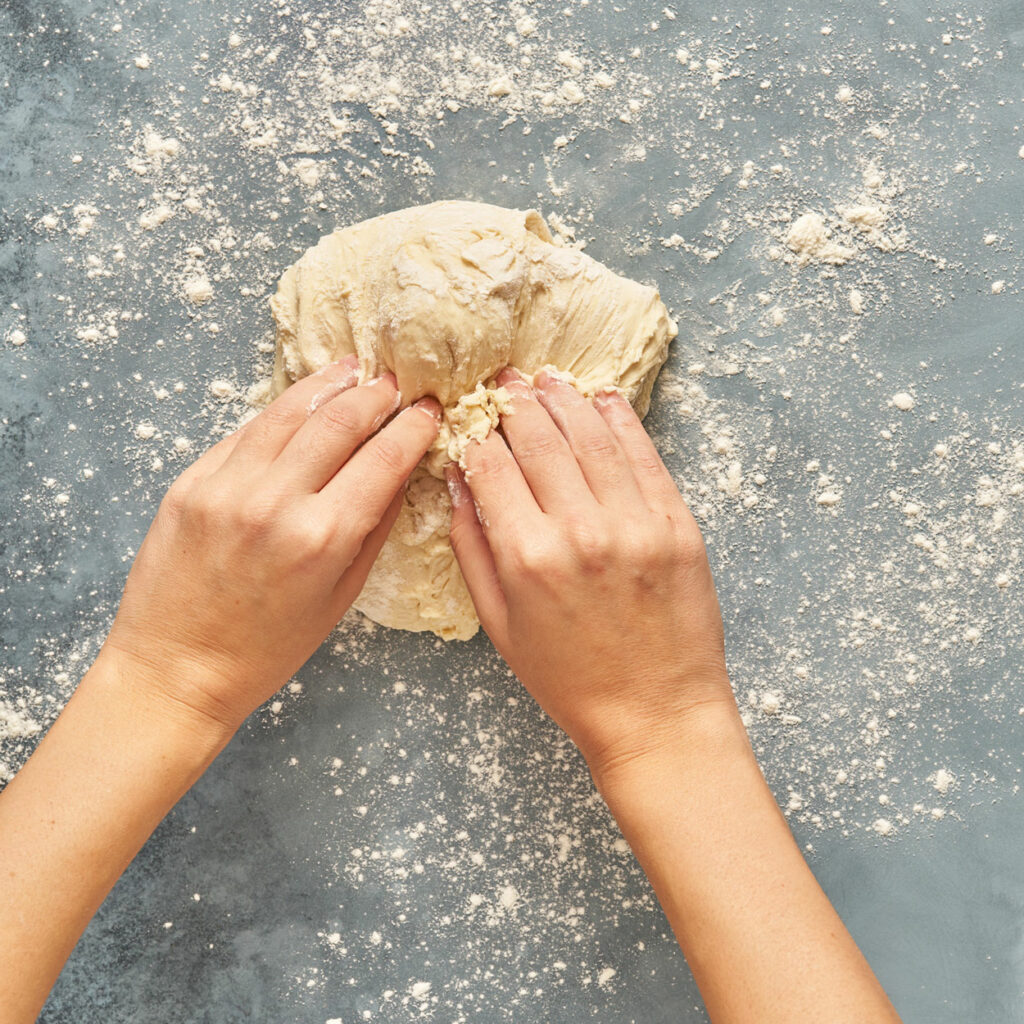
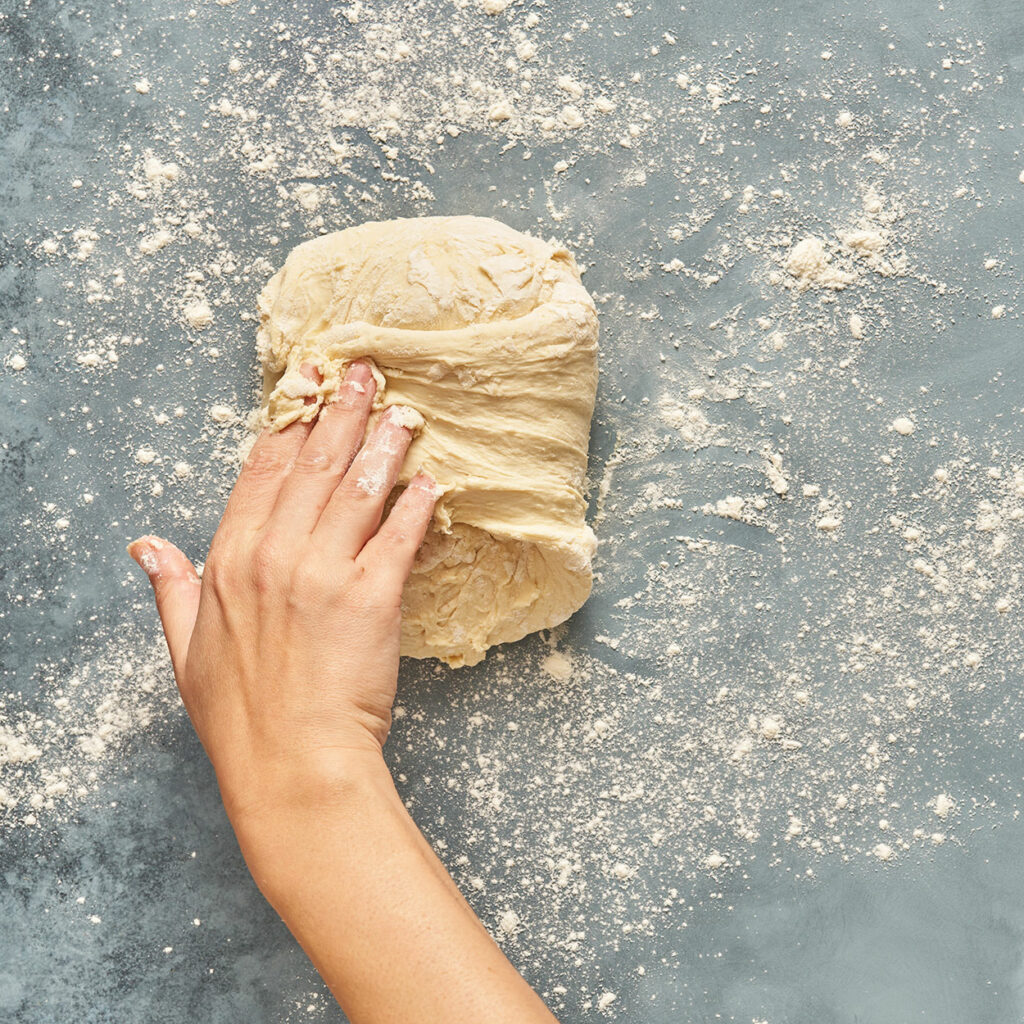
Start folding the dough onto itself. Pull one side of the dough out and fold it inwards towards the middle like an envelope, continue with the bottom and left and right sides. Keep working it in a circle until the dough starts firming up and resists your pulls.
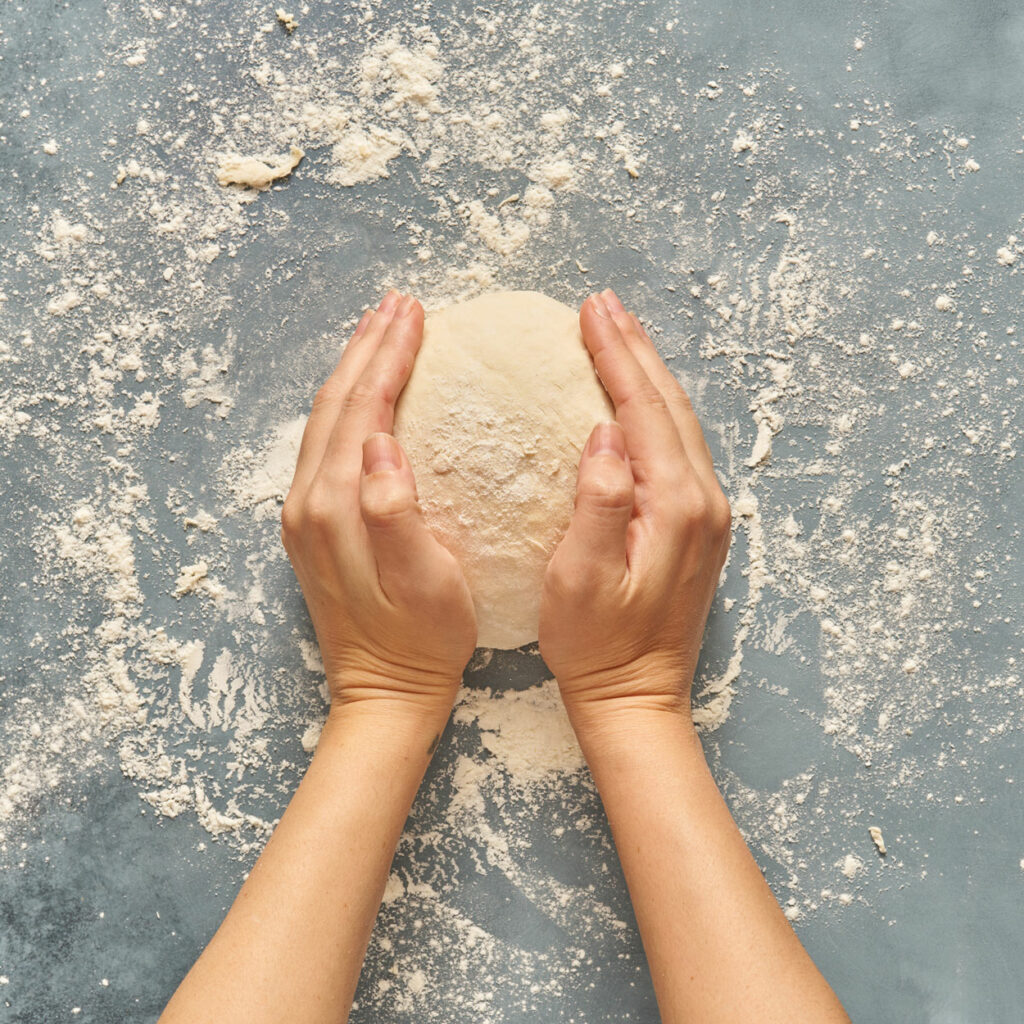
Next, you want to shape, with both hands start rolling and pulling the dough ball towards you until it forms into a tight ball. Lightly flour the ball again on all sides, then flour a medium bowl well and place your dough seam side down into the bowl. Generously flour the top of the loaf, cover with a towel, and let rest for 30 minutes while you preheat your oven and Dutch oven.
Baking (40 minutes)
Place your Dutch oven with lid on inside your cold oven then preheat the oven to 240C (if using a regular ovenproof pot then you do not need to preheat it in the oven). Lay a large piece of parchment down on your counter, gently tip out your bread seam side up. You want the seam up to form the lovely cracks you see on rustic bread. Once your oven has preheated to the correct temperature, using oven mitts carefully remove the Dutch oven and place on a heatproof surface. Remove lid and use the parchment paper to lift your loaf and drop it into the Dutch oven. Place the lid back on and immediately place it in the oven.
Bake for 30 minutes, then remove the lid and continue to bake for an additional 10-15 minutes until the top of the bread is crusty and brown.
Again, using ovenproof mitts, lift out the bread using parchment paper. Allow bread to cool for 30 minutes before using a serrated knife to cut into your loaf.
To keep bread fresh place leftovers in a paper bag or soft linen bag to prevent it from drying out.
If you like our recipe for Crusty Roasted Garlic Bread, try our Focaccia or Hokkaido. Leave your comments below or tag us on #TheTableDiaries and show us what you are up to.
Easy Crusty Bread with Roasted Garlic
Ingredients
- 360 grams All Purpose Flour 3 cups spooned and levelled
- 1 tsp Salt
- 1¼ cup Warm Water Around 38C° (100F°)
- 1 tsp Sugar
- 2¼ tsp Active Dry Yeast
Roasted Garlic
- 1 bulb Whole bulb of garlic
- 1 tbsp Olive Oil
- Salt
Instructions
Roasting Garlic
- Preheat your oven to 200°C.
- Keep the garlic bulb whole and with a sharp knife cut the tip of the bulb to expose the cloves. Drizzle with olive oil and sprinkle with salt.
- You can bake the garlic bulb in a small pot with a lid or wrap it in aluminum foil and place in the oven for 40-50 minutes or until the cloves are light brown and soft when pressed. Squeeze the cloves out of the bulb and allow them to cool slightly while we start the dough.
Making the Dough and the First Rise (1 hour)
- In a measuring cup or a bowl add the warm water (not too hot to kill the yeast), add yeast and sugar (or honey). Stir and let that sit for 5-10 minutes until
- In a stand mixer fitted with the dough attachment add the flour and salt give it a quick mix on low speed or combine.
- Add in the water yeast mixture and continue to mix.
- Add in the garlic cloves (if using) and continue to mix until all the flour has incorporated and the dough starts to come away from the sides slightly. This should not take more than 5 minutes. The dough will be wet and sticky that's fine.
- Lightly flour the top of your dough and pat the flour down (do not mix it in). Using your hand flip the dough onto the other side and repeat. We want to make sure there is flour on all sides so that it helps prevent the dough from sticking. Cover it with a kitchen towel and let that rise for an hour. If your kitchen is cold turn on the oven’s light and place it inside to proof.
Shaping and Second Rise (30 minutes)
- Flour your working surface well and drop your dough on it, if its stuck use your hand to pull it out in one piece as gently as you can. Do not punch the dough as we want to preserve the air-pockets created during the rest.
- Dust the top of the dough with flour and pat the flour down gently. Flip over and repeat. Make sure to get some flour on the sides too.
- Start folding the dough onto itself. Pull one side of the dough out and fold it inwards towards the middle like an envelope, continue with the bottom and left and right sides. Keep working it in a circle until the dough starts firming up and resists your pulls.
- Next, you want to shape, with both hands start rolling and pulling the dough ball towards you until it forms into a tight ball. Lightly flour the ball again on all sides, then flour a medium bowl well and place your dough seam side down into the bowl. Generously flour the top of the loaf, cover with a towel, and let rest for 30 minutes while you preheat your oven and Dutch oven.
Baking (40 Minutes)
- Place your Dutch oven with lid inside your cold oven then preheat the oven to 240C (if using a regular ovenproof pot then you do not need to preheat it in the oven).
- Lay a large piece of parchment down on your counter, gently tip out your bread seam side up.
- Once your oven has preheated to the correct temperature, using oven mitts carefully remove the Dutch oven and place on a heatproof surface. Remove lid and use the parchment paper to lift your loaf and drop it into the Dutch oven. Place the lid back on and immediately place it in the oven.
- Bake for 30 minutes, then remove the lid and continue to bake for an additional 10-15 minutes until the top of the bread is crusty and brown.
- Again, using ovenproof mitts, lift out the bread using parchment paper. Allow bread to cool for 30 minutes before using a serrated knife to cut into your loaf.
- To keep bread fresh place leftovers in a paper bag or soft linen bag to prevent it from drying out.